8.5 USB driver installation
If the USB driver has been previously installed, skip the USB driver installation.
Power cycle the unit.
If the USB driver has never been installed, a pop-up window will appear → Driver Software Installation. Proceed with the driver install.
Upon completion, it will indicate USB Input Device Installed.
8.6 Firmware update
Remove power from the LMU-5541™
Remove the top cover of the LMU-5541™
Connect the 4-pin connector of 5C940 into the 4-pin header located on the board at J25. The red stripe of 5C940 is placed facing towards the closest edge of the
board.
Connect the 5-pin connector of the serial adaptor cable 5C940 to the 5-pin connector of the serial cable 134364-SER.
Connect the DB-9 connector of 134364-SER to the serial port or serial adaptor connected to the maintenance computer.
Power up the LMU-5541™
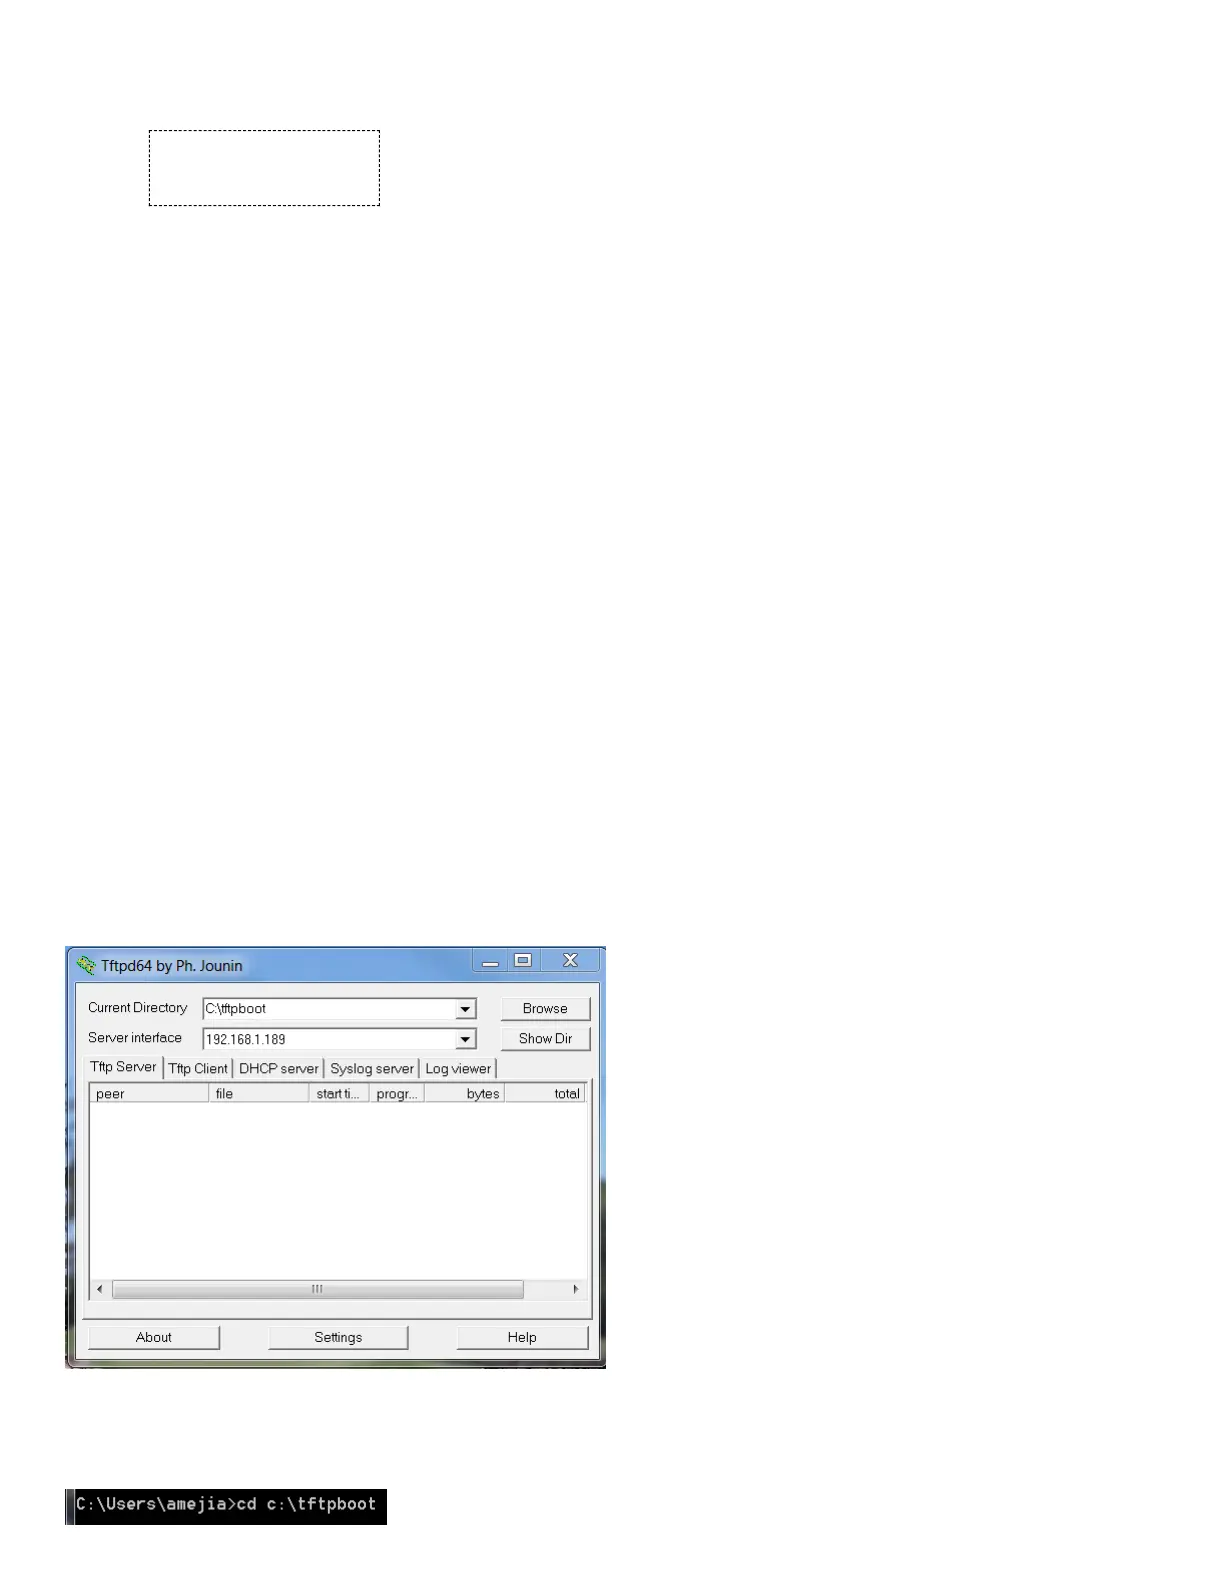
Launch the TFTP32 or TFTP64 server.
For the Current Directory window, Browse for Directory C:\tftpboot
For the Server interface window, select 192.168.1.189
On the maintenance computer, open the command prompt by searching for CMD.EXE followed by <enter>
Type: cd c:\tftpboot
 Loading...