Proprietary*Information:*Not*for*use*or*disclosure*except*by*written*agreement*with*Calix.*
"!#$%&'(!)%%!*&+,-.!*/./01/2(!
"0--4I/% -L!/0! /D4!?P)*:*!P47%#$!H07/!
The E7-20 has an RS-232 serial port that you can connect to a PC for console management
connections. The serial port is located on the E7-20 fan tray assembly (RJ-11F connector).
Note: Calix does not provide a console cable with the E7-20. You must supply your own
cable. Use a cable with an RJ-11 male connector on one end and a DB-9 female connector
on the other end. See RS-232 Serial Port Pins for pin assignments.
C0!I0--4I/!/0!/D4!?P)*:*!.47%#$!F07/!
9A! Get an appropriate RS-232 console cable (DB-9F to RJ-11M) to connect to the E7-20.
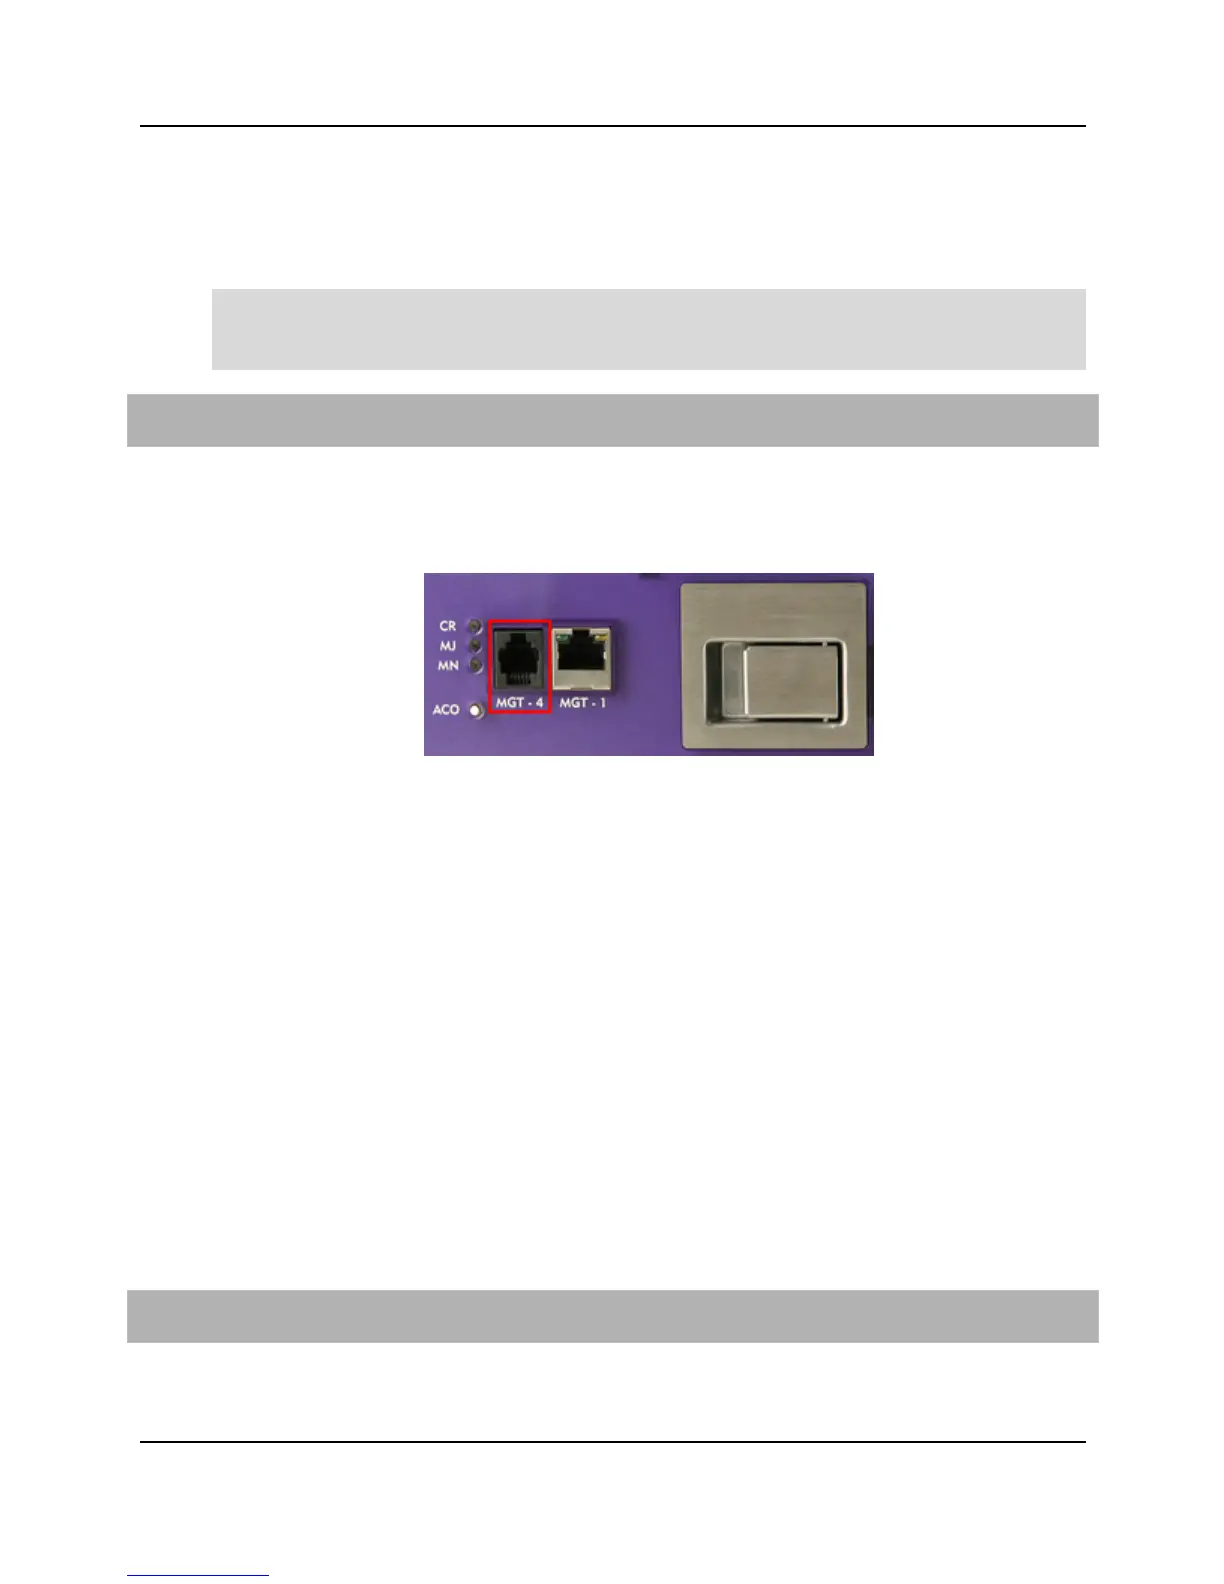
*A! Connect the cable's RJ-11 end to the E7-20 serial port (labeled MGT-4, located on the
E7-20 fan tray assembly).
:A! Connect the cable's DB-9 end to your PC.
Use the following settings to establish a console connection from the serial port:
For instructions to log in to the E7-20 management interface, refer to the Calix E7-20 User
'./#6$%.D %-L!#!X 46!,-/47 Q#I4!P4..%0-!
Launch an E7-20 web interface session by entering the E7-20 IP address into your browser.
The E7-20 supports 15 simultaneous web interface sessions.
C0!4./#6$%.D!#-!'()*+!K46!%-/47Q#I4!.4..%0-!
9A! Verify that your PC is connected to the E7-20.
*A! Open a web browser window (Internet Explorer or Firefox).