CHAPTER 4: PERFORMANCE TEST
4.1 SYSTEM CHECK
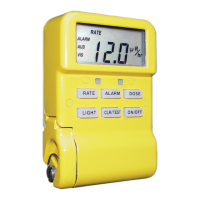
The ADM300 survey meters and probes, if available, should be checked prior to use
and at least every 180 days for accuracy to assure maximum confidence levels and
preparedness.
4.2 ACCURACY VERIFICATION PROCEDURE
4.2.1 ABP100 VERIFICATION PROCEDURE
1. A Thorium-232 source is permanently attached to the ABP100 probe cover to
verify the probe operation.
2. With the ADM300 turned OFF, attach the ABP100 and turn ON the ADM300.
Press and release the INC (↑) until "cps Alpha" is displayed.
3. Make sure the probe cover is well seated with the Thorium-232 facing the alpha
sensitive area.
4. Allow the reading to settle for approximately 20 seconds. Observe that the
displayed Alpha cps rate reading is above the background reading.
5. Press and release the INC (↑) until "cps Beta" is displayed
6. Allow the reading to settle for approximately 20 seconds. Observe that the
displayed Beta cps rate reading is above the background reading.
7. Turn ADM300 OFF and disconnect the ABP100.
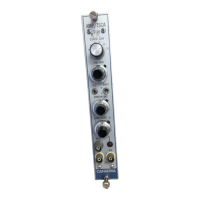
4.2.1 ADM300 VERIFICATION PROCEDURE
Equipment requirement:
GCF200 Test Fixture
TS-100 Test Sources
Consisting of container, Cs-137 button source, and Th-232 fixture.
Note: Verify Cs-137 source serial number matches that on the test
source container lid.
1. Prepare the GCF200 Test Fixture by inserting the Cs-137 source face-up in the
circular inset indicated for testing the ADM300.
2. Refer to the illustration in the ADM300 Kit E (Test/Verification Kit) manual or
on the source container lid and place the ADM300 Survey Meter in position on
the test fixture as shown.
44