3.3.1 LIGHT LEAK VERIFICATION
To verify the existence of a light leak compare the displayed count rate with the
Mylar window protective cover in place to that with the cover removed. A higher
reading with the protective cover removed indicates a light leak in the Mylar
window. This verification procedure should be performed under well lit conditions.
Sunlight or a bright light will work well. Do not allow the light or any hot object get
close to the Mylar window, or damage may result.
The displayed count rate will vary due to the statistical nature of radiation. The
scaler mode can be used to make more accurate and objective readings. The Mylar
window and cover can be further protected from the light for the initial reading by
the use of an opaque cloth or material.
3.4.2 MYLAR WINDOW REMOVAL PROCEDURE
CAUTION
Exposing the photomultiplier tube to bright light can
cause damage to the tube. The following procedures
must be performed beneath a cloth light shield, or in a
darkened area, to avoid tube damage.
1. To remove the AP100A alpha probe Mylar window, turn the ADM300 OFF and
disconnect the AP-100A.
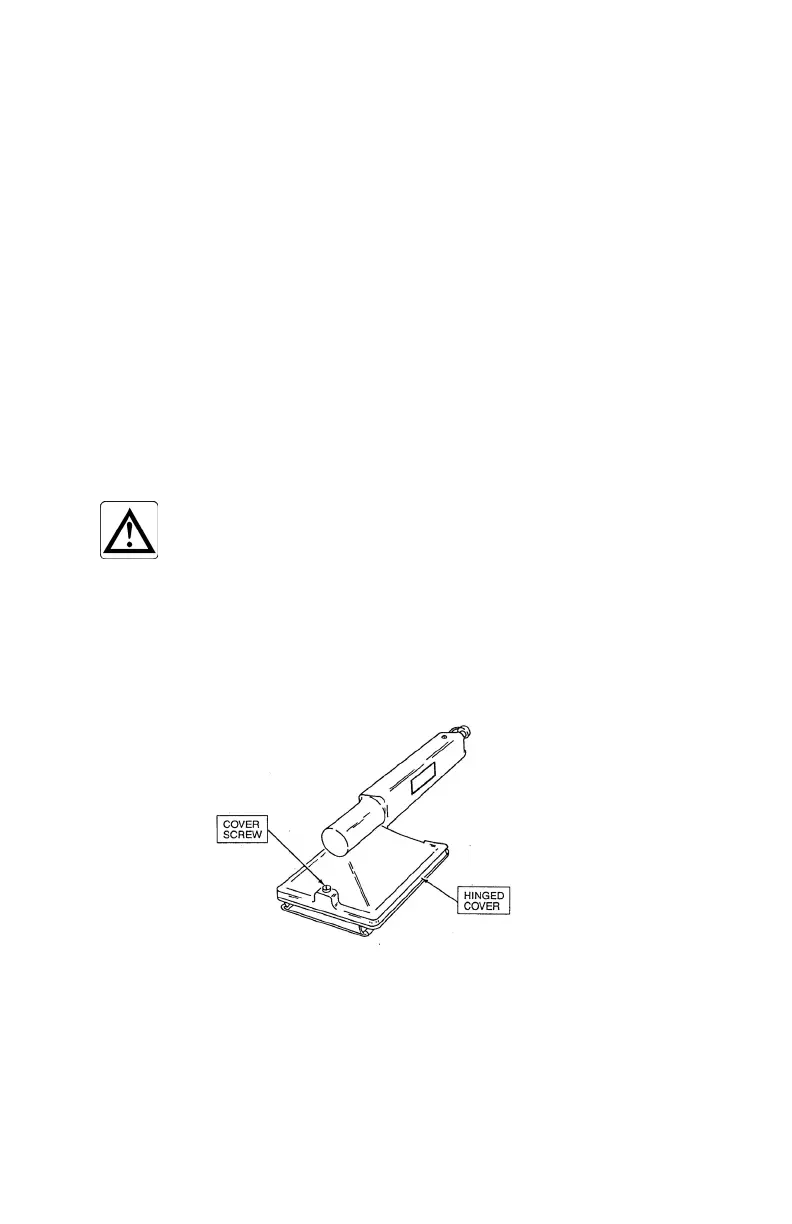
2. Loosen the captive thumb screw in the AP-100A housing assembly, and then
invert the probe so that the hinged cover is facing up.
41
 Loading...