CandCNC
Page 18
That concludes the internal connections you will have to make for your unit.
Make sure all leads are insulated and away from possible physical damage.
Double check to make sure there are no loose connections and that you have
attached/ re-attached any wires mentioned in the above guidelines.
Replace all covers and safety devices on the plasma unit and plug the plasma
unit into power with the unit switched off. Turn the unit on, and make sure the
unit works correctly in manual mode. (i.e. cut a piece of metal by hand). If you
have a machine torch manually fire the torch from the Torch On button in MACH3
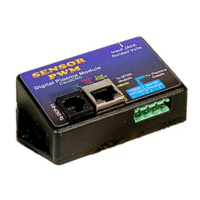
USING THE RAV-01 TO FIRE THE TORCH
(for plasam units with no external connector
to fire the torch or with a hand torch)
The next internal signal you need to locate is the TORCH SWITCH. If you are connecting
to a unit with a Hand Torch you will need to find and tap into the two wires coming from the
torch switch in the hand piece. How will you know? First the wires will be smaller and
different colors than the ELECTRODE or PILOT ARC (more about that later) wires. In most
cases there will be four smaller wires. Two will be the torch switch and two will be the PIP
or CIP (Consummables-In-Place) wires. Once again the manufacturers documents can be
of service here identifying colors and even connection points. If you do not have the
manufacturers service information with schematics and cannot find them on-line you will
need to do a little detective work to identify the torch switch wired.
The first thing your should do is get an Ohmmeter, and with it set to low ohms, short the
leads together and make sure the meter shows the change and displays low (close to zero)
ohms. If your meter has a “squaker” continuity tester position then use that as a tone
indication. Clip across two of the four smaller wires. If you get no reading or tone (or an
OV or OL indication) the circuit is open. Activate the torch switch on the hand piece and if
the reading goes to a low value of ohms (<100) or the tone sounds, it is the switch
contacts. Confirm the reading by pushing the torch switch several times. Keep testing
wires until you find the pair that changes the meter. Note the colors. Use your meter to
test the other wires. You may well find a pair that causes the meter to go to low ohms as
soon as you touch them, but working the torch switch WILL NOT change the meter. Those
are NOT the torch switch pair. Once you have identified the Torch Switch pair study the
diagram on page ____ and using the two ScotchLOC connectors slide one over each of
the two wires connect them to the Torch Switch pair.
E
 Loading...