Chapter 4
4-2
4.2 Disassembly/Reassembly
4.2.1 Disassembly/Reassembly
0016-9451
For the procedure for disassembly/reassembly of the components excluding the major components, refer to the parts catalog.
Illustrations in the parts catalog are assigned illustration numbers according to the order in which parts are disassembled.
4.3 Points to Note on Disassembly and Reassembly
4.3.1 Note: Items that should never be disassembled
0012-6514
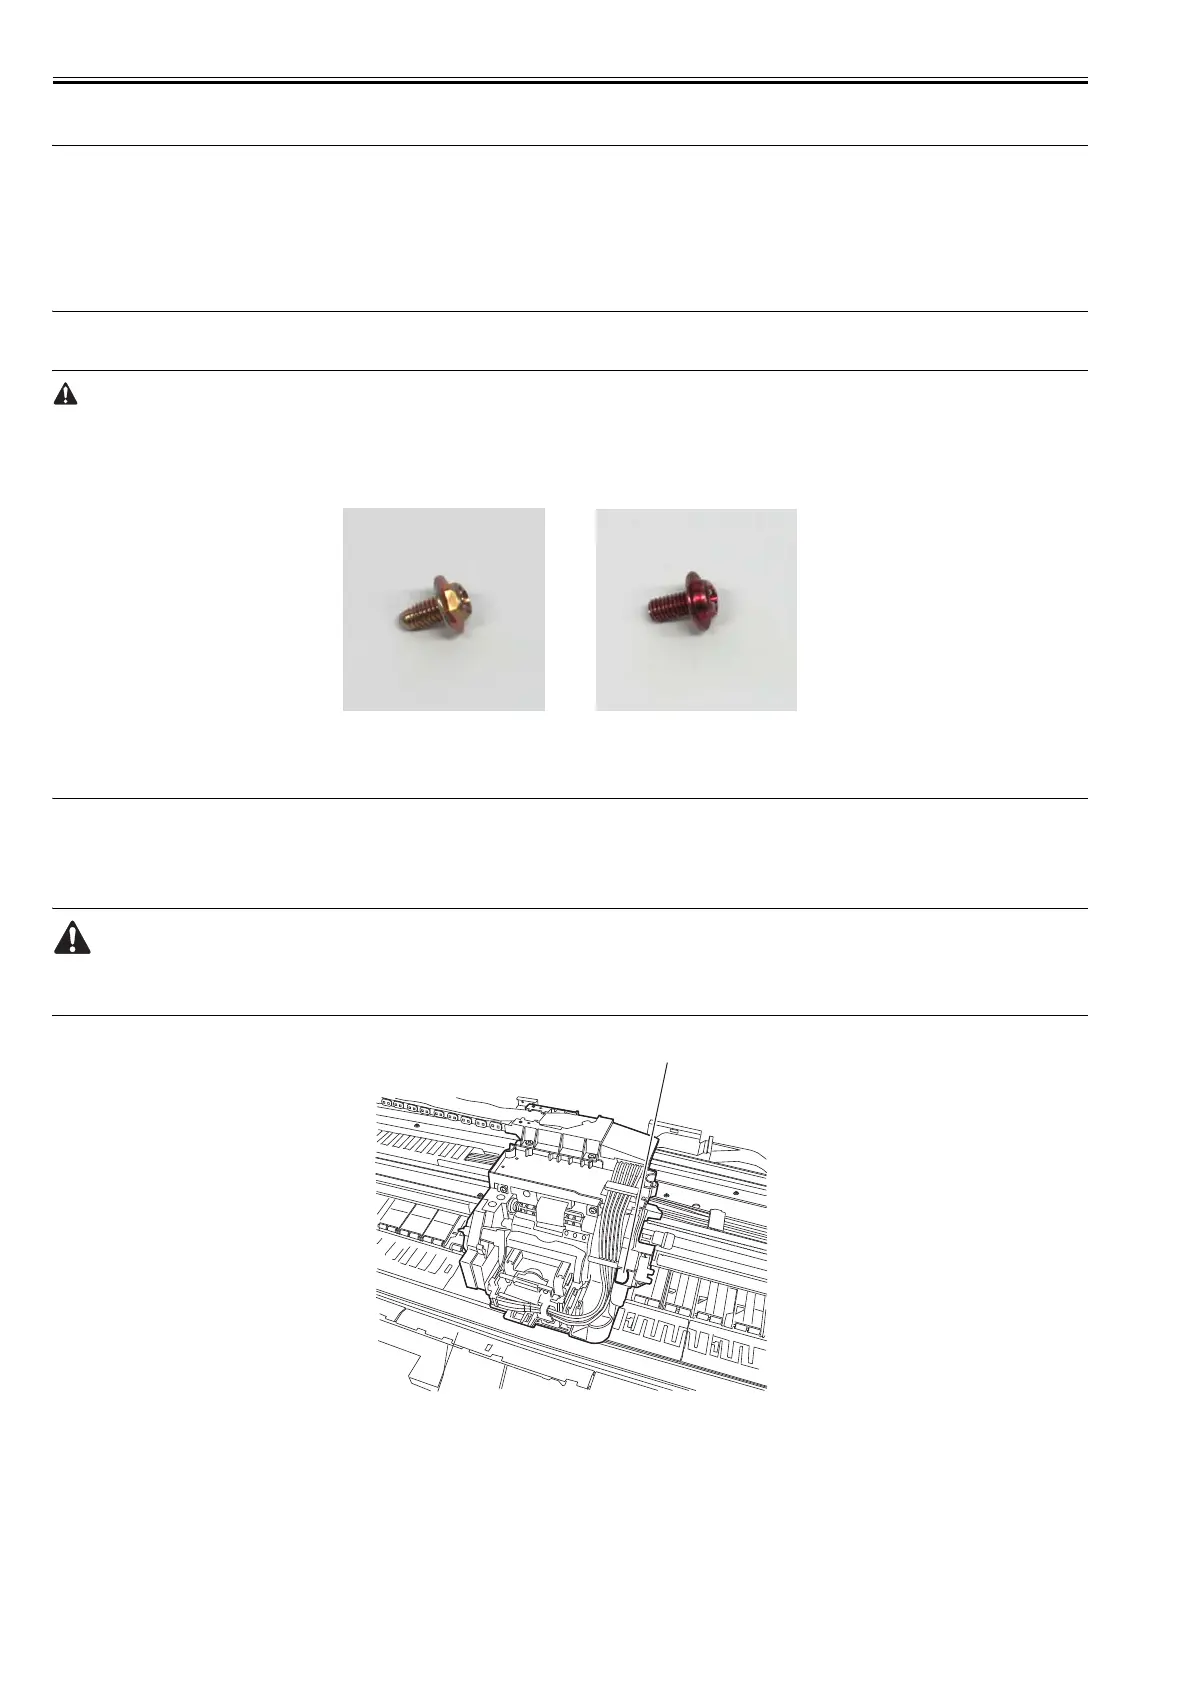
Assemblies that should never be removed after initial factory adjustments, are indicated by the presence of red screws.
Under no circumstance should these red screws be loosened or removed. Removing these screws will render the printer out of alignment forever.
F-4-2
4.3.2 Moving the carriage manually
0020-5644
When moving the carriage, hold it by the handle [1] shown below.
Move the carriage as required during assembly and disassembly to prevent the carriage from contacting the parts to be removed.
You cannot move the carriage when capping has been performed. Refer to DISASSEMBLY/REASSEMBLY > Points to Notes on Disassembly and Reassembly
> Opening the caps and moving the wiper unit to remove the caps, and then move the carriage.
F-4-3
4.3.3 Units requiring draining of ink
0014-8953
When disassembling the following units, drain the ink completely, to prevent ink leakage. For ink drain instructions, refer to DISASSEMBLY/REASSEMBLY >
Points to Notes on Disassembly and Reassembly > Draining the ink.
[1] Carriage unit
Refer to DISASSEMBLY/REASSEMBLY > Points to Notes on Disassembly and Reassembly > Carriage unit.
[2] Ink tube unit
Refer to DISASSEMBLY/REASSEMBLY > Points to Notes on Disassembly and Reassembly > Ink tube unit.
 Loading...