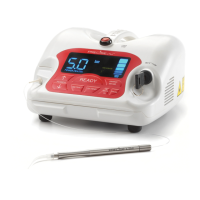
12
Additionally, the tip can transfer heat up the shaft of the ber to the
edge of the jacket which may melt slightly. After your procedure,
always cleave the blackened tip and strip the damaged jacket.
Wipe the jacket down using BIREX® CIDEX® or a comparable
product that can disinfect the jacket. Dry the jacket using a clean
2 x 2 sponge prior to retracting the ber into the ber cartridge.
Also see section 6.0 on page 15.
4.1 LASER MAINTENANCE
4.1.1 Laser Chassis Disinfection
The exterior of the laser should be cleaned using a liquid
disinfectant similar to BIREX® or CIDEX®. Do not spray the
disinfectant directly on the chassis. Apply with a gauze sponge
or wipe. Do not use abrasive materials to clean the system. Place
a barrier material similar to cellophane over the control panel and
LED screen prior to treating the next patient.
4.1.2 Calibration
The Precise® LTM Laser uses solid-state circuitry to continuously
monitor the power output and adjusts the power supplied to
the laser module to keep the output consistent with the user
dened setting. If output levels are more than ± 20% of the set
value, the unit is designed to shut down power to the laser, and
an audible alarm will sound. If this happens, the unit should be
turned off and allowed to sit for 5 minutes and turned on again.
If the laser then boots without beeping, the microprocessor has
been able to make operational adjustments and the unit will
perform its functions. If, upon restart, the unit continues to beep,
the unit will need to be sent in for adjustment by CAO Group,
Inc., Service Department. We suggest that your practice establish
an internal calibration program for your laser. Recalibration is
recommended at a minimum of once per year based on average
usage. Recalibration may be performed by the manufacturer by
returning the unit. Alternatively, you may purchase a calibrated
hand -held power meter approved for use with 810 nm devices to
check power output. The laser should be set at 1, 3, and 5 Watts
with output checked at each level. The output display should be
within 20% of the meter reading. If not, recleave the ber and
re-check. If the output display is still outside the 20% tolerance,
return the unit to the manufacturer for recalibration. There are
no methods available for the user to adjust the calibration of the
unit and the unit must not be adjusted by the user for any reason.
4.1.3 Handpiece Preparation
The Precise® LTM handpiece is designed for easy assembly and
then sterilization after each patient.
The handpiece has four (4) components:
a. Fiber locking cap (See Figure 33)
b. Plastic collet - located inside ber locking cap (See Figure 34)
c. Body (See Figure 35)
d. Disposable tip - discard after each patient; not
autoclavable (See Figure 36)
Assemble the handpiece with plastic collet, Fiber Locking Cap and
disposable tip in place; only lightly tighten the the Locking Cap
onto the handpiece body. Extend the ber about 3-4’ from the
Precise unit. Slide the end of the ber through the Fiber Locking
Cap, through the handpiece and out the disposable tip so that
about 2-3” of ber extends out of the handpiece. Firmly tighten
the Fiber Locking Cap so that the ber is held securely in place.
Now the ber can be prepared for lasing (Section 4.1.4).
The Precise® LTM uses an autoclavable stainless steel handpiece
that should be sterilized after every patient. Clean the handpiece
with warm soapy water; rinse thoroughly; disassemble; place in
an autoclavable bag, and then autoclave it accordingly.
Note: Do not re working laser if handpiece is not properly attached
to ber.
4.1.4 Preparation for Lasing
Using your stripper, remove approximately 1/4” - 3/8” of jacket
from the distal end of the ber. Cleave the ber and examine the
results by turning the laser to the Ready status. The aiming beam
should create a near perfect circle when directed onto a white
surface from about 1/4” - 3/8” above the paper. (See Figures 27
through 32). Once cleaved, the ber tip should be disinfected
(See Section 4.0.9).
4.1.5 Disposable Tips
The disposable tips can be shaped to provide the clinician two (2)
degrees of access required, straight and 60° curved.
Note: Disposable tips are single use, not autoclaveable.
Figure 33 - Fiber locking cap Figure 34 - Plastic collet
Figure 35 - Body Figure 36 - Disposable straight
tip (60° angle disposable tip
also available)
Figure 37 - Handpeice Assembly