9
life expectancy of an Alkaline battery is less than 35 hours of
operating time.
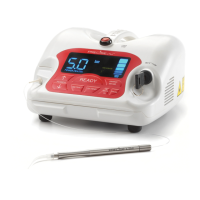
3.1.3 Checking the Key Activation and Control Panel Display
Turn the Key Switch on the front of the laser to the “On” position by
turning it approximately 1/4 turn to the right (clockwise). The control
panel should light up and show the laser is in Standby Mode.
3.1.4 Checking the Laser Stop Button
Check the Laser Stop Switch to see that it has not been pressed.
If it has, release it by pressing it slightly. See page 6, section 2.2.5.
3.1.5 Checking the Disposable Fiber Cartridge
Before using the laser, check the ber cartridge to see that it is
rmly seated. Depress the extend/retract button on the control
panel to see that it is functioning properly. After checking the ber
cartridge power, extend some ber from the cartridge. You will
want to have approximately 3 feet (1 meter) of ber available to
strip the ber, cleave the ber, initiate the ber, and disinfect the
ber. When the ber is prepared, the handpiece and tip should be
attached. Once prepared place the handpiece into the holder
on the laser. The extend and retract button for ber cartridge
operation should not be depressed during laser operation. Examine
the ber tip to insure that you have not created a ber tip shard
during the cleaving process. The shard can act like a miniature
scalpel and cause damage while diffusing the light beam and
lowering the laser’s power.
3.1.6 Setting Modes
Review your power and mode requirements and then depress the
mode button to select either Continuous or Pulse mode. The mode
you have selected will be displayed on the LED screen and will
be designated by a (Continuous Mode) or (Pulse Mode).
3.1.7 Setting Power
Select your power by pressing the up or down arrow until you
have reached the desired wattage. Beginning with a low of
0.5 Watts, the power increases in increments of 100 mW up to a
maximum of 5.0 Watts (Continuous Mode). By holding the up or
down arrow, you can have an uninterrupted increase until you
reach your desired power.
3.1.8 Setting Aiming Beam
The aiming beam can be turned on and off by pressing the
aiming beam button on the laser control panel. Press this button to
progressively increase the aiming beam intensity from zero (0) (off)
to full intensity. Press the key once more to cycle back to zero (0).
Each bar represents approximately 20% of the aiming beam output.
Note: Adjusting the intensity of the aiming beam has no effect on
the output power of the working laser.
3.1.9 Programming your Precise® LTM
You are able to easily set four (4) different combinations of Power,
Mode and Aiming Beam Intensity. The initial Precise factory setting
is 1.4 W Power + Continuous Mode + 80% Aiming Beam Intensity.
To set your programs, push the Program key to display one of the
program numbers. Choose the desired Power level, the desired
Mode and the desired Aiming Beam Intensity. Press the READY
button – your settings have been saved. Repeat for each of the
four programs. You may change your settings as often as you like.
The settings saved into the four programs will be retained even if
the laser is turned off.
NOTE: Whenever your press the READY button, the settings
displayed on the unit will be saved into the unit’s memory for the
program setting shown.
3.2 OPERATING YOUR LASER
3.2.1 Before Beginning Procedures
Examine the ber tip to insure that you have not created a ber
tip shard during the cleaving process. The shard can act like a
miniature scalpel and cause damage while diffusing the light
beam and lowering the laser’s power. Depress the “Ready” button
and the aiming beam can light after 3 seconds. Review your power
and mode requirements and then depress the mode button to
select either or mode.
3.2.2 During Procedures
•
Test re the laser outside the mouth by activating the laser
into a 2 x 2 gauze sponge that has been moistented with
water to prevent combustion. Do not use ammable liquids
to wet the sponge.
•
Standby and Ready Status: The status of the laser will be in
Standby which is a non-active status. The laser will not emit
energy while in Standby, even if you depress the foot pedal.
On the top-center of the control panel you will see the “Ready”
button. See Figure 3.2. Press this button to place the unit into
the ready status. When this button is pressed whatever settings
are displayed on the unit will be saved into the unit’s memory
for the program setting shown. The settings saved into the
four programs will be retained even if the laser is turned off.
The laser will now be ready to emit energy as you depress
the foot pedal.
•
Depress the foot pedal and make short quick strokes at the
lowest power that you can to remove the target tissues while
lightly contacting it.
• Continuous Mode ( ): In setting up the laser while in the
mode, you will deliver the amount of energy in Joules in one
second equal to the value indicated in the working beam
setting, i.e., set the laser for 2 Watts and while activated the
laser will deliver 2 Joules per second as long as you have the
foot pedal depressed. The mode is generally the fastest way
to ablate tissues but heat can build up and cause collateral
damage to the target and adjacent tissues. Cool the tissues
being lased by using periodic blast of air from a triplex syringe
and high speed suction. You may use water to cool in areas
where there is prolonged exposure to the laser’s beam. Avoid
using the air syringe when you have an opening in soft tissue
adjacent to or within the surgery site. An air embolism may
occur as a result of air captured within the tissue during the
cooling process.
•
Pulse Mode( ): Pulsing the laser energy will allow some
cooling of the tissue inbetween emissions of energy. The
“duty cycle” is the percentage of the time in each second
that the laser is emitting energy. The pulses per second, the
duty cycle and, the energy intensity per pulse will determine
your average power. In the pulsed mode, the Precise LTM®
is programmed to deliver 10 pulses per second with each
Figure 23 - Fiber with a shard (a bad cleave)