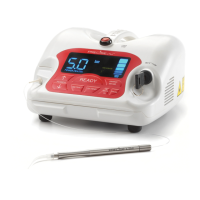
5
2.2.1 Power Cord Installation
Remove the AC adapter and the AC power cord. Push or plug
the power cord rmly into the adapter. Plug the small adapter
cord into the appropriate receptacle on the back of the laser.
To prevent power surges due to electrical storms or spikes in line
voltage, we recommend that you use a power strip with a surge
suppressor or unplug the laser when you are not present. Plug
the power cord into a 110 Volt AC outlet rated at 60 Hz. Be sure
to position the equipment such that you can quickly access and
disconnect the power cord connection from the back of the unit
if the need arises.
2.2.2 Power/Fan Switch and Key Switch
The Power/Fan Switch for the laser and fan is the rst item you
turn on each day. The switch is located on the rear panel of the
laser near the lower left hand corner. The Key Switch is the major
circuit breaker for your laser. It will be the second item you turn on
when activating the laser each day. Place the laser key into the
key receptacle located near the right-hand side on the front of
the laser. (See Figure 4 above.) Check the key switch by pushing
in and turning the key clockwise, approximately 1/4 of a turn. This
is the (ON) operating position for the key. The fan will start when
the power/fan switch is on and the key is turned. Prior to leaving
the ofce, the laser safety ofcer should check to see that the
key switch has been turned off and the key removed and stored
by the LSO.
Precise® LTM Remote Interlock
The Precise® LTM laser is equipped with a Remote Interlock Jack.
The Remote Interlock Jack is provided so that a clinician may install
the laser in a dedicated laser treatment room such that the laser
will be interlocked with the entrance door of the room. In such
an interlocked installation, the laser would shut off anytime the
door is opened, hypothetically, to protect the person’s eyes who
is entering the room. It is recognized that such installment is not
facilitated nor required in many operatories or clinics. To that end,
the Remote Interlock is available to any practitioner that requires
it. The Remote Interlock Jack is located and clearly labeled on the
rear of the laser. The miniphono jack is wired in the normally closed
position; meaning that no further action is required to operate the
laser without the interlock loop. If the interlock loop is desired you
may purchase the loop from a local electronics store. You need
only to inform the local electronics store that you require a mini
(1/8”) phono jack wired into a normally open momentary switch
and select the switch design that best suits your needs. To install the
loop, install the switch on the door and simply plug the miniphono
jack into the Remote Interlock Jack on the rear of the laser.
2.2.3 Wireless Foot Pedal Battery Installation
Remove the battery cover from the underneath side of the foot
pedal. Insert the enclosed 9 Volt Lithium battery. Replace the
battery cover. The foot switch is now ready for operation.
1. Insert a Phillips-head screwdriver into the screw holding
down the battery cover. Rotate the driver counter-
clockwise until the screw comes out completely. Repeat
for the other screw holding down the battery cover.
2. Push down on one end of the battery cover while
simultaneously lifting up on the other end to remove it.
3. Locate the battery terminal inside the well and pull the
terminal out. Do not pull excessively on the wires.
4. Remove the battery from its packaging and attach the
battery to the terminal.
5. Place the battery in the well with the connector to the
same side as where the wire leads emerge from the
housing.
6. Replace the battery cover and replace the two screws.
Turn the driver clockwise to tighten the screws. The
screws are sufciently secure once they no longer turn
with gentle nger-applied force. Do not over-tighten.
Place the pedal face up. Allow at least 1 minute after
completing this procedure before turning on the laser.
Note A: An extra 9 Volt Lithium battery should be
kept in your ofce inventory as the battery should
be replaced every 100 hours of continuos operation.
Note B: Make sure the laser is completely turned
off before replacing the battery in the foot pedal.
Note C: Place the pedal face down on a hard, clean
surface.
2.2.4 Disposable Fiber Cartridge
When it comes time to install a new cartridge, carefully
remove the new ber cartridge from the packing.
Figure 6 - Step 1
Figure 11 - Step 6
Figure 7 - Step 2 Figure 8 - Step 3
Figure 9 - Step 4
Figure 10 - Step 5
Figure 4 - OFF Position Figure 5 - ON Position
Figure 12 - Step 1
Figure 13 - Step 2 Figure 14 - Step 3
Figure 17 - Step 6
Figure 15 - Step 4
Figure 16 - Step 5
Figure 20 - Step 9
Figure 18 - Step 7
Figure 19 - Step 8