Setting up the Capsule Neuron [Chapter 2]
15
English
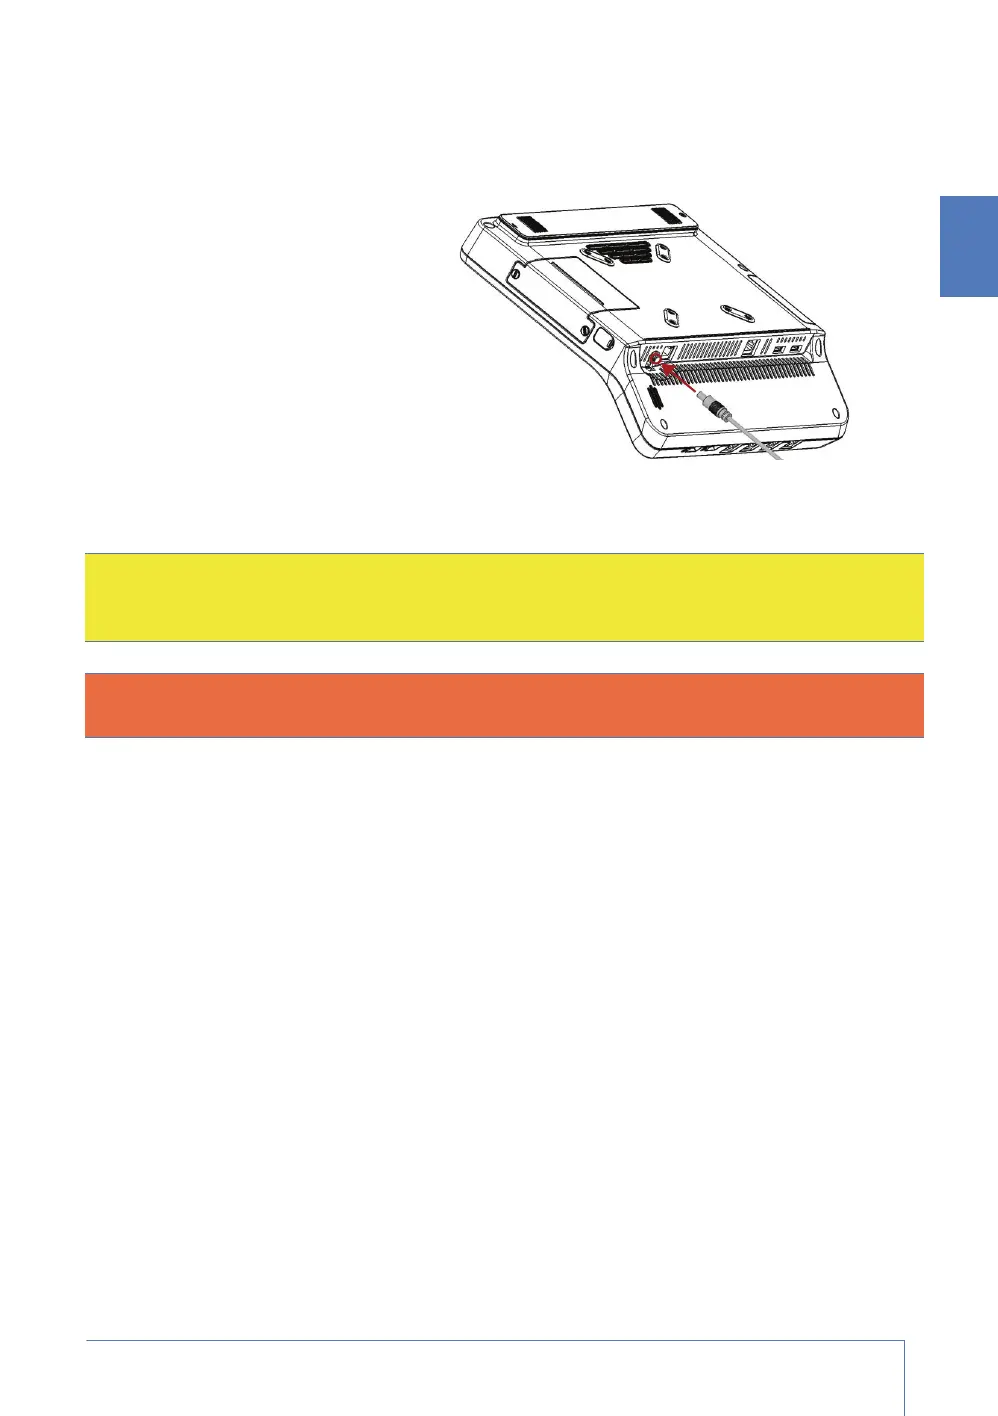
Connecting the Capsule Neuron to the power supply
1. The power brick that was shipped with your Capsule Neuron has a power cable on one end, and
an open plug on the other end. Plug that power cable into the Capsule Neuron at the DC-in
power connector (as illustrated).
2. Tighten the locking mechanism on
the DC-in power connector to lock
the power plug in place.
3. Plug the power cable that was
shipped with your Capsule Neuron
into the open plug on the power
brick.
4. Plug the other end of that power
cable into a grounded electrical
outlet (generally 3-prongs). The
Capsule Neuron switches on
automatically.
Before you use the Capsule Neuron for the first time
For all deployments, before you use the Capsule Neuron for the first time, you must completely
charge its battery.
1. Set up the Capsule Neuron as described in this chapter:
• install the main battery
• install the extended battery, if you use one
• connect the Capsule Neuron to the electrical mains
2. The battery/ies start to charge as soon as you plug the Capsule Neuron into the electrical
mains. Allow the main battery to charge for about two hours.
If you have installed both the main battery and the optional extended battery, allow the two
batteries to charge for about six hours.
For a fuller description of the batteries, and the charging / discharging process, refer to “Working
with the batteries” on page 21.
Caution: For safety, cables are designed to prevent inadvertent disconnection if someone
accidentally pulls on them. However, make sure that you route cables so that they do not
present a tripping hazard.
Warning: You must only connect the Capsule Neuron’s power brick to an appropriate power
source. To avoid risk of electric shock, use a grounded (3-prong) electrical power outlet.