Setting up the Capsule Neuron [Chapter 2]
11
English
• If you select to deploy the Capsule Neuron on a wall-mount, then you require a mounting solution
that is VESA 75/100-compatible.
Installing the batteries in the Capsule Neuron
Installing the main battery in the Capsule Neuron
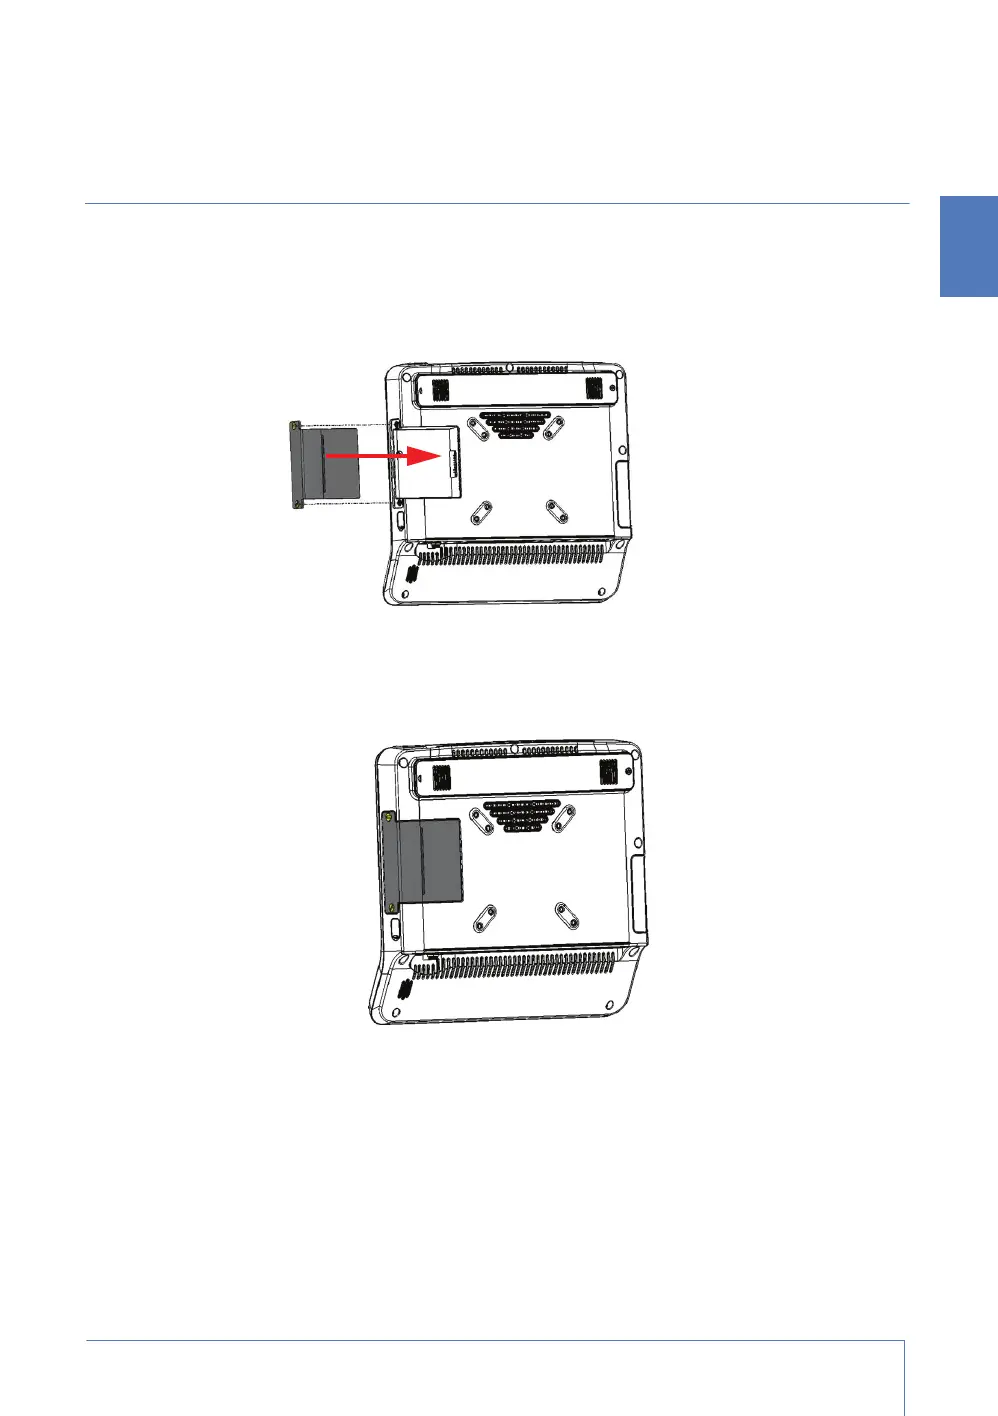
The Capsule Neuron is shipped with the main battery in position but not yet fixed in place.
1. Push the main battery towards its connection port.
2. Use a screwdriver or other tool to screw in the two screws that hold the main battery in place.
3. Tighten the screws until the battery is connected to its pins. Do not overtighten.
Installing the optional extended battery in the Capsule Neuron
1. Turn the Capsule Neuron so that the screen is facing away from you.
2. Use a screwdriver to unscrew the screw that holds the extended battery faceplate in position.
3. Push the loose faceplate to the left, then lift the faceplate away from the Capsule Neuron.