6
Intake Assembly
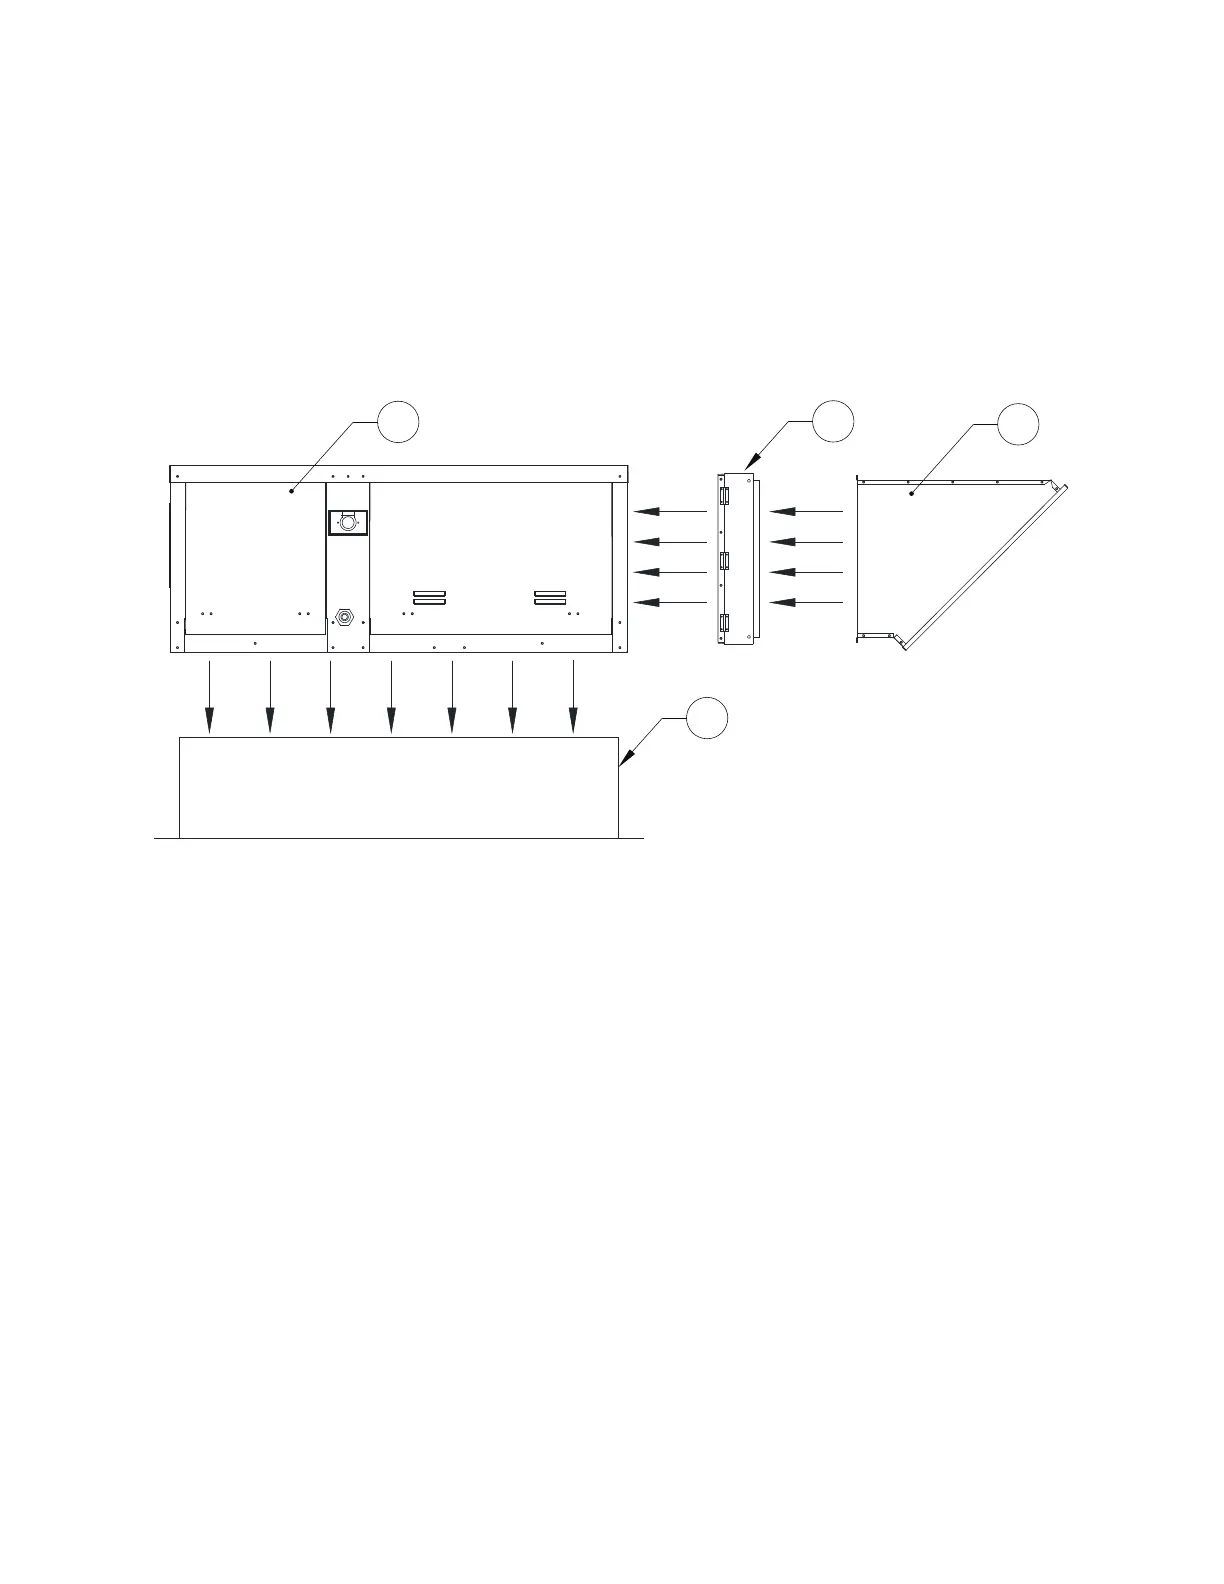
Intakes and curbs (Figure 2) are shipped on a separate skid. Upon unit arrival, perform the following steps
to assemble the intake to the unit.
1. Apply silicone or weather-proof gasket on the backside of the flanges of the intake hood or V-bank
intake.
2. Secure the flanges of the intake hood to the unit with the supplied sheet metal screws.
3. Use caulk on the outside of the screws to prevent water leaks.
Figure 2 - Intake and Curb Assembly
1. Blower/Motor Access Door
2. Filtered Intake
3. Screened Intake
4. Curb