22 docs.carbide3d.com support@carbide3d.com 23
Position the X‑Rail
1. Place the X-rail, with the decals facing the
front, across the top of the two empty Y-Axis
Left and Right Assembly boxes, as shown in
Figure3‑15.
Install the Y1‑Carriage
1. Identify the Y1-carriage. See Figure3‑15.
2. ×12mm
button head cap screws to attach the
Y1-carriage to the LEFT end of the X-rail as
shown in Figure3‑16.
When properly attached, the motor body will be
to the inside and behind the X-rail. The V-wheels,
idlers, and motor pulley will be facing out as shown
in Figure3‑16.
3. Snug the Y1-carriage to the X-rail, but do not
fully tighten the screws.
Install the Z‑Plus
1. With the router mount facing front, line the
four V-wheels up with the two V-rails, and
slide the Z-Plus onto the open end of the X-rail.
See Figure3‑17.
Pay special attention to all four V-wheels, making
the Y2-carriage goes on, the Z-Plus is locked in
place.
Install the Y2‑Carriage
1. Locate the Y2-carriage.
2. ×12mm
button head cap screws to attach the
Y2-carriage to the open end of the X-rail. See
Figure3‑18.
When properly attached, the motor body will be
to the inside and behind the X-rail. The V-wheels,
idlers, and motor pulley will be facing out.
3. Snug the Y2-carriage to the X-rail, but do not
fully tighten the screws.
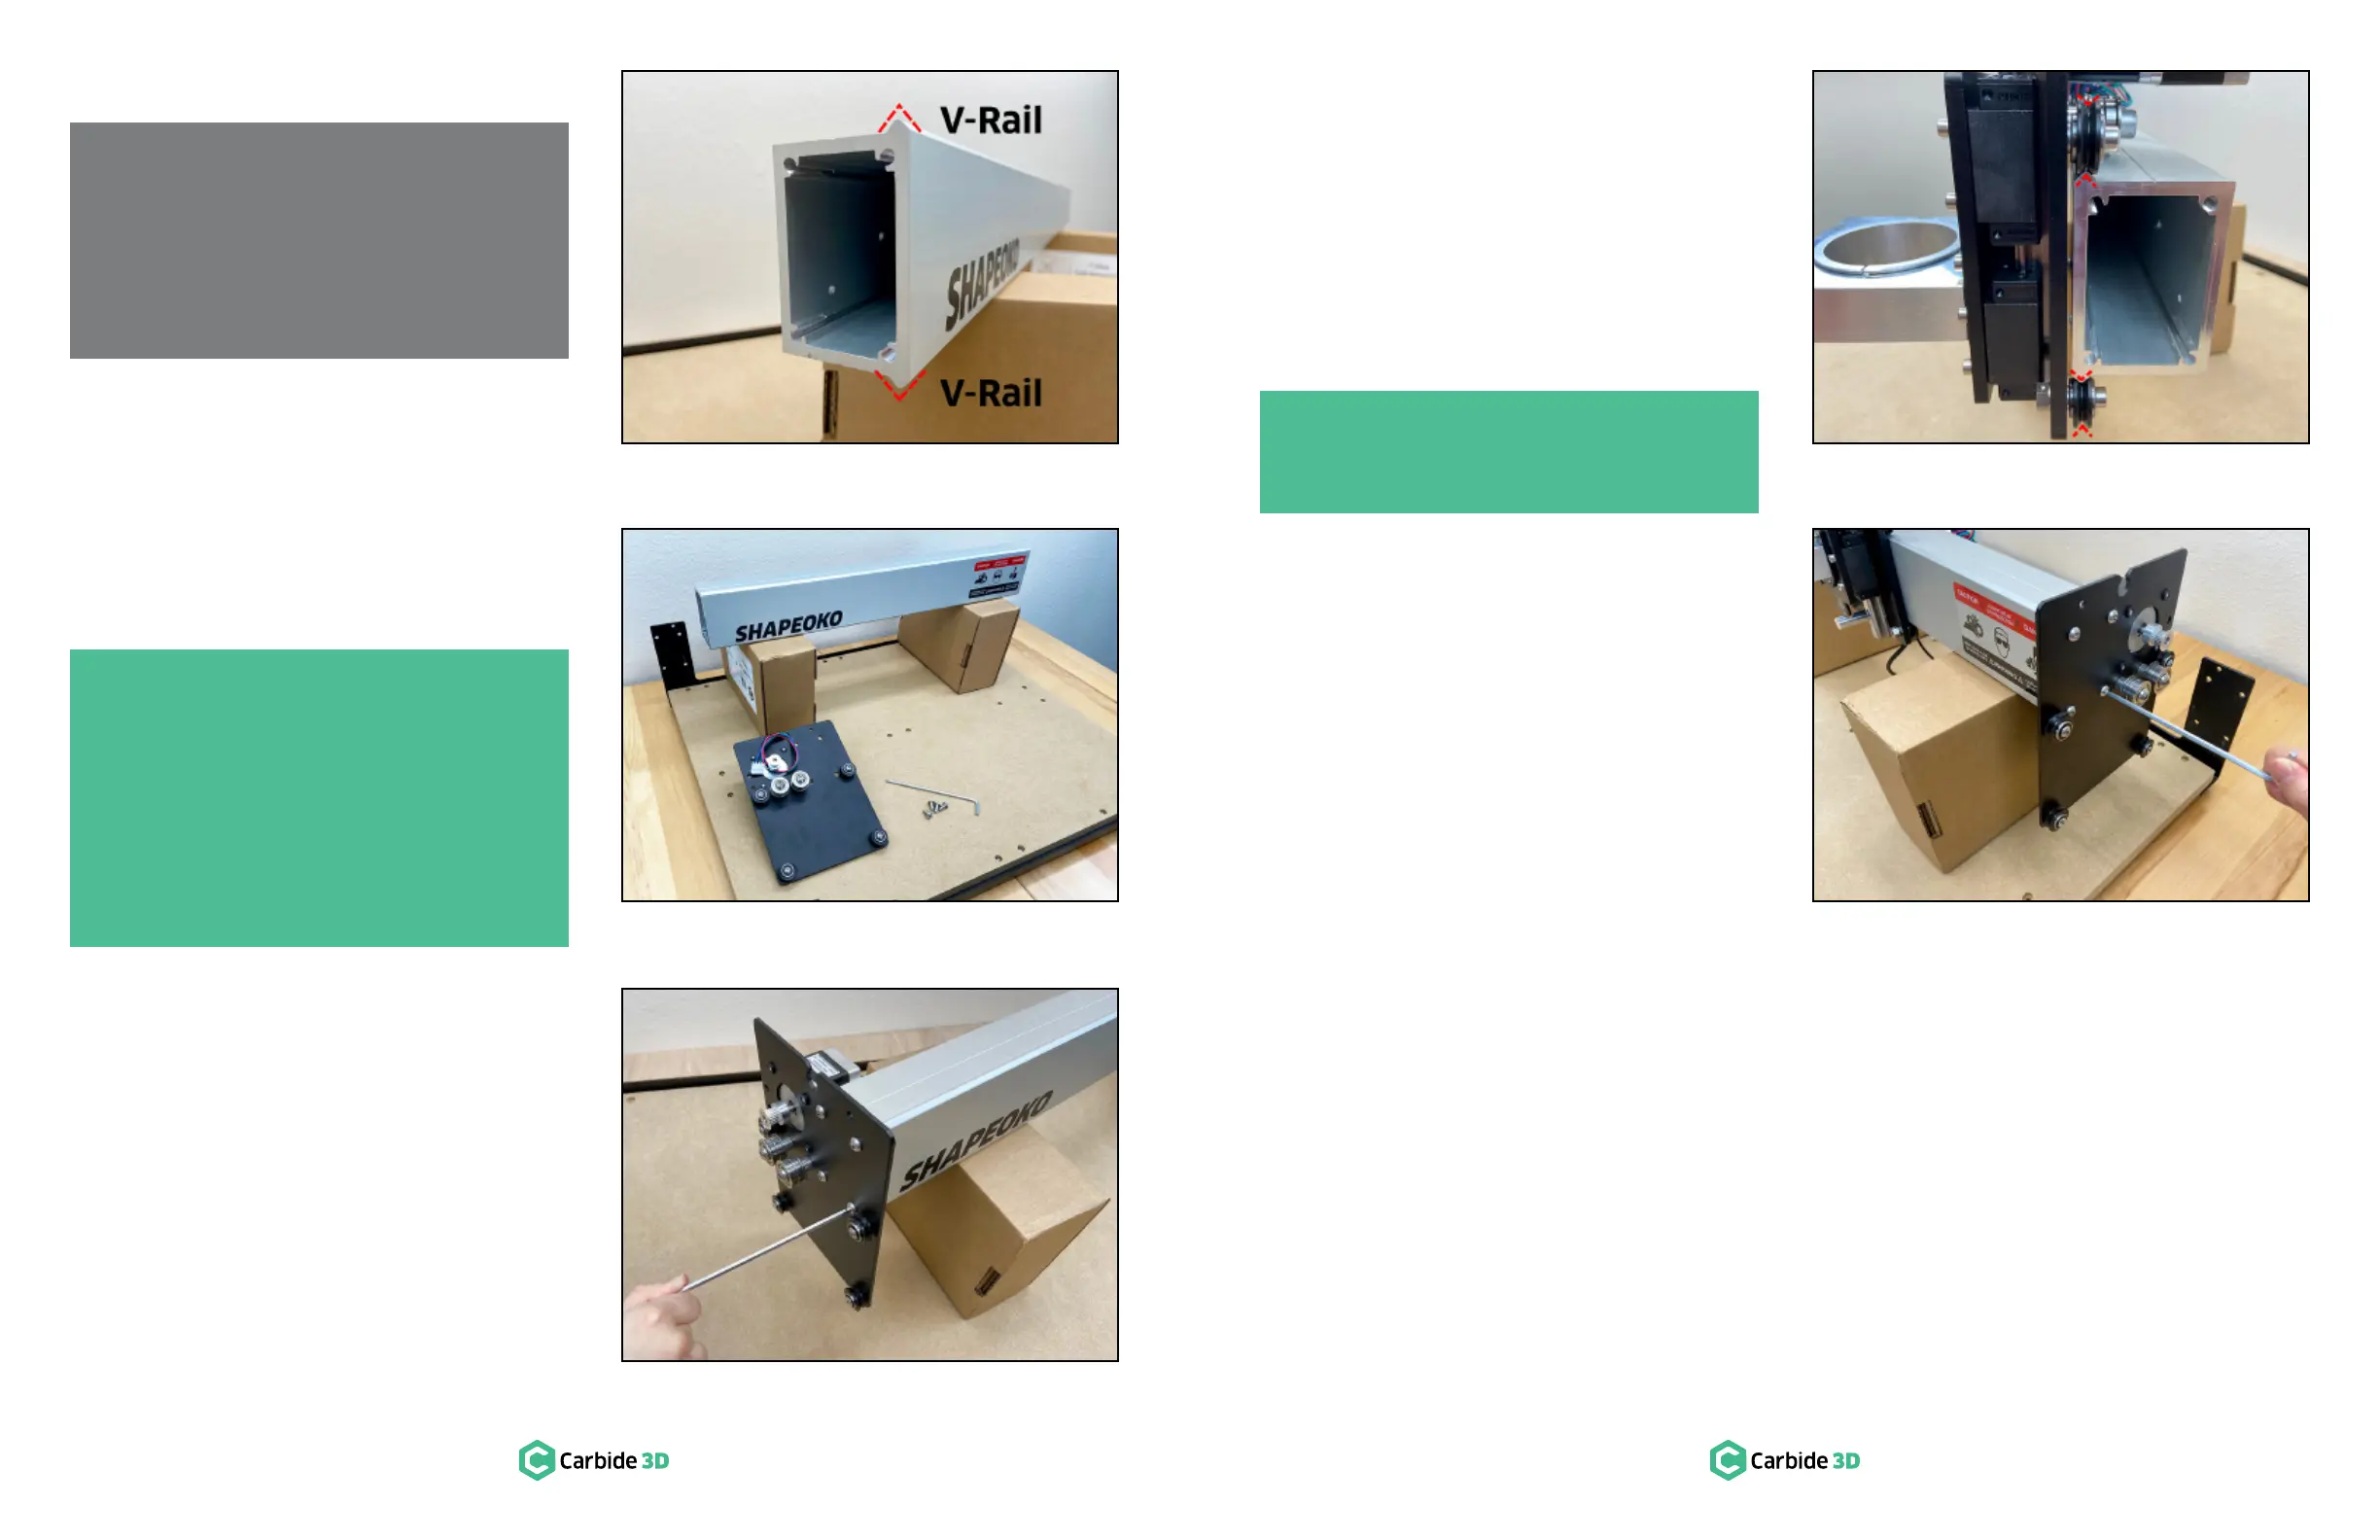
NOTE: Each extrusion rail has a pair of
V-rails running the entire length of one side.
These V-rails serve as linear tracks for the
V-wheels, securing the carriages to the
gantry and allowing them to glide smoothly.
The V-rails will face to the front (X) or inside
(Y1 and Y2) of the machine. See Figure 3‑14.
PRO TIP: Screws going into the ends of the
extrusion rails are prone to cross-threading.
Prior to installation, pre-screw each extrusion
rail to clear any debris from the threads.
These “practice” screws should thread easily,
with little resistance and without wobble.
When you’re ready to attach the carriages,
partially thread all screws before tightening
each one a little at a time in a cross pattern.
PRO TIP: Center the Z-Plus on the X-rail and
use several strips of masking tape to keep it
from rolling back and forth.
Figure3-14
Figure3-16
Figure3-17
Figure3-15 Figure3-18
 Loading...

