24
7. CARE AND MAINTENANCE
Follow these easy steps to replace the tyre:
1. Turn o the scooter and remove the key. Make sure the
lever is in D position before you lift the scooter.
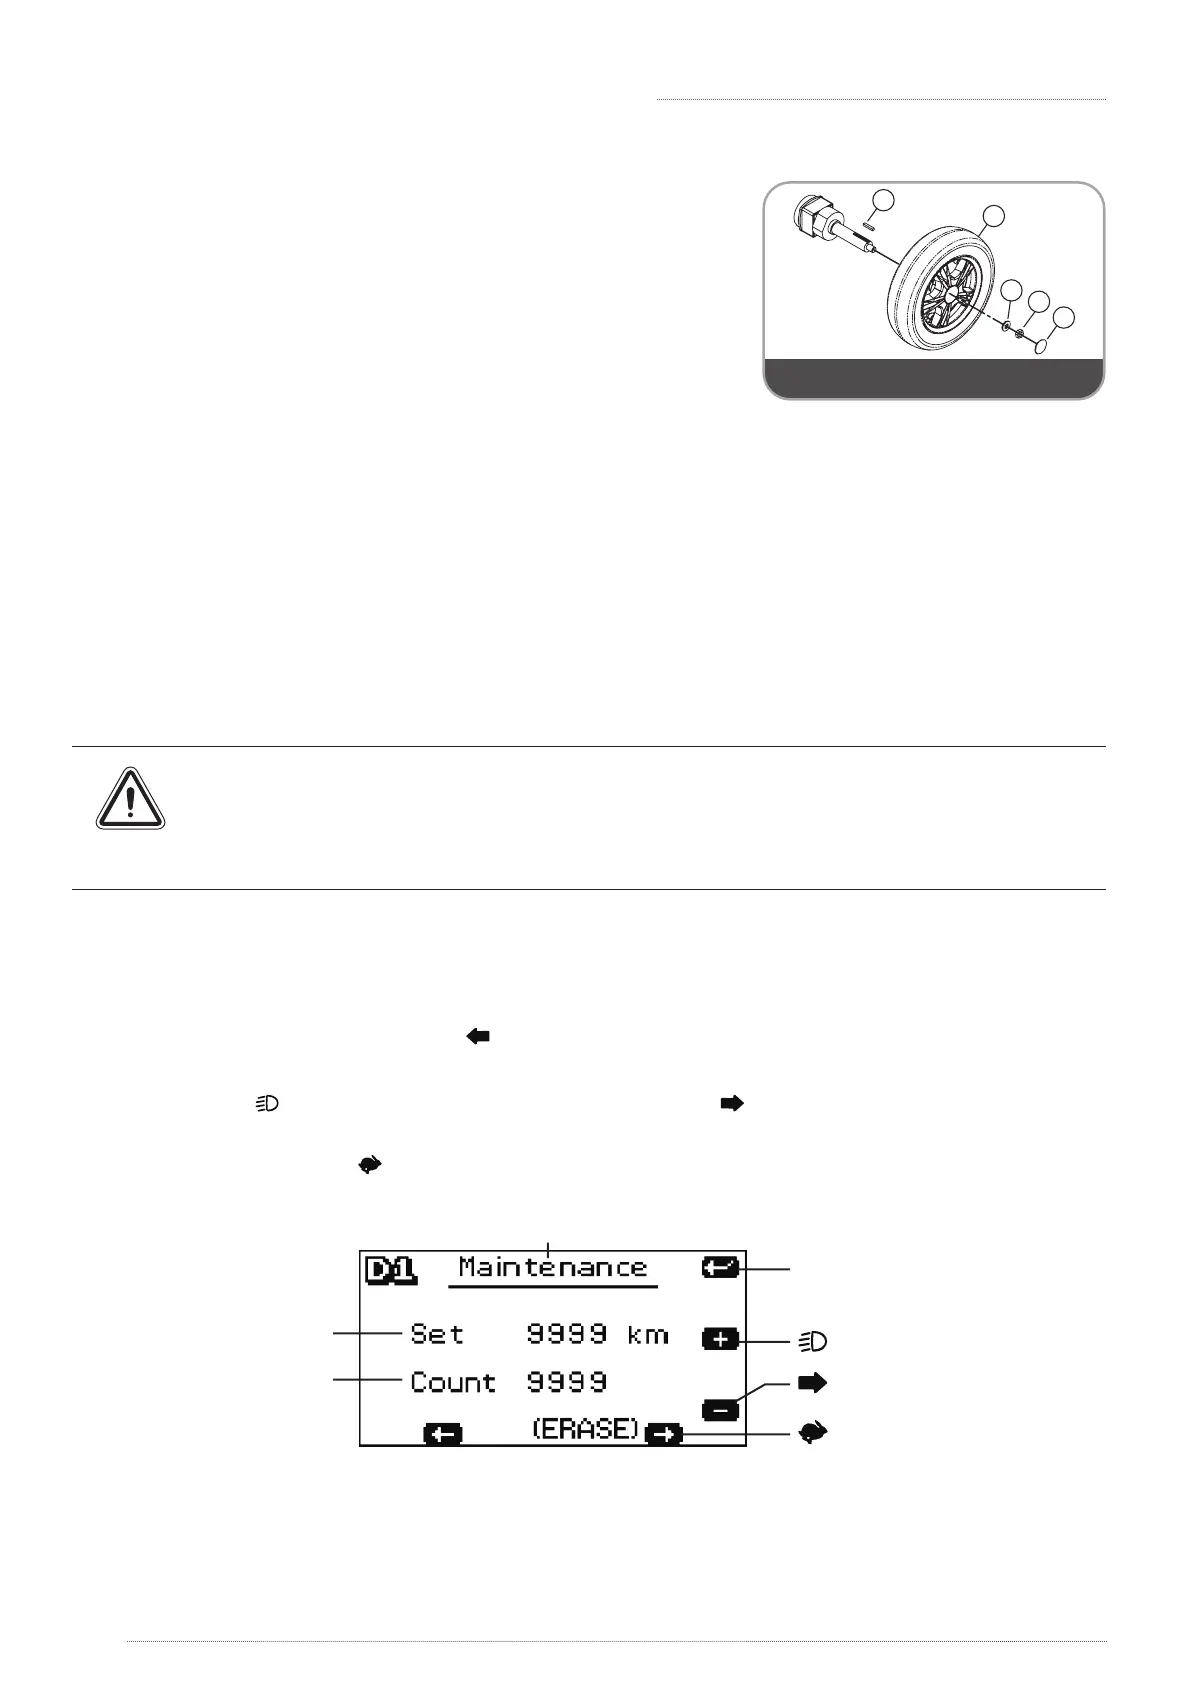
2. Use an ratchet and socket to remove the drive wheel
screw from the centre hub of the wheel. Pull the wheel
o of the axle.
3. Separate the tyre from the rim.
4. Remove the old tyre and replace it with a new tyre.
5. Slide the wheel back onto the shaft.
1
2
5
3
4
Component 5 is for rear wheel only
6. Install the drive wheel nut into the centre hub and verify the key is lined up with axle and
wheel,then tighten to secure it in place. (Torque 300±30kgf-cm)
All maintenance and repair of scooter should be done by an authorized dealer.
7.6 MAINTENANCE REMINDER
» User can set the system to track distance intervals for maintenance.
» The maintenance warning light on the LCD screen will be ashing when the maintenance is
due at set distance. The ashing light will be o automatically after a minute.
» The scooter/control panel can still be operating when the maintenance warning light
is ashing.
» Please contact the authorized dealer for routine maintenance when the
maintenance warning light is ashing.
Setting:
» Please reset for next maintenance distance when the maintenance is performed.
1. Turn the power (key) o
2. Press [MODE] button and [ ] button at the same time.
3. Hold the two buttons and then turn the power to get in Maintenance mode setting.
4. Press [ ] to increase digits (+ 500km/per press) or [ ] to decrease digits (-500km/ per
press).
5. Press and hold [ ] for 2 seconds to erase the setting.
6. Press MODE to save and exit setup mode when nished.
MODE
Save/Exit/Next Setu p
Increas e
Decreas e
Erase
Set Distanc e
Count Distanc e
» The maintenance warning light will ash for a second every time when the scooter turns on if
the Set Distance reaches Count Distance.
» Setup mode will automatically o after 15 secs without pressing any button. Scooter will save
the setting and return to operation mode.