6.7 How to modify the mode of operation (parameter
C0)
a) hold down “SEL” and “PRG” together for 5 seconds;
b) the display shows “0”;
c) introduce the password (press
and/or until “22” is
displayed);
d) press “SEL” to confirm the password;
e) if the procedure has been carried out correctly, the display
shows “C0”, otherwise press “PRG” and repeat all above
operations; “C0” corresponds to the mode of operation of the
controller.
To make the controller work according to one of the 9 desired
modes, give C0 the appropriate value:
f) when C0 appears on the display, press “SEL”;
g) the display shows “2’”that identifies the factory-set
mode (C0=2);
h) to set a different mode press
or until you
display the number corresponding to the desired mode
(1-9); press SEL to confirm;
i) press “PRG” to end the operation and store the new
mode of operation.
6.8 Programming the controller via remote control
The IR32 Infrared instruments have been designed to be easily
and quickly programmed by means of the remote control. The
remote control can be used not only to program the controller
from a remote position but also to allow the End-User to set the
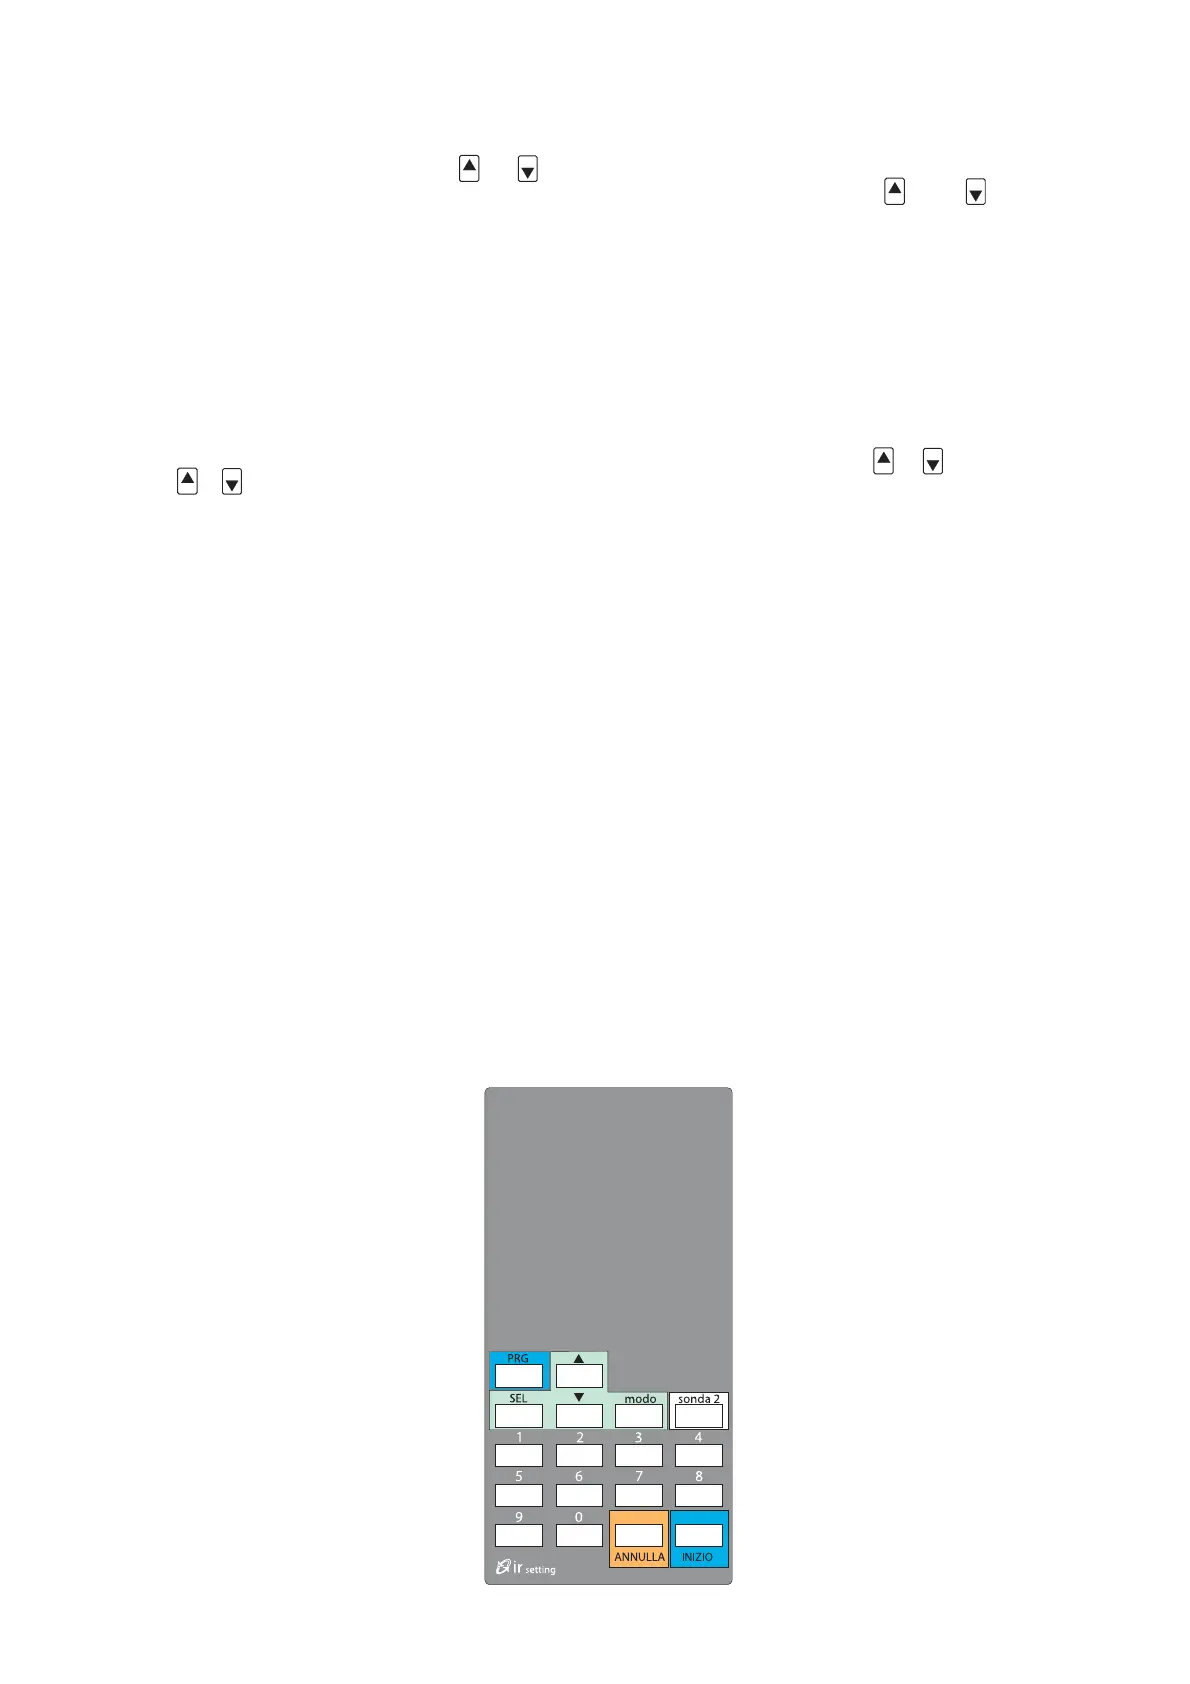
main operation parameters easily and fast. Buttons have been
divided into three groups:
a) buttons that operate/deactivate the use of the remote control;
b) pre-programmed buttons for the modification of the
values of the main parameters;
c) buttons for scrolling/modifying all parameters.
a) buttons used to activate/deactivate the use of the remote
control
These buttons are the remote control ON/OFF buttons.
They also allow you to store any new parameter value.
“Start” Button: enables the use of the remote control unit;
NUMERIC keypad: allows you to select the access code (pas-
sword). We advise you to give each controller a
specific access code, especially when your control
panel includes several IR instruments or when all
of them are exposed to the beam of the remote
control. In this way it will be possible for you to
change exactly the parameter/s you need to
change, without interfering with the data of the
other controllers (see chapter 6.9).
“CANCEL” button: interrupts the programming
procedure without storing any modification.
“MEMO” button:
1) silences the buzzer;
2) ends the programming procedure and stores the
new values given to the parameters;
“MODE” button: displays “C0” (direct access).
Second “SENSOR”: displays the value of the
second sensor (NTC) (direct access).
6.7 Come modificare il Modo (parametro C0)
a) premere i tasti “SEL” e “PRG” contemporaneamente per 5 s;
b) a display compare “0”;
c) impostare la password, ovvero premere il tasto
e/o fino
a visualizzare “22”;
d) premere il tasto “SEL” per confermare la password;
e) se la procedura è stata eseguita in modo corretto, a display
compare il codice “C0”, altrimenti premere il tasto “PRG” e
ripetere le operazioni dal punto a); C0 è il parametro
corrispondente al Modo di funzionamento.
Per caricare sullo strumento uno dei 9 modi descritti è
sufficiente assegnare a C0 il numero del Modo scelto,
seguendo le seguenti modalità:
f) quando C0 compare sul display, premere il tasto “SEL”;
g) a display appare “2”, che identifica appunto il Modo
(C0=2) assegnato in fabbrica;
h) per selezionare un diverso Modo di funzionamento premere i
tasti
o fino a visualizzare il valore numerico
associato al Modo di funzionamento scelto, valore
compreso tra 1 e 9; premere “SEL” per confermare il dato;
i) premere il tasto “PRG” per concludere l’operazione e
memorizzare definitivamente il nuovo Modo di funzionamento.
6.8 Accesso da telecomando
Il telecomando è stato progettato per rendere più semplice la
programmazione dei controlli elettronici. Oltre che program-
mare a distanza lo strumento, consente una veloce e semplice
impostazione dei parametri più comuni e maggiormente usati. È
caratterizzato da tre gruppi di tasti:
a) tasti per attivare/disattivare l’uso del telecomando;
b) tasti preprogrammati per la modifica diretta dei
parametri principali;
c) tasti per la scansione/modifica di tutti i parametri.
a) tasti per attivare/disattivare l’uso del telecomando
Consentono di attivare la comunicazione con il controllo e di ter-
minarla memorizzando o no i nuovi valori dei parametri.
Tasto “Inizio”: inizia la comunicazione;
Tastiera NUMERICA: imposta l’eventuale password di accesso ai
parametri; l’utilizzo della password è consigliato quando più con-
trolli si trovano nel raggio d’azione del telecomando, come nel
caso di più controlli posizionati su un quadro
elettrico. Selezionando una password diversa
per ogni strumento, la modifica dei parametri
tramite telecomando potrà essere selettiva, ovvero
solo sul controllo desiderato (si veda il capitolo
6.9).
Tasto “ANNULLA”: termina la programmazione
annullando le eventuali modifiche;
Tasto “MEMO”: è dedito a due funzioni princi-
pali;
1) tacita, eventualmente, il buzzer di allarme;
2) termina la programmazione memorizzando i
nuovi valori attribuiti ai parametri.
Tasto “MODE”: visualizza il parametro C0; acces-
so diretto.
Tasto “SONDA 2”: nei modelli NTC, visualizza il
valore della seconda sonda; accesso diretto.
13
Fig.11
 Loading...