40MULA: Installation Instructions
Manufacturer reserves the right to change, at any time, specifications and designs without notice and without obligations.
15
SENSOR INSTALLATION
To Install the T1 Sensor:
1. Use a 1/4” drill bit (or Unibit) to drill an opening in the return plenum. The distance of the T1 location should be within the 16' of the T1 extension wire
provided.
2. Connect the T1 extension to the T1 sensor and install the sensor into the return plenum. Seal the opening as needed to avoid air leakage.
To Install the T2 sensor:
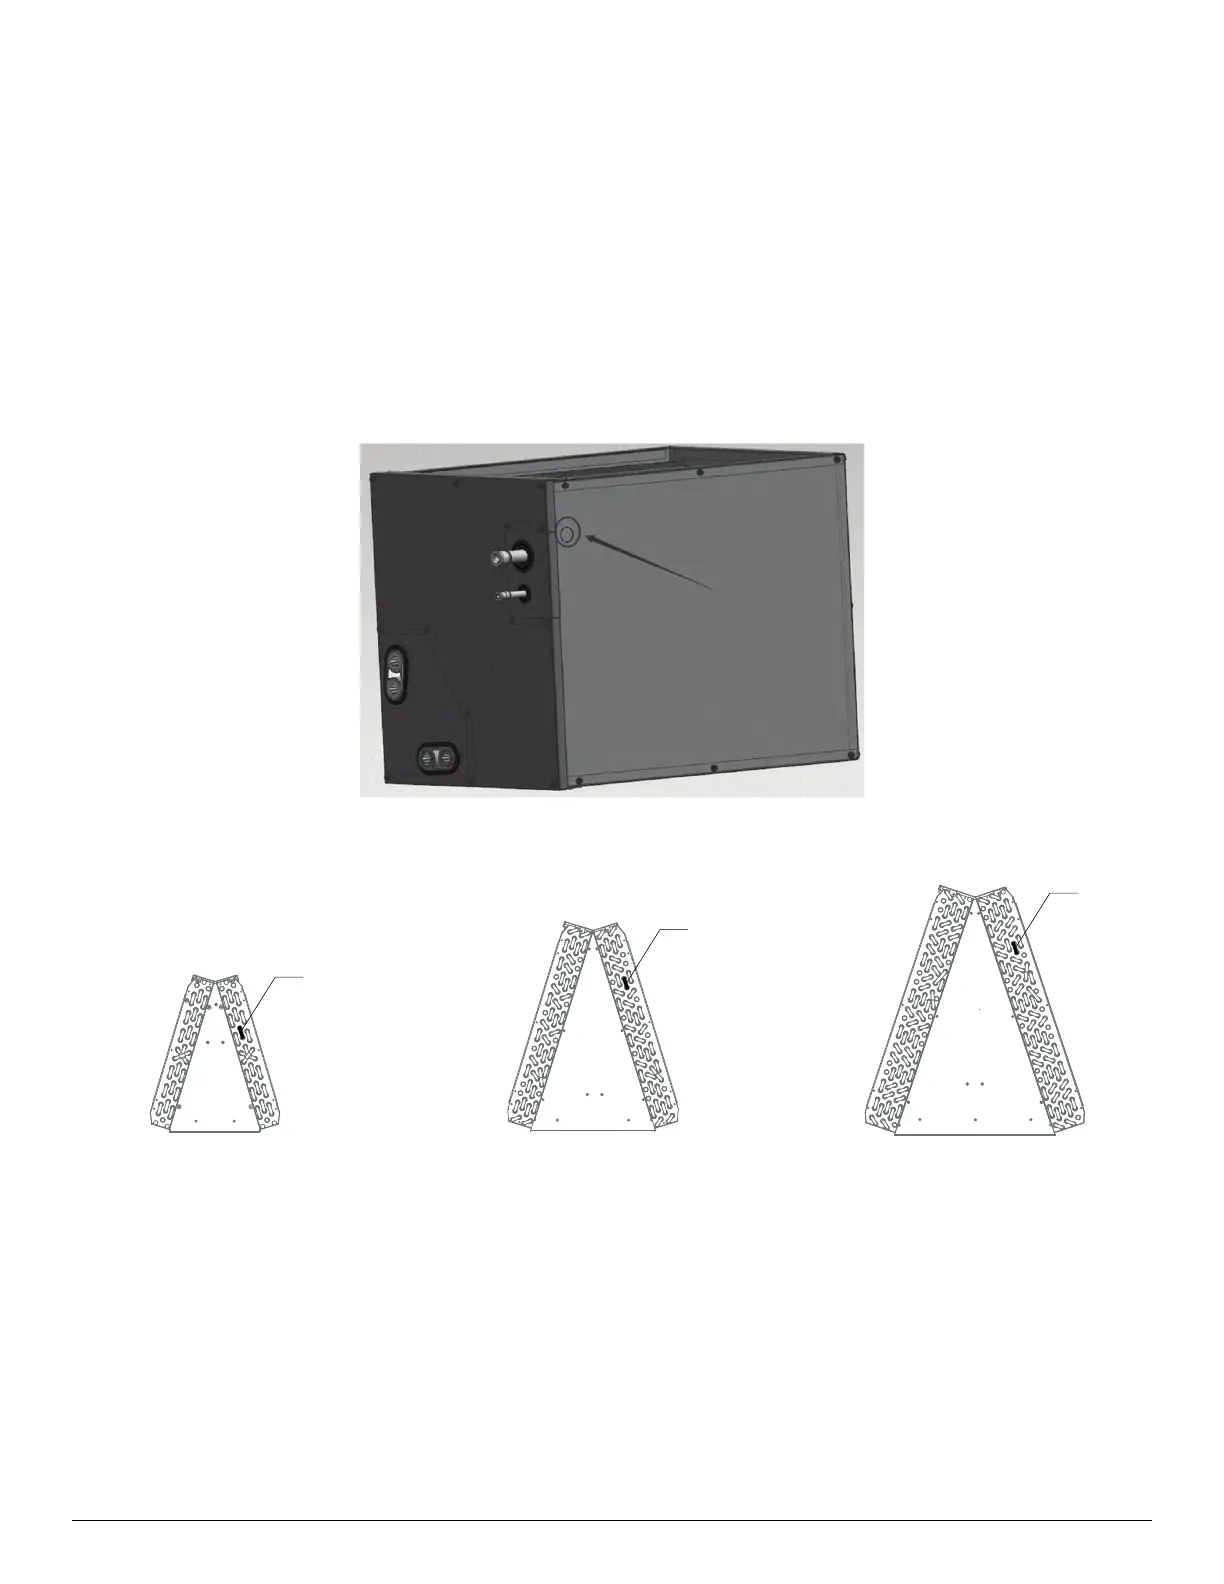
1. Locate the marking on the coil cabinet for marking. If there is no marking, the location for drilling will be the upper left or upper right side of cabinet
depending on install orientation (see Fig. 13).
2. Use a 1/4” drill bit (or Unibit) to drill an opening on the appropriate side for installing T2 sensor. Use caution when drilling to not damage the coil.
3. Install the sensor through the opening and seal opening as needed to avoid air leakage.
4. Refer to Fig. 14 to match the T2 sensor location with the appropriate coil with sensor clip provided to install the T2 sensor.
Fig. 13 — T2 Drill Point Location
Fig. 14 — Position of Pipe Temperature Sensor (T2) On Evaporator Coil
(T2)
(T2)
(T2)
40MULAQ24XBX
40MULAQ24XAX
40MULAQ36XCX
40MULAQ36XBX
40MULAQ48XCX
40MULAQ60XDX
 Loading...