10 - CONNECTIONS
Connection diameters:
W40 W53 W78 W100 W115
Cooling coil
Inlet G 1"1/4 (M) G 1"1/4 (M) G 1"1/2 (M) G 1"1/2 (M) G 1''1/2 (M)
Outlet G 1"1/4 (F) G 1"1/4 (F) G 1"1/2 (F) G 1"1/2 (M) G 1''1/2 (F)
W40 W53 W78 W100
Heating coil
Inlet G 3/4" (M) G 3/4" (M) G 3/4" (M) G 3/4" (M)
Outlet G 3/4" (M) G 3/4" (M) G 3/4" (M) G 3/4" (M)
Always use two spanners when connecting or tightening the hydraulic couplings to avoid twisting the pipes and applying stress on the
welds.
To avoid the risk of condensation, the hydraulic pipes and elements must be carefully insulated.
Before insulating, check the tightness of the couplings.
Warning: the operating pressure on the chilled or hot water network must not exceed 8 bar.
Once all the connections have been made, the access holes must be sealed.
Insulated exible connections are available on request for carrying out hydraulic connections. Ensure these are not bent too acutely
to avoid pinching the inner tube and restricting the ow of water.
Condensate drain
The condensate drain pan should include a siphon to avoid any risk of overowing.
(See position and connection diameter on the dimensional drawing).
In these units, the pan is depressed due to its position in relation to the fan motor assembly.
To enable correct drainage, the height must be equal to at least twice the unit's depression.
67
67
A condensate drain pump option is available (see technical specications), provided that the humidier option has not been requested.
If the humidier option is selected, the discharge must not drain into the unit's drain pan. To have a single discharge for both, connect
the humidier drain downstream of the unit's drain pan.
Warning: the condensates from the humidier can reach 100 °C.
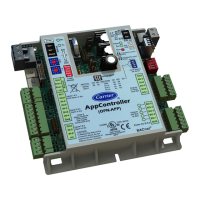
10.2 - Electrical connection
The electrical connections and wiring must be set up as shown on the wiring diagram included with the unit and in accordance with
applicable standards and regulations.
The unit's power supply cable must be determined according to the power of the unit, the length of the cable, the protection, and the
operating mode.
Check that the characteristics of the electrical power supply conform with the indications on the name plate.
Please ensure the unit is connected to earth, and that the power supply is always able to supply the necessary power.
9
 Loading...