14
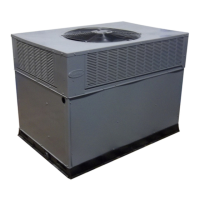
Fig. 18 — Top Panel Removal
4. Remove the compressor access panel to access the lower coil
clips. The condenser coil corner post may also be removed.
See Fig. 18.
5. Remove the screws from both sides of the 4 coil retaining
clips on the hairpin end of the coil tube sheets. See Fig. 19.
6. Remove the 4 retaining clips.
Fig. 19 — Condenser Coil Clips
7. Draw the inner coil inward to separate the coils for cleaning.
8. Insert a spacer (field-supplied) between the tube sheets to
hold the coils apart. See Fig. 20.
9. Clean the outer coil surface to remove surface loaded
fibers or dirt. See “Remove Surface Loaded Fibers” on
page 13 for details.
10. Use a water hose or other suitable equipment to flush down
between the 2 coil sections to remove dirt and debris. If a
coil cleaner is used be sure to rinse the coils completely
before reassembly.
11. Move the inner coil back into position. Reinstall the 4 coil
clips. Reinstall the top panel and replace all screws.
Replace the compressor access panel.
Fig. 20 — Separating Coil Sections
(Top View)
Top Panel
Support (Field-Supplied)
Compressor
Access Panel
Corner Post
Corner Post
CAUTION
UNIT DAMAGE HAZARD
Failure to follow this caution may result in reduced unit
performance or unit shutdown.
High velocity water from a pressure washer, garden hose, or
compressed air should never be used to clean a coil. The force
of the water or air jet will bend the fin edges and increase
airside pressure drop.
CAUTION
UNIT DAMAGE HAZARD
Failure to follow this caution may result in accelerated
corrosion of unit parts.
Harsh chemicals, household bleach or acid or basic cleaners
should not be used to clean outdoor or indoor coils of any kind.
These cleaners can be very difficult to rinse out of the coil and
can accelerate corrosion at the fin/tube interface where
dissimilar materials are in contact. If there is dirt below the
surface of the coil, use the environmentally balanced coil
cleaner.
 Loading...