Installing the AppController
AppController CARRIER CORPORATION ©2019
Installation and Start-up Guide All rights reserved
17
Installing the AppController into an i-Vu® Control System
You must complete the following procedures to successfully install your AppController into an i-Vu® Control
System. Use the Help in the referenced software for detailed descriptions of these procedures.
EquipmentBuilder or Snap
1 Use EquipmentBuilder or Snap to create control program(s) for your AppController.
2 If applicable, print the Sequence of Operation, which includes the points list.
NOTE You can create a points list under Reports in the i-Vu® application or Field Assistant after installing
your control program.
This Installation Guide
1 Prepare a wire list using the points list. Refer to Appendix A.
2 Use the wire list and the following installation procedures to install and wire I/O points to your AppController.
The i-Vu® or Field Assistant application
1 Upload the controller to the database by selecting the router in the navigation tree.
2 Select Devices > Manage tab.
3 Select the controller in the list on the page and click Upload.
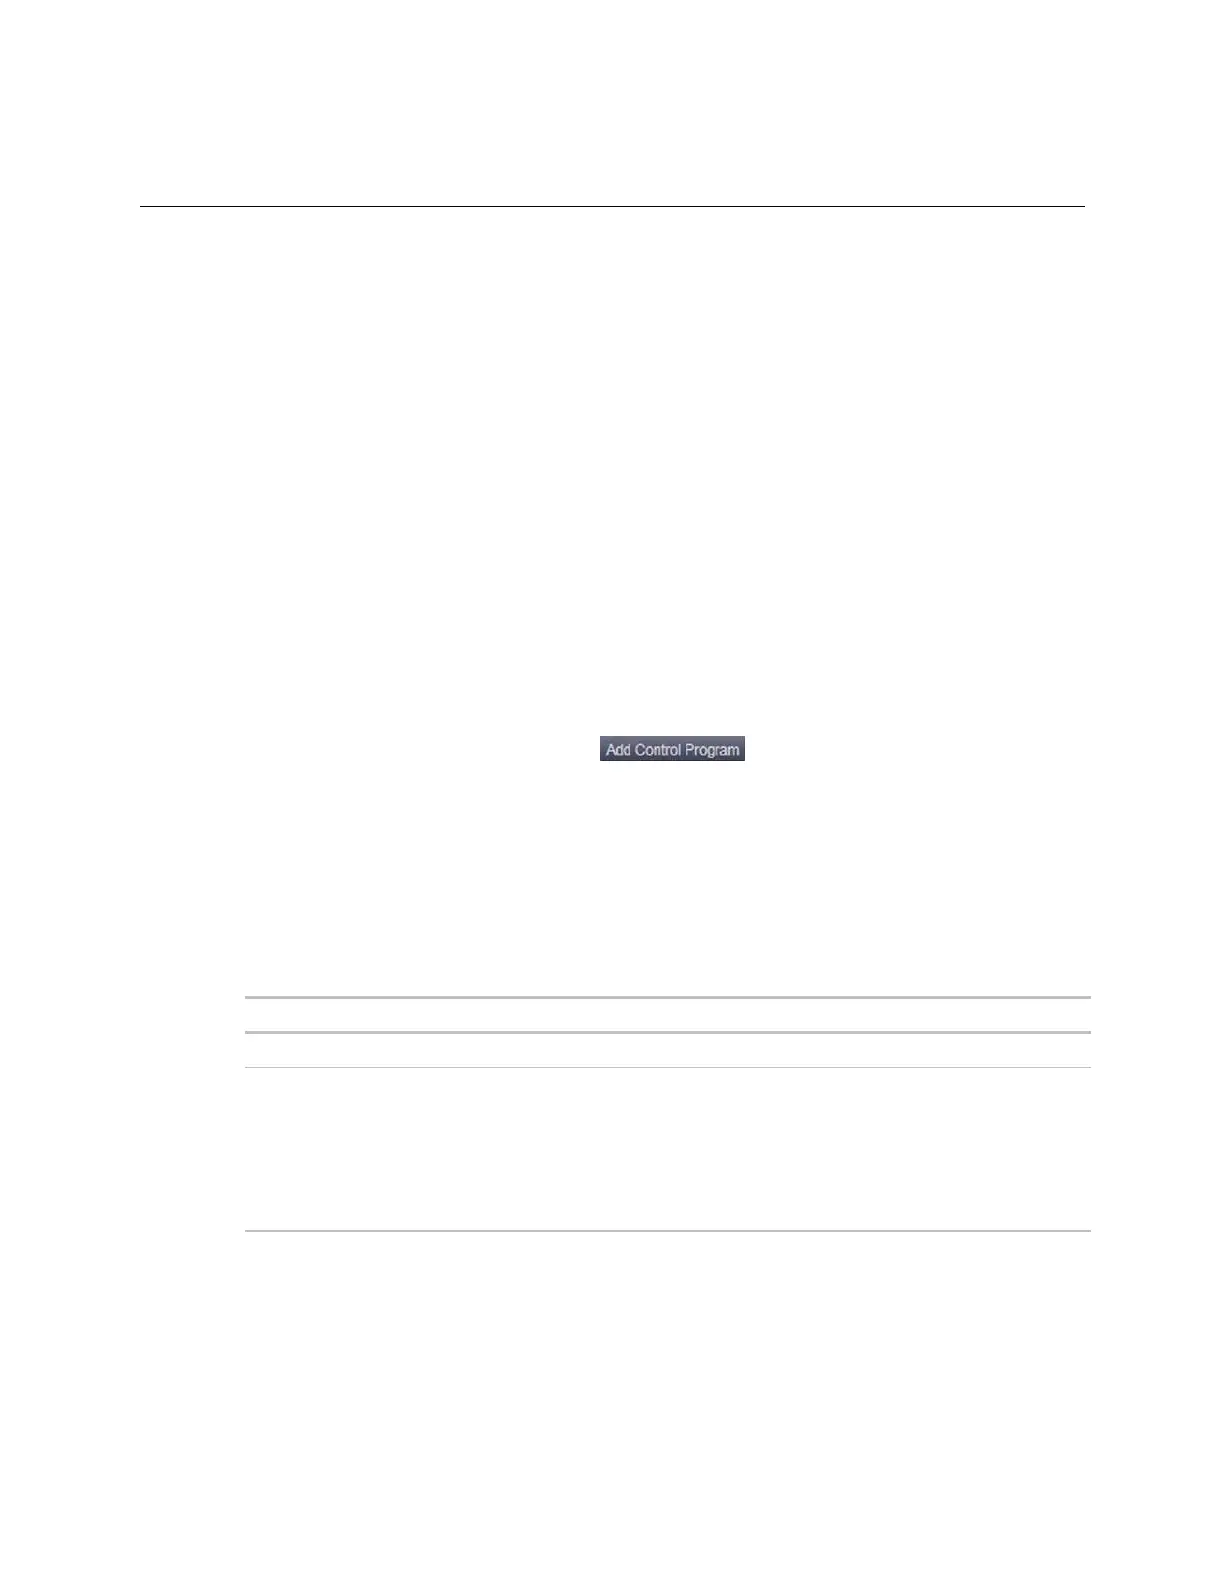
4 If you are adding a new control program, click . A dialog window appears.
5 Enter a name for your control program in Display Name and select your controller in the Controller drop-down
list.
NOTES
○ If you already have the maximum number of control programs for a controller, it will not appear in the
list.
○ Optional: You can change the control program's Reference Name if needed.
6 Do one of the following:
If the control program is...
In the Control Program drop-down list
Select the control program.
Not in the Control Program drop-down list
a. Click Add New.
b. Browse to select the control program.
c. Click Open.
d. Click Continue.
e. Click Close.
7 To upload a graphic, click Add New under Views and browse to your .view file.
8 Click Continue. When message appears File added successfully, click Close.
9 Click Close again.