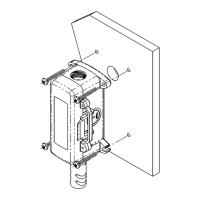
ZS pipe clamp-on temperature sensor
ZS Sensors Carrier Proprietary and Confidential CARRIER CORPORATION ©2017
Installation Guide All rights reserved
26
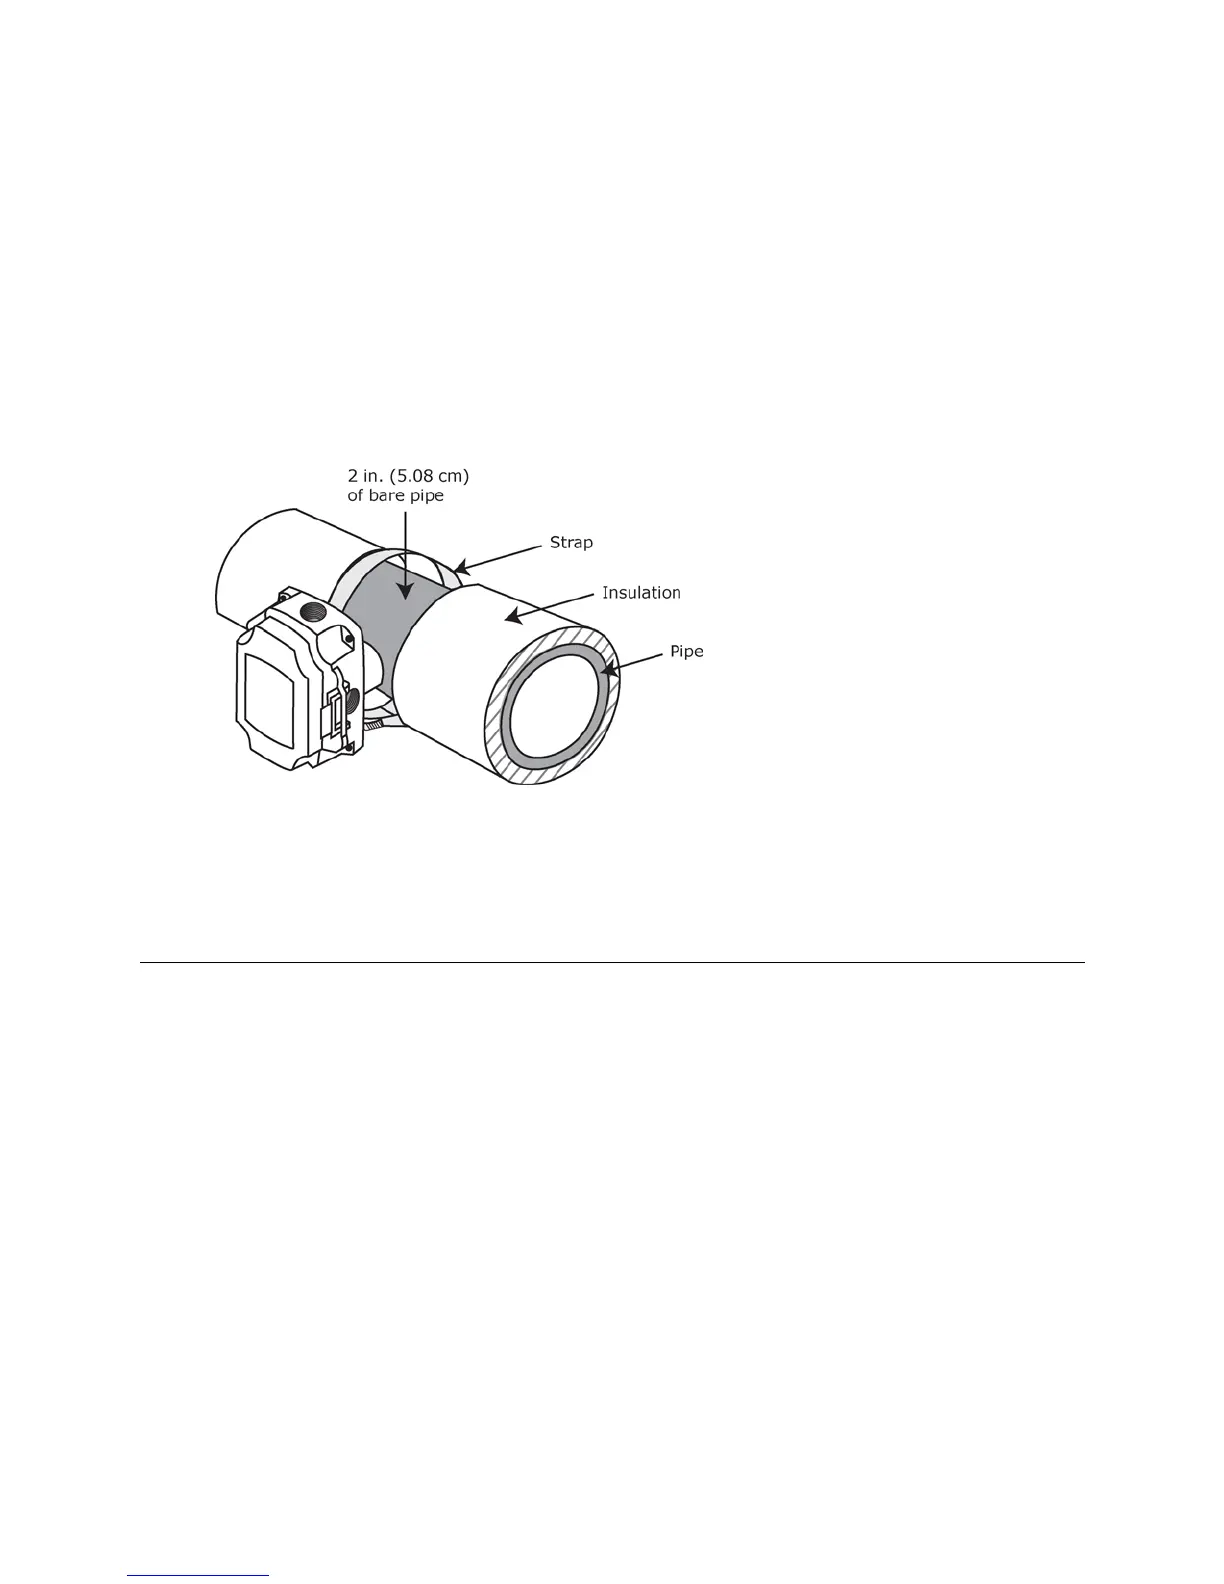
5 Lift up on the clamp screw to release the stainless steel strap from the clamp.
6 Wrap the sensor's strap around the pipe, and then insert the strap into the clamp.
7 Push the clamp screw down against the strap, and then turn the screw to tighten the strap enough so that
the sensor does not rotate around the pipe, but only enough so that the foam is compressed no more than
50%.
8 If the pipe does not have insulation, add pipe insulation on either side of the sensor to prevent airflow from
affecting the temperature readings. The insulation should:
• Be at least 1 in. thick, but only cover the sensor enclosure to the door hinge.
• Extend a minimum of 4 pipe diameters away from the sensor. For example, a 2 in. (5.08 cm) pipe should
have 8 in. (20.32 cm) of insulation on each side of the sensor.
To wire a ZS pipe temperature sensor
NOTES
• Do not drill into the sensor's watertight enclosure which will violate the NEMA and/or IP rating.
• Use caulk or Teflon tape for your conduit entries to maintain the appropriate NEMA or IP rating for your
application.
• For outdoor or wet applications, conduit entry should be from the bottom of the enclosure.
The Rnet cable is wired to the controller. The shield wire and the ground wire should be inserted
into the controller's GND terminal.
 Loading...