Do you have a question about the Carver Fanmaster and is the answer not in the manual?
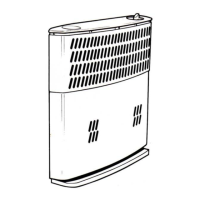
The Fanmaster is an automatically controlled fan designed to distribute warm air through ducts.
Air can be heated by the Carver heater or Fanmaster's integral elements, not simultaneously.
Integral elements use 230v AC, fan/control uses 12v DC. Remote control is standard.
230v AC, 8.1 amp, 1863 W, fused at 10-13 amp.
12v DC, 1.5 amp, 18 W, fused at 5 amp.
100m³/h maximum air delivery and 3.05Kg weight.
Thermistor for air temp sensing and manually resetable over-temperature trip.
Approved to BS/EN standards; suitable for caravans complying with BS 4626.
Recommended installation by competent electrician, certified by NICEIC.
Gas fitting work must be done by a competent gas fitter.
Uses 230V mains supply; exercise extreme caution during installation.
Disconnect caravan mains supply and isolate 12v battery before starting.
Lists all items included in the Fanmaster kit, e.g., Fanmaster unit, controller, looms, screws.
Lists necessary tools like Posidriv drivers, screwdrivers, spanners, drill, and pad saw.
Details required materials like 3-core wire and a double pole switched outlet.
Notes on fitting to new heaters, replacing older fan units, and SB/SD/SBT types.
Remove screws securing 'UR' ducting to the TBM fan's inlet and outlets.
Remove the old fan, wiring, and wall switch, leaving the main caravan wiring loom safe.
Remove the existing plastic 'Tee' piece and installation box plastic adaptor.
Fit straight adaptors ('UM') to extend ducts and secure with self-tapping screws.
Fanmaster requires both warm air outlets to be fully utilised; pay attention to Section 9.
Release warm air ducting from the fan unit by removing self-tapping screws.
Isolate and disconnect 12v fan wiring; identify usable 12v supply cables.
Unscrew the heater at its three location points and remove from the Installation Box.
All associated wiring must be disconnected and removed; new cable of superior specification is required.
Connect the existing ends of ducting to the appropriate Fanmaster outlet connections.
Fanmaster is designed for both warm air outlets to be fully utilised; refer to Section 9.
Remove the circular knock-out from the rear of the installation box.
Loosely fix the Fanmaster using screws through the terminal block bracket.
Ensure no part of the Fanmaster touches the heater flue.
Use specific M4 stud and screws (Part No. 101584) for SB type heaters.
Select an accessible position for the controller on the front wall or wardrobe side.
Use the template to make the cut-out and drill holes; reinforce thin panels if needed.
Connect the three-core loom from Fanmaster to controller and two-core loom to 12v DC supply.
Screw the controller in position using self-tapping or machine screws.
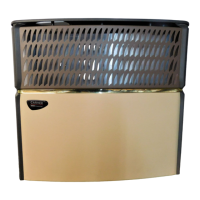
Fanmaster is a major component of the Carver Blown Air Central Heating System.
Layout and installation of ducts/outlets is identical to Carver TEB 12v Fan.
Twin outlets accept 'UR' flexible ducting; recommend at least one outlet is permanently open.
Shows three typical layouts for duct installation, detailing body length and outlet distribution.
Push duct ends firmly past retaining ridges into Fanmaster ports up to the stops.
Care must be taken in routing the duct into ports to avoid kinks; fit ducts before securing Fanmaster.
Wire 3-core cable (Brown, Blue, Green/Yellow, 1.5mm²) into Fanmaster terminal block.
Lead mains cable to accessible double pole switched outlet fused at 10A.
Alternatively, supply via a 13A plug from an existing 13A socket.
Check Earth Continuity, Insulation Resistance, and Earth Impedance before/after connection.
Clip cables to structure to prevent disturbance and fit the Fanmaster connection box lid.
Remove badge backing and stick firmly on the bottom right hand side of the heater.
Reconnect the caravan's battery, gas, and mains electrical supplies.
Test functions mode by mode, referring to Section 3 of the Fanmaster User's Instructions.
No regular servicing required, but annual checks on mains installation continuity are recommended.
| Heat Output | 1.8 kW |
|---|---|
| Power Supply | 12V DC |
| Voltage | 12V |
| Thermostat | Yes |
| Overheat Protection | Yes |
| Fuel | Propane/Butane |