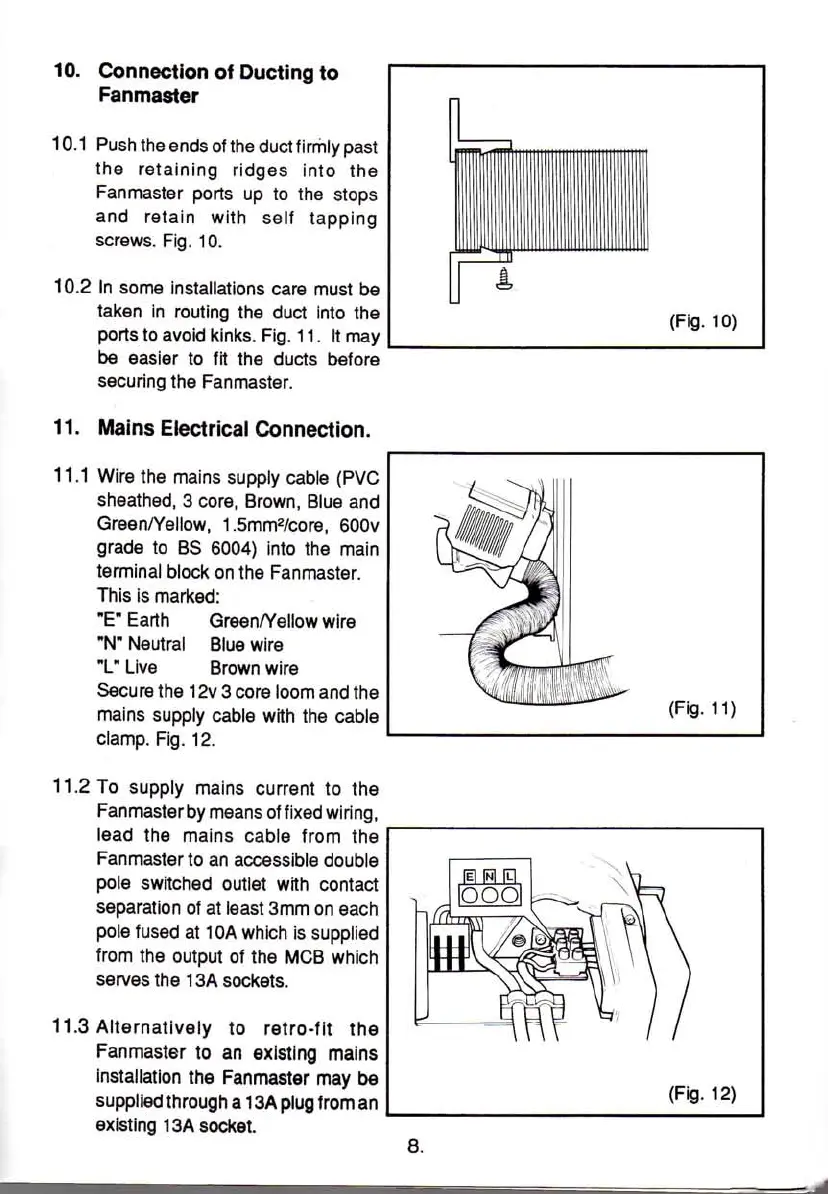
10.
Connection
of
Ducting
to
Fanmaster
10.1
Push
the ends of the duct
firmly
past
the retaining ridges
into
the
Fanmaster ports up to the stops
and retain
with
self tapping
screws.
Fig. 10.
10.2 In some installations care must be
taken in
routing
the duct
into
the
ports to avoid kinks. Fig. 11. It may
be easier to fit the ducts before
securing the Fanmaster.
11.
Mains
Electrical
Connection.
11.1 Wire the mains supply cable (PVC
sheathed,
3 core, Brown, Blue and
Green/Yellow,
1.5mm2/core, 600v
grade to BS 6004)
into
the main
terminal block on the Fanmaster.
This is marked:
"E"
Earth Green/Yellow wire
"N"
Neutral Blue wire
"L"
Live Brown wire
Secure
the 12v 3 core loom and the
mains supply cable
with
the cable
clamp. Fig. 12.
11.2 To supply mains current to the
Fanmasterby means of fixed wiring,
lead the mains cable
from
the
Fanmaster to an accessible double
pole switched
outlet
with
contact
separation of at least 3mm on each
pole fused at 10A which is supplied
from
the
output
of the MCB which
serves
the 13A sockets.
11.3 Alternatively to
retro-fit
the
Fanmaster to an existing mains
installation the Fanmaster may be
supplied through a 13A plug
from
an
existing 13A socket.
III
" (Pig. 11)
www.vwT4camper.info - a useful website for owners and enthusiasts of VW T4 Transporter Campervans
 Loading...