8
Fitting
the
Remote
Controller
8.1
Select
the position
forthe
controller.
This
will ideally be in an accessible
position on the
front
wall of an
overhead
locker or on the wardrobe
side.
Ensure
the three core loom will
reach
from the controller to the
Fanmaster
and allow for clipping to
the structure.
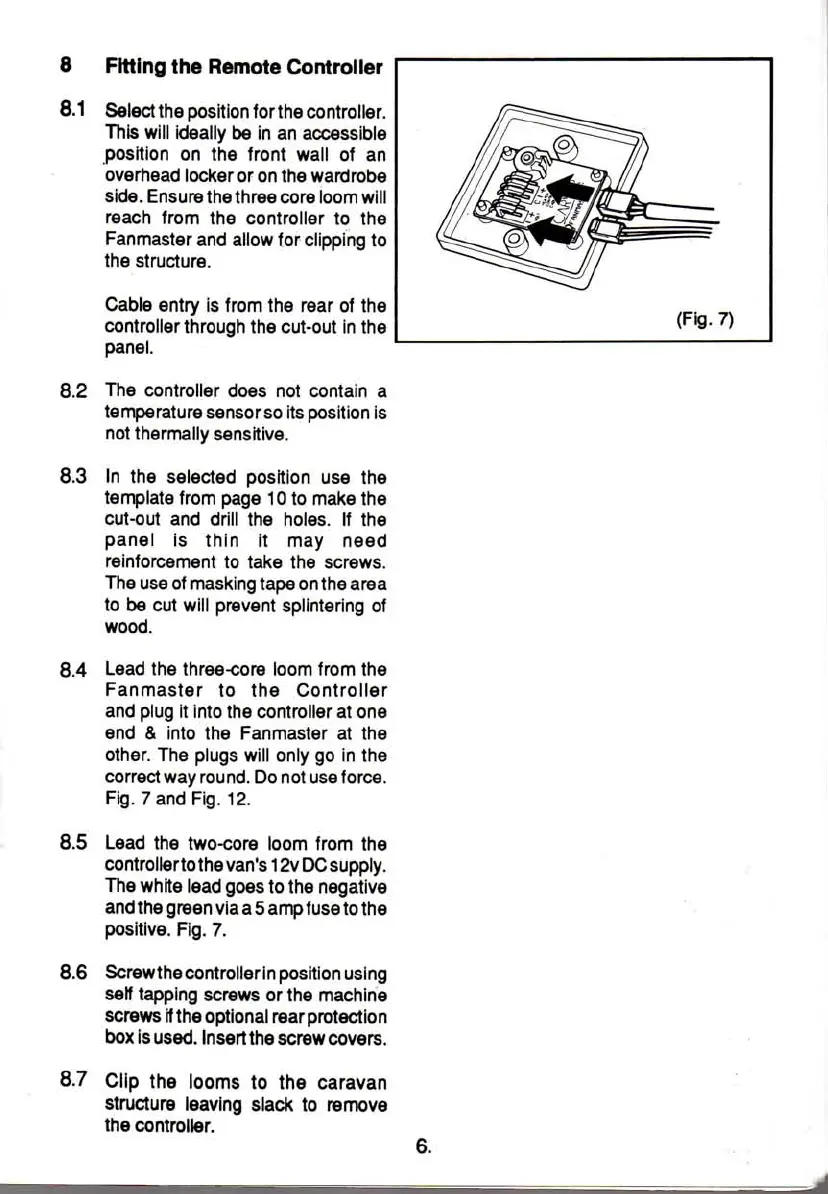
Cable
entry is from the rear of the
controller through the cut-out in the
panel.
8.2 The controller does not contain a
temperature
sensorso
its position is
not thermally sensitive.
8.3 In the selected position use the
template from page 10 to make the
cut-out and drill the holes. If the
panel
is
thin
it may need
reinforcement to take the screws.
The
use of
masking
tape
on
the area
to be cut will prevent splintering of
wood.
8.4 Lead the three-core loom from the
Fanmaster
to the Controller
and
plug it
into
the controller at one
end
&
into
the Fanmaster at the
other. The plugs will only go in the
correct way round. Do not
use
force.
Fig.
7 and
Fig.
12.
8.5 Lead the two-core loom from the
controller to the
van's
12v
DC
supply.
The
white lead goes to the negative
and
the green
via
a
5
amp
fuse
to the
positive.
Fig. 7.
8.6 Screwthecontrollerin position using
self
tapping screws or the machine
screws
if
the optional rear protection
box is
used.
Insert
the screw
covers.
8.7 Clip the looms to the caravan
structure leaving slack to remove
the controller.
www.vwT4camper.info - a useful website for owners and enthusiasts of VW T4 Transporter Campervans