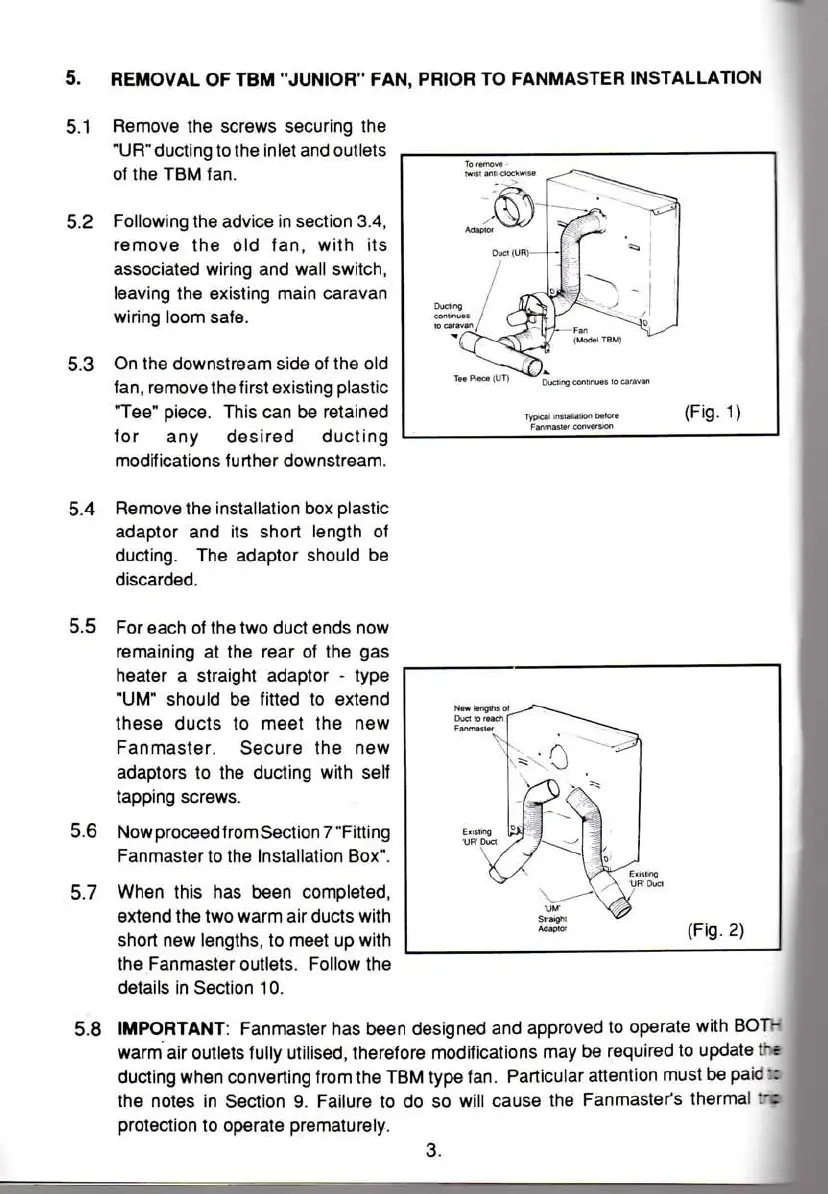
5.
REMOVAL OF TBM
"JUNIOR"
FAN,
PRIOR
TO FANMASTER
INSTALLATION
5.1 Remove the screws securing the
"UR"
ducting to the inlet and outlets
ot the TBM fan.
5.2 Following the advice in section 3.4,
remove the old fan,
with
its
associated
wiring and wall switch,
leaving the existing main caravan
wiring loom safe.
5.3 On the downstream side of the old
fan,
remove the
first
existing plastic
"Tee"
piece. This can be retained
for any desired ducting
modifications
further
downstream.
5.4 Remove the installation box plastic
adaptor and its short length of
ducting. The adaptor should be
discarded.
5.5 For each of the two duct ends now
remaining at the rear of the gas
heater a straight adaptor - type
"UM"
should be
fitted
to extend
these ducts to meet the new
Fanmaster.
Secure the new
adaptors to the ducting
with
self
tapping screws.
5.6 Now proceed from Section 7 "Fitting
Fanmaster
to the Installation Box".
5.7 When this has been completed,
extend the two warm air ducts
with
short new lengths, to meet up
with
the Fanmaster outlets. Follow the
details in Section 10.
5.8
IMPORTANT:
Fanmaster has been designed and approved to operate
with
BOT-
warm air outlets fully utilised, therefore modifications may be required to update ft
ducting when converting from the TBM type fan. Particular attention must be paic
T
the notes in Section 9. Failure to do so will cause the Fanmaster's thermal M
protection to operate prematurely.
3.
To
remove -
Fanmaster
conversion
Fanmaster
•2)
www.vwT4camper.info - a useful website for owners and enthusiasts of VW T4 Transporter Campervans