11
Step 6 continued
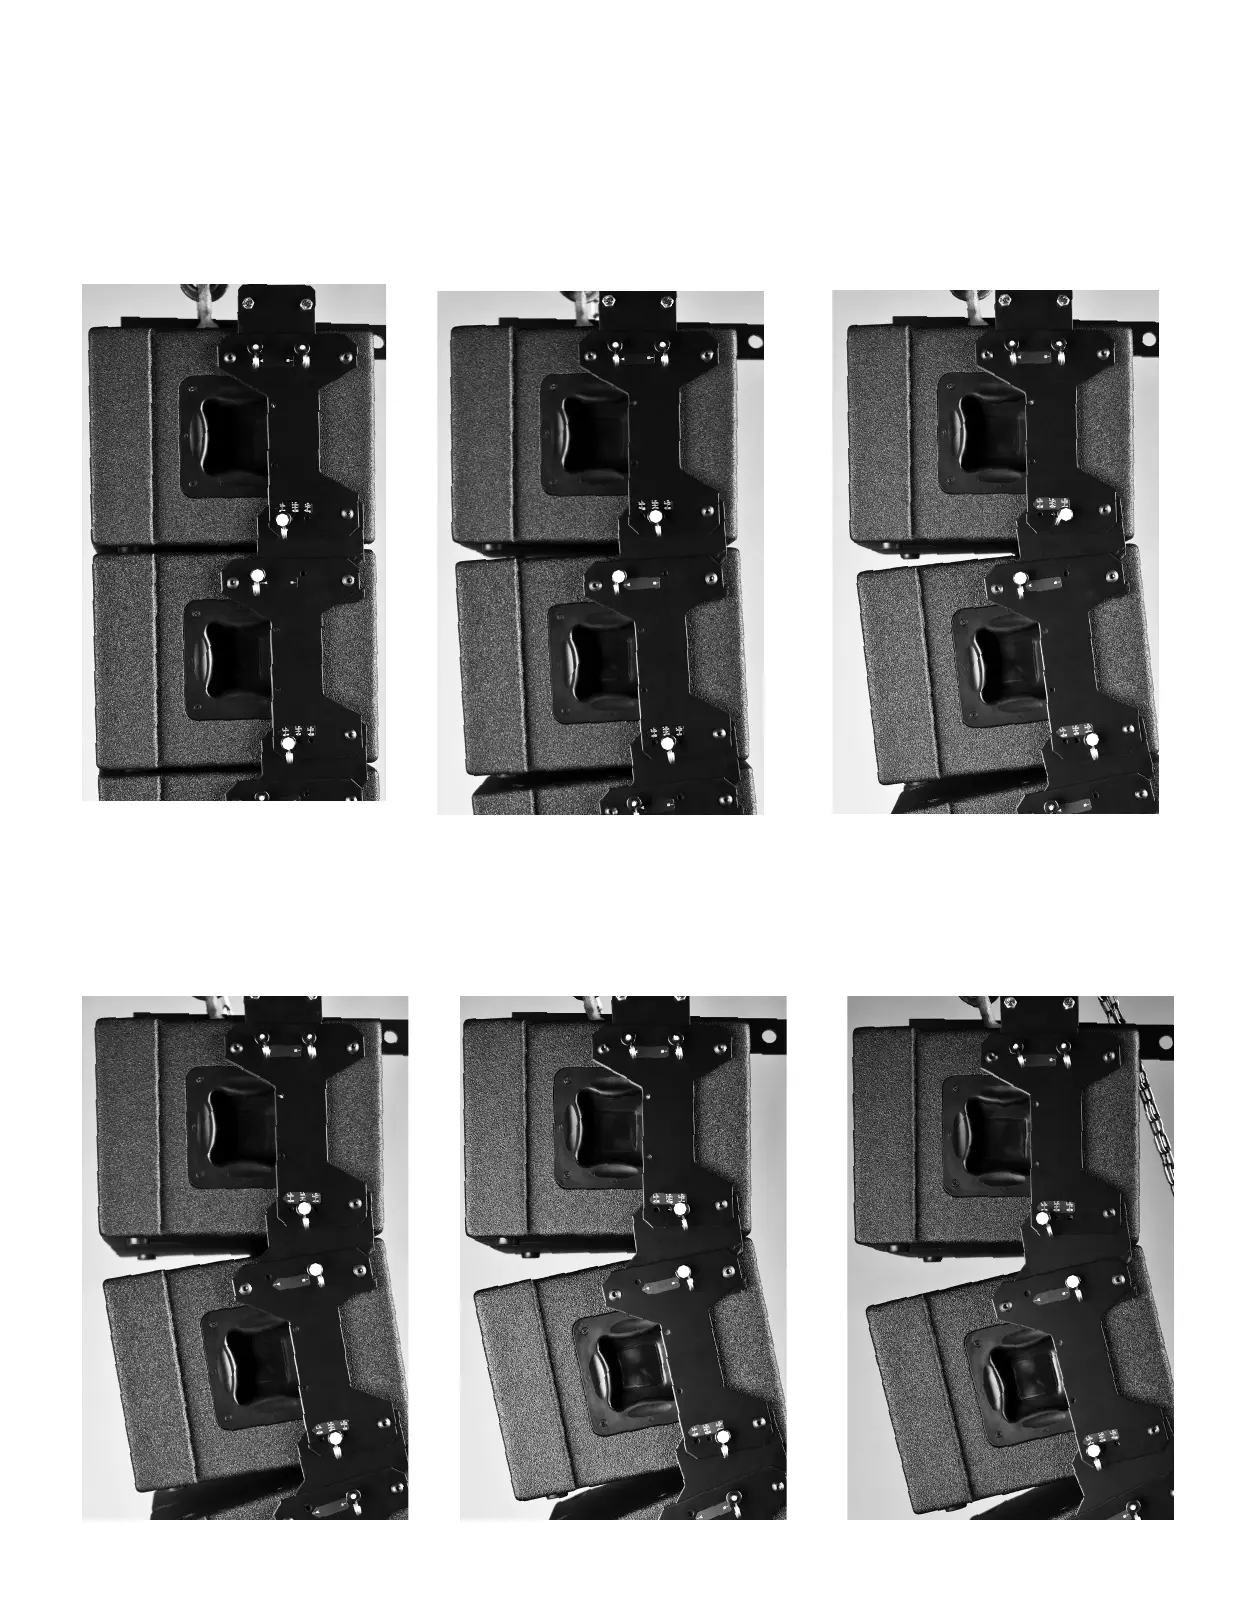
If you require a J curve at the bottom of a long array or a curve array, adjust the pins on the lower enclosures to
create the desired curve. There are 6 different angles that can be achieved between each enclosure by changing
both pin positions. With the lower enclosure in the “A” position, the upper enclosure’s pin positions/angles are:
0, 2.5, 5 degrees. When adjusting angle pin, lower the front of the bottom cabinet to the desired angle.
0 degree Pin position
2.5 degree Pin position
5 degree Pin position
7.5 degree Pin position 10 degree Pin position 12.5 degree Pin position
With the lower cabinet in the “B” position the upper enclosure’s angle pin positions/angles are: 7.5, 10, 12.5
degrees. Caution when adjusting pin “A” or “B”. Support the weight of the lower enclosure. Do not adjust pin
“A” or “B” with additional enclosures attached below. This pin locks the adjustment plate to the lower enclosure.
 Loading...