Applying Effects to a Sound
E-35
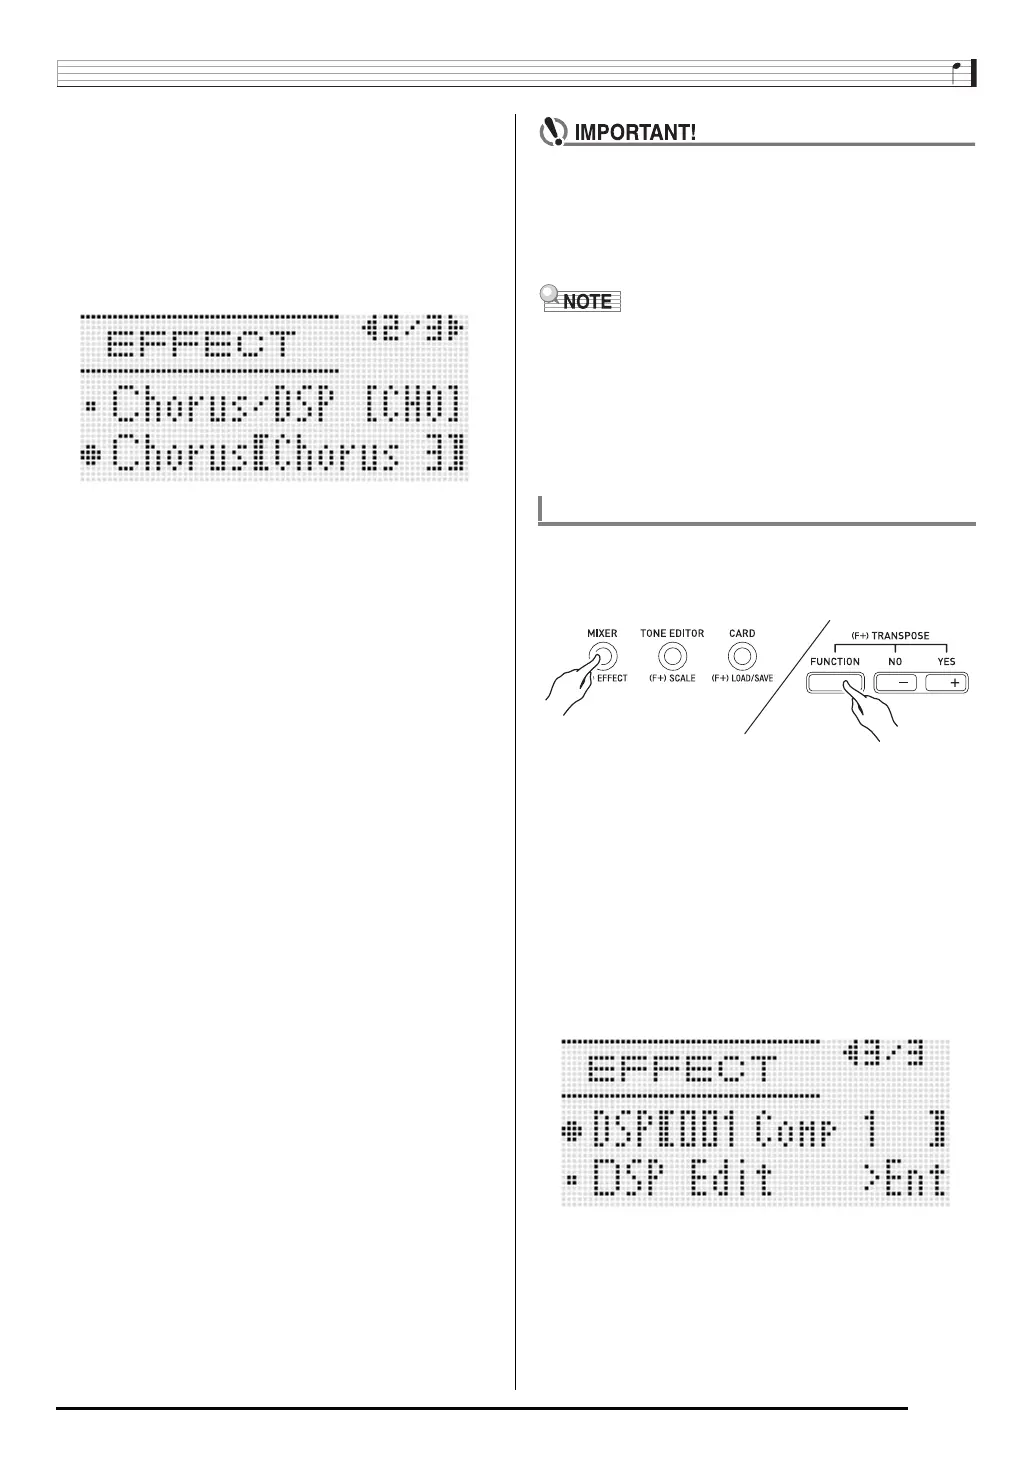
3.
Use the R-17 (t, y) buttons to move the thick
brackets (%) to the “Chorus/DSP” setting.
4.
Use the R-14 (–, +) buttons to select “Chorus”.
• This enters the chorus effect mode, which enables the
use of the chorus effect.
5.
Use the R-17 (t, y) buttons to move the thick
brackets (%) to the “Chorus” setting.
6.
Use the dial or R-14 (–, +) buttons to select the
chorus type you want to use.
• Refer to the separate “Appendix” for information about
supported chorus types.
7.
Press the C-5 (EFFECT) button or the R-15
(EXIT) button.
• This exits the effect setting screen.
8.
Use the mixer to adjust the chorus send of the
part to which you want to apply chorus.
• You can use “Cho.Send” (Part Chorus Send, page
E-43) to adjust how chorus is applied to the tone of
each keyboard or Auto Accompaniment part. The initial
default setting is 0 for the chorus send of all parts, so
change the settings to a chorus send value greater than
0 for all parts to which you want to apply the chorus
effect. For details, see “Using the Mixer” (page E-38).
• Selecting a tone with DSP causes the “Chorus/DSP”
setting to change automatically to the “DSP” (DSP
effect mode), so the chorus effect will not be available.
If you want the chorus effect always to be available,
change the “DSP Disable” setting to “on”. This will
keep the Digital Keyboard in the chorus effect mode.
• A pointer indicator is displayed next to CHORUS when
“Chorus” is selected for the “Chorus/DSP” setting. The
pointer indicator is not displayed next to CHORUS when
“oFF” is selected for the chorus type or when “DSP” is
selected for the “Chorus/DSP” setting.
• Selecting “Chorus” for the “Chorus/DSP” setting will cause
the “DSP Line” (Part DSP Line, page E-43) setting for all
parts to be changed to “oFF”.
1.
While holding down the R-13 (FUNCTION)
button, press the C-5 (EFFECT) button to
display the effect setting screen.
• Check to make sure that the “DSP Disable” setting is
“oFF”. If it is “on”, change it to “oFF”.
2.
Use the R-17 (t, y) buttons to move the thick
brackets (%) to “Chorus/DSP”.
3.
Use the R-14 (–, +) buttons to select “DSP”.
4.
Use the R-17 (t, y) buttons to move the thick
brackets (%) to the “DSP” setting.
• This causes the number and name of the currently
selected preset DSP to appear within the thick brackets
(%) on the display.
To use a DSP