Using the Song Sequencer
E-93
1.
Perform steps 1 and 2 under “To delete a beat
event” (page E-92).
2.
Move the cursor to the beat event that comes
immediately before the location where you want
to insert a new beat event.
3.
Press the C-9 (INSERT) button.
• This will insert a new beat event into the next measure
after the cursor position you selected in step 2, which
does not contain a beat event. If, for example, there are
beat events already in measures 16 and 17, selecting
the beat event in measure 16 with the cursor and
pressing the C-9 (INSERT) button will insert a new beat
event into measure 18.
4.
Change the beat event measure and beat as
required.
• Use the R-17 (u, i) button to move the cursor, and
then use the dial or R-14 (–, +) buttons to change the
value at the cursor position. The cursor flashes during a
value change operation. Pressing the R-16 (ENTER)
button applies the setting and causes the cursor to stop
flashing.
5.
To return to the event editor screen, press the
R-15 (EXIT) button.
Step input is an event editor function. You can use step input
to specify the length and pitch of each individual note (note
event). In the system track, you also can perform step input of
Auto Accompaniment chords (chord events) as well.
• Performing step input into a track that already contains
recorded data will not delete the existing data. This means
you can use step input to add to existing recorded data.
1.
Display the event editor screen of the track
where you want to perform step input.
• See “To select a track for editing” (page E-84).
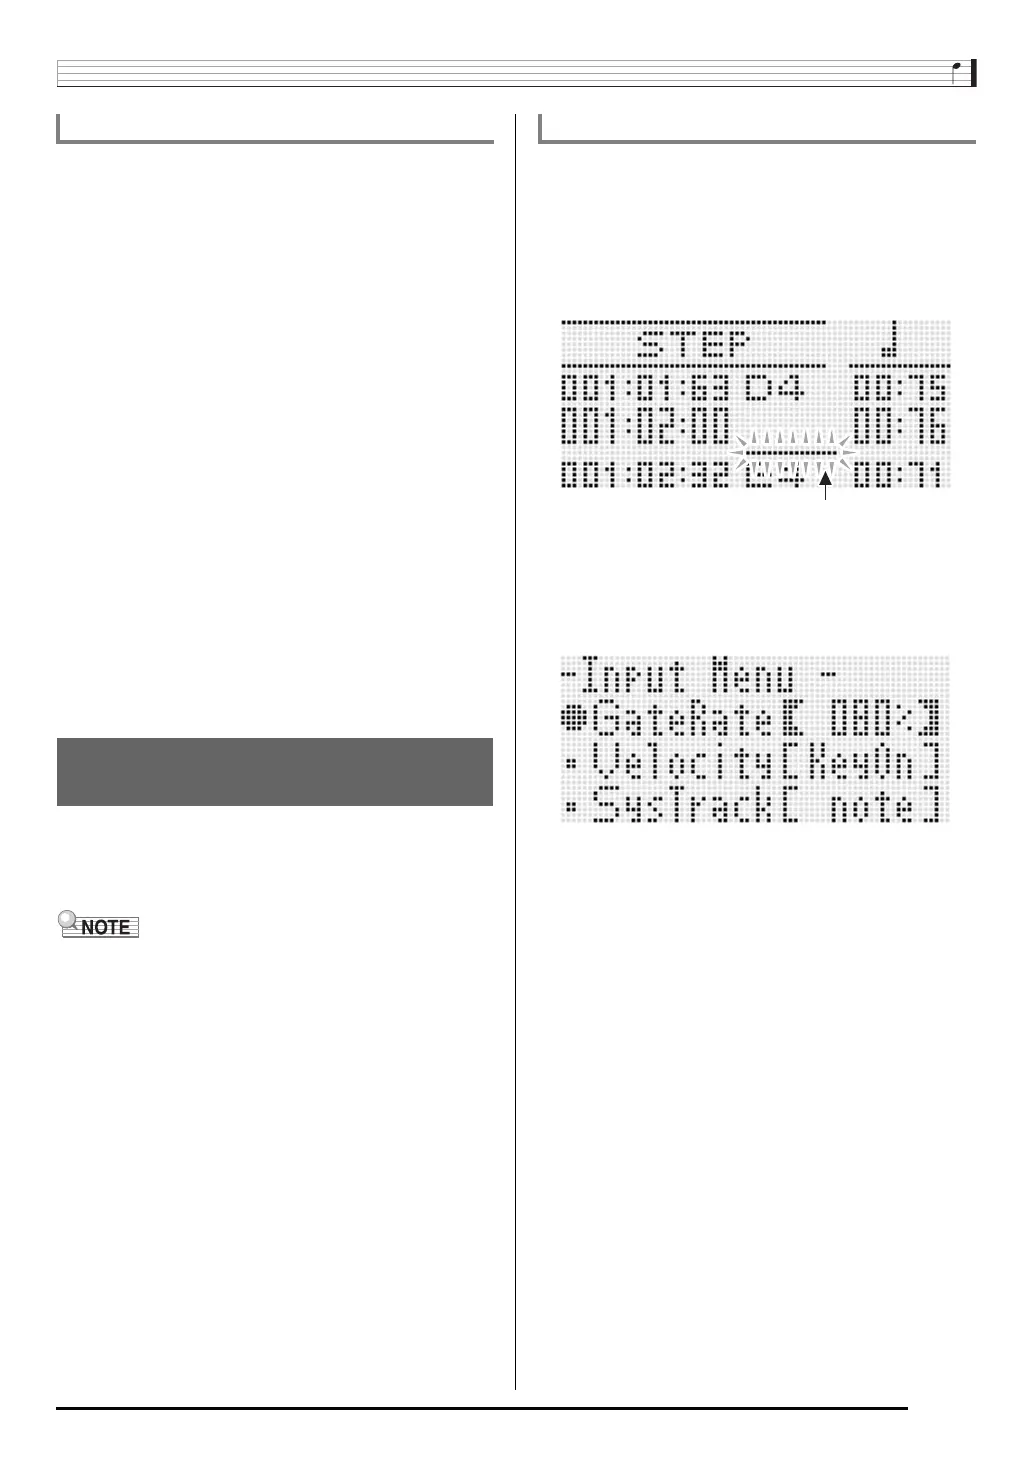
2.
Press the C-12 (STEP) button.
• This will display a step screen like the one shown
below. The cursor is always flashing during step input.
3.
Configure step input settings.
4.
Use the L-14 (dFF) and L-13 (sREW)
buttons to move the cursor to the location from
which you want to perform step input.
• The cursor will move in one-measure steps.
To insert a beat event
Directly Inputting Note Events
(Step Input)
To perform step input
(1) While holding down the R-13 (FUNCTION) button,
press the C-13 (MENU) button.
This displays the input menu shown below.
(2) Use the R-17 (t, y) buttons to move 0 to the setting
item you want to change.
(3) Use the dial or R-14 (–, +) buttons to change the
setting value.
For information about the meanings and setting ranges
of the on-screen items, see “Input Menu Setting Items”
(page E-94).
(4) Press the R-15 (EXIT) button to exit the menu.
Cursor (flashing)