㩷
5. In the event function for the button to click, add the following code.
Dim result As Int32
Dim msg As String
result = Calib.SystemLibNet.Api.SysSetLED( _
Calib.SystemLibNet.Def.LED_RED, 5, 8, 8)
'.NET vales of “true” and “false” are “-1” and “0” respectively.
If result = -1 Then
result = Calib.SystemLibNet.Api.SysGetLED()
Select Case (result And &HF)
Case Calib.SystemLibNet.Def.LED_OFF
msg = "LED_OFF"
Case Calib.SystemLibNet.Def.LED_RED
msg = "LED_RED"
Case Calib.SystemLibNet.Def.LED_GREEN
msg = "LED_GREEN"
Case Calib.SystemLibNet.Def.LED_ORANGE
msg = "LED_ORANGE"
Case Calib.SystemLibNet.Def.LED_BLUE
msg = "LED_BLUE"
Case Calib.SystemLibNet.Def.LED_CYAN
msg = "LED_CYAN"
Case Calib.SystemLibNet.Def.LED_MAGENTA
msg = "LED_MAGENTA"
Case Else
msg = "LED_UNKNOWN"
End Select
MessageBox.Show(msg, "LED")
End If
Note:
If you type this code manually you should see the IntelliSense offer you suitable options as
appropriate. If you do not, make sure you review steps 1 to 5 to make sure you have added the
reference correctly.
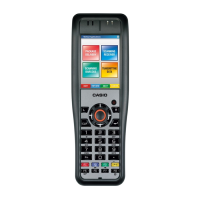
6. Initiate ActiveSync to establish connection between the DT-X8 and PC.
7. Choose Deploy <name of project> on Build menu.
8. The project will be built and copied to the DT-X8. By default, it will be copied to \Program
Files\<name of project> folder. SystemLibNet.dll will be deployed to the same folder.
9. Check that the program works correctly on the DT-X8.
65
㩷

 Loading...