11
EN
Part 3 Deleting and Inserting Characters
Moving the Cursor
To make the cursor do this: Do this:
Move left Press
.
Move right Press
.
Jump to the fi rst text character Press
FUNC
then
.
Jump to the last text character Press
FUNC
then
.
To delete the character to the left of the current cursor
position
1. Move the cursor to the character to the right of the character you want to
delete and then press
.
To delete the character at the current cursor position
1. Move the cursor to the character you want to delete and then press .
To clear the display
Press
FUNC
and then .
At this time the message “
CLEAR? OK/CANCEL
” appears on the display to
confi rm that you want to clear the display. Press
OK
to clear or
to abort
the operation without clearing anything.
To insert characters
1. Use and to move the cursor to the location where you want to insert
the characters.
2. Input the new characters.
x
This inserts the characters at the current cursor position.
Part 4
Fonts, Character Sizes and Character Styles
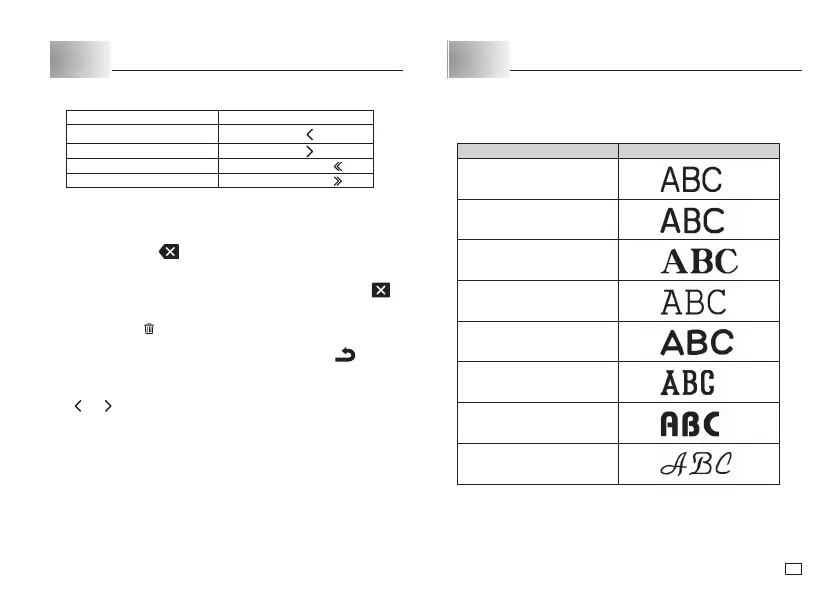
Selecting a Font
Your printer gives you a choice of eight fonts (examples shown below).
Font Sample
SANS-SERIF
SANS-SERIF RND
(Sans-serif Rounded)
ROMAN
COURIER
POP
SLAB SERIF
BORDEAUX HEAVY
CURSIVE