7
EN
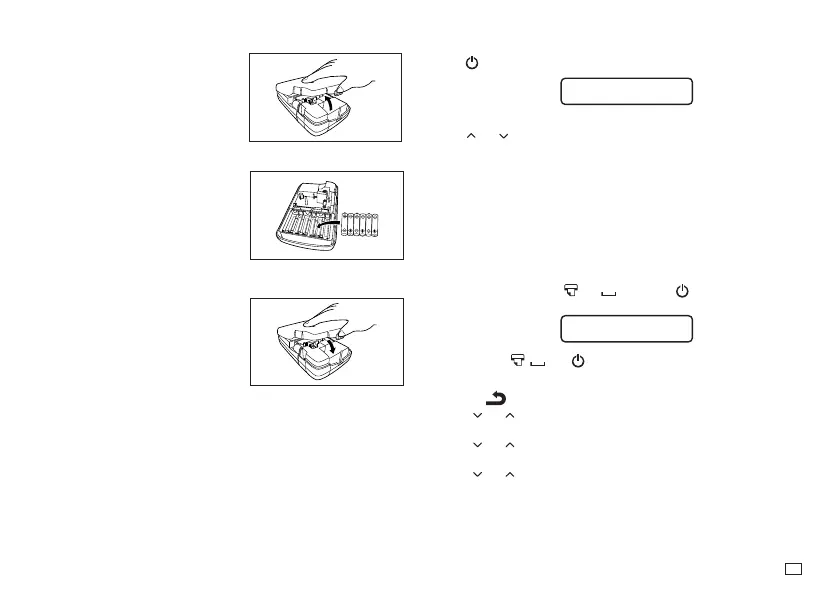
1. Turn off the printer.
2. Turn over the Label Printer and
remove the back cover while pressing
down on its lock as shown in the
illustration.
3. Load batteries into the battery
compartment.
x
Be sure to use alkaline batteries.
x
Make sure the plus (+) and minus
(–) ends of the batteries are facing
correctly when you load them.
4. Replace the printer cover.
Turning the Printer On and Off
Press to turn the printer on and off.
SE L ECT
TAPE I
DTH
W
x
When you turn on the printer, the tape width selection screen will appear.
Use
and
to select the tape width you will use, and then press
OK
.
Initializing Memory
Important!
x
If you are using the Label Printer for the fi rst time, you should Initialize it
fi rst.
x
Note that initializing memory will delete all currently stored data. You
should only initialize memory before using the printer for the fi rst time.
To initialize memory
1. Make sure that printer power is off.
2. While holding down the
and keys, press to turn power on.
x
A message appears to confi rm whether you want to initialize memory.
I N I T I AL I ZE?
OK / CANCEL
3. Release the , , and keys.
4. Press
OK
to initialize the Label Printer.
• This displays the language setting screen.
• Press
to abort the reset operation
5. Use and to select the display language you want and then press
OK
.
• This displays the length unit setting screen.
6. Use and to select the length unit you want and then press
OK
.
• This displays the tape width selection screen.
7. Use and to select the width of the tape you will use and then press
OK
.