– 8 –
4. MAINTERNANCE & TROUBLESHOOTING
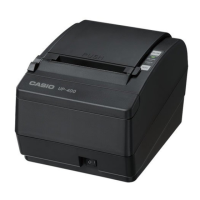
4-1. INSTALLING OR REPLACING PAPER ROLL
CAUTION: Make sure that paper rolls meets printer’s specifi cation. Do not use paper rolls that have one
end glued to the core. This causes excessive load on the paper feed.
1: Make sure that the printer is not printing or receiving data, and open the
printer cover by sliding the cover open knob. Unroll 10 to 15 cm of the
paper as shown.
2: Insert the paper roll as shown.
3: Pull out 10 to 15 cm of paper and close the printer cover as shown.
Tear off the excess paper on the cutter edge.
4-2. ADJUSTING THE PAPER NEAR END SENSOR
A sensor detects when the paper roll is running out. Due to variation in the width of paper roll cores, it is
diffi cult to measure the exact length of the paper left on the roll when the detector is triggered. The factory
setting is based on a paper roll core with an outside diameter of 18 mm and an inside diameter of 12 mm. If
you use a paper roll with different widths, adjust the setting as described below.
1: Open the printer cover and remove the paper roll.
2: Loosen the adjusting screw and move the tab to fit the core of the paper roll.
3: Tighten the adjusting screw.
4: Replace the paper roll and close the printer cover.