EasyManua.ls Logo

Cedes APS - Installation Overview

Cedes APS
28 pages
Print Icon
To Next Page IconTo Next Page
To Previous Page IconTo Previous Page
Loading...
APS English
© CEDES | V 2.2 11
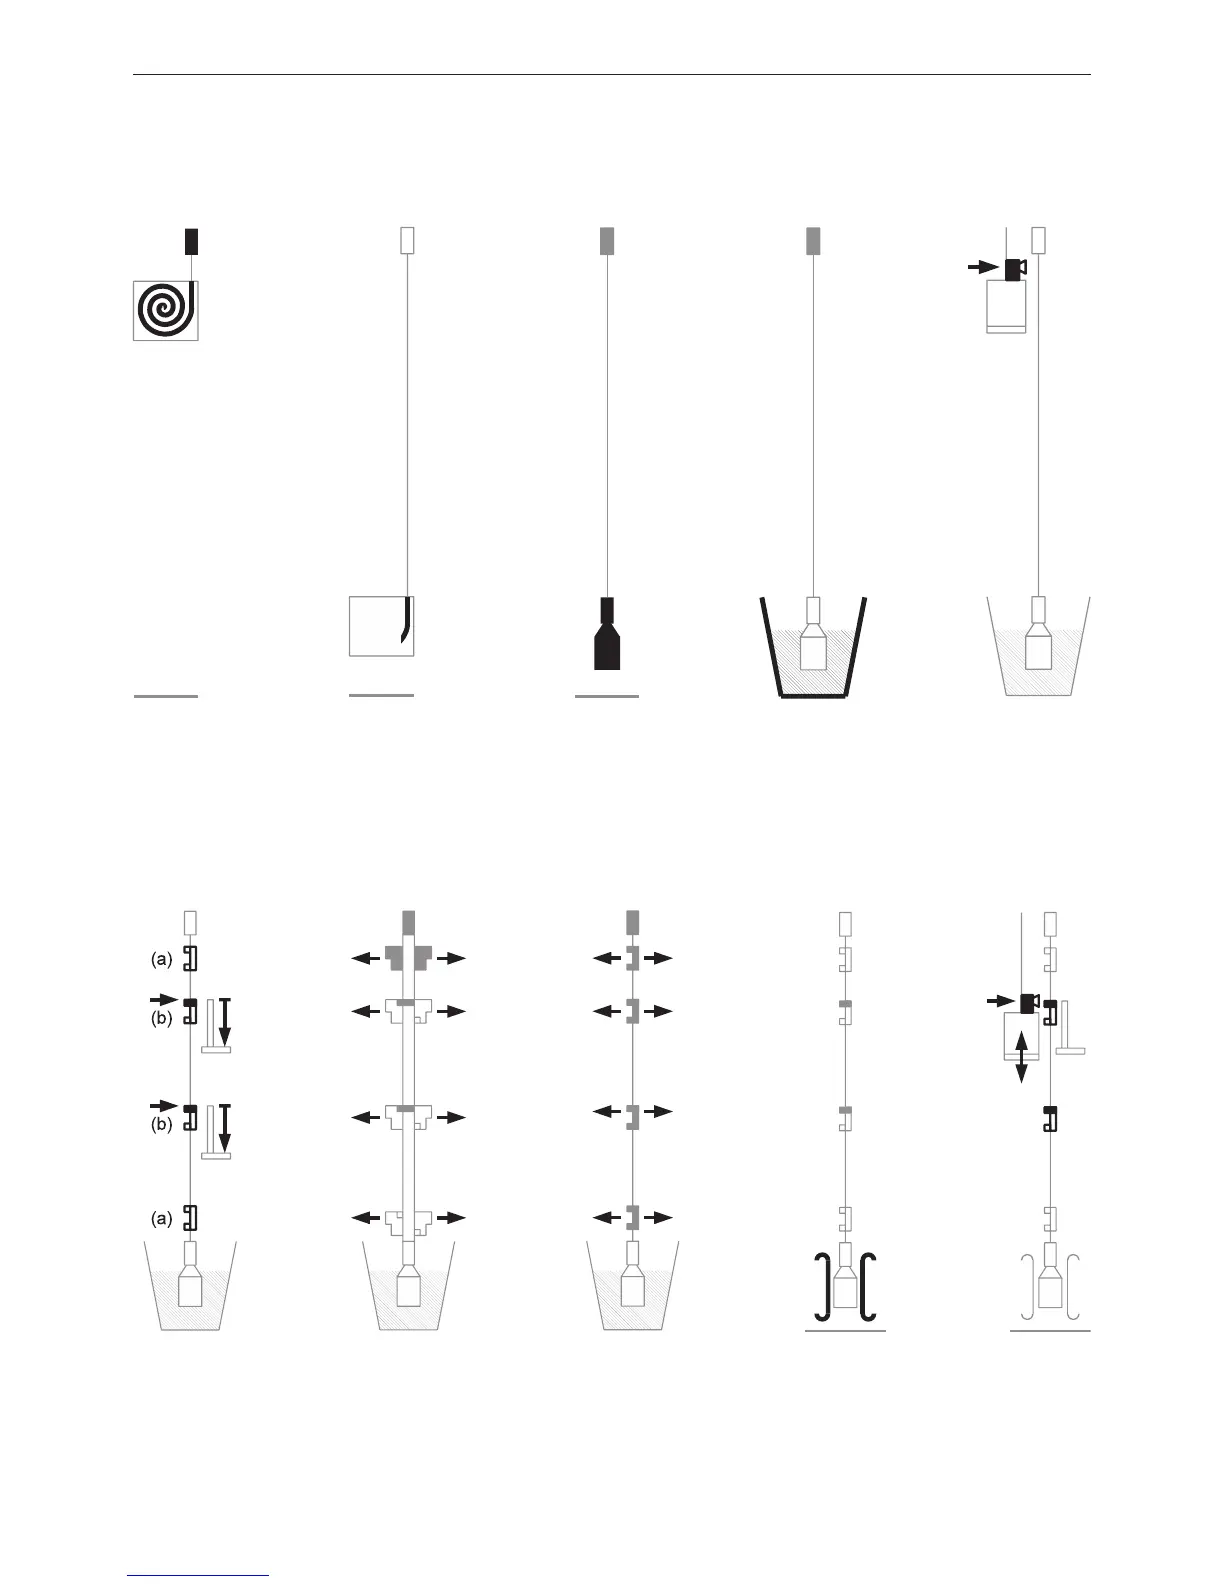
6.1 Installation overview
• Step 1-1 … Step 1-4: Unpack and prepare the code tape for final installation, see Chapter 6.2.
• Step 2: Installation of the APS sensor, see Chapter 6.3.
• Step 3-1 … Step 3-5: Clip installation and adjustment of the APS system, see Chapter 6.4.
* Installation tip: Use adjustment aid for code tape
Figure 17: Step 3-1
Figure 12: Step 1-1 Figure 13: Step 1-2 Figure 14: Step 1-3 Figure 15: Step 1-4 Figure 16: Step 2
Figure 18: Step 3-2
Figure 19: Step 3-3
Figure 20: Step 3-4 Figure 21: Step 3-5
* *
*
*
*
Install top tension
lock. Begin to unroll
code tape from box.
Install guide clips (a)
to fix code tape; align
position indicator clips
(b) to door sills (side
view).
Read position
indicator clips via
teaching ride (side
view).
Align clips left / right
(front view).
Align clips far / near
(side view).
Install anti-swing,
recommended.
Continue to unroll
code tape until it
reaches required
length.
Cut code tape to
length, mount bottom
tension lock and
tension weight.
Install APS sensor
on cabin (side
view).
Use an adjustment aid
for code tape.