www.cellarcool.com | Page 33
Magnum Series
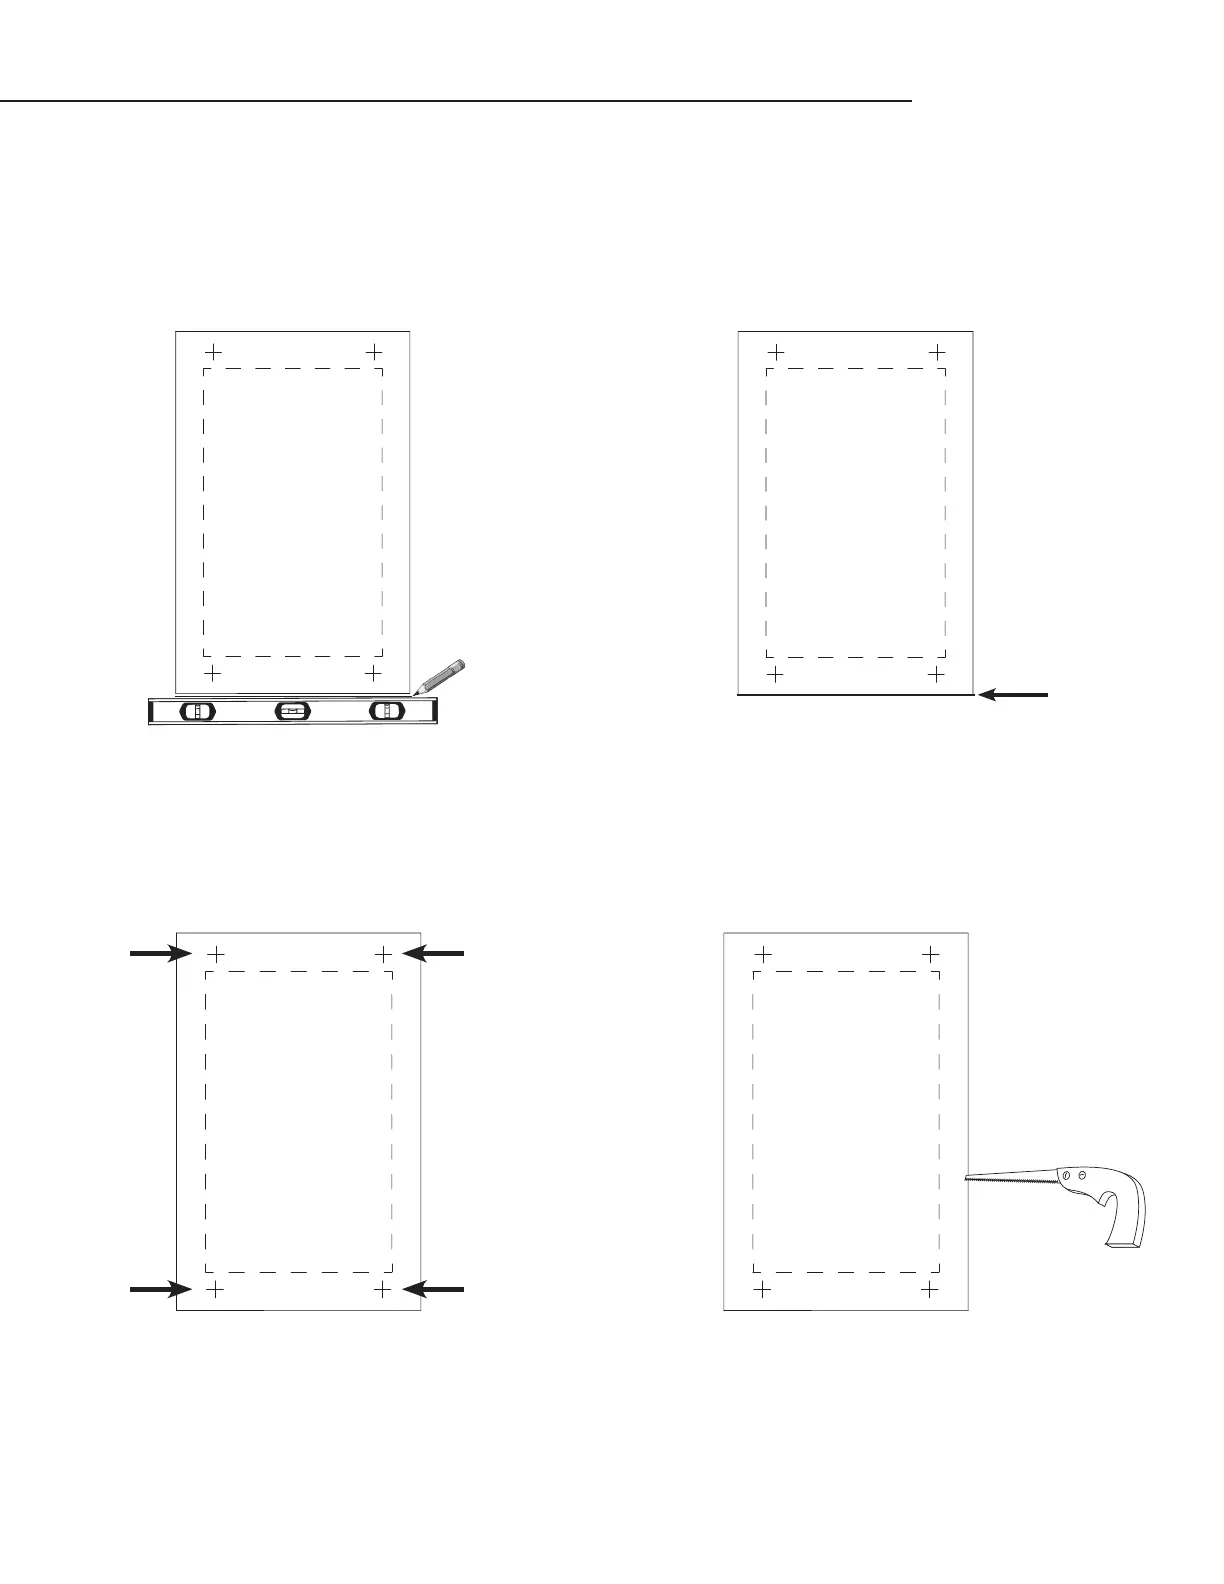
1. Square the ush mount template on the wall
using a level. Then draw a 3” line along the
bottom edge of the template.
FLUSH MOUNT BRACKET INSTALLATION
TOP
TOP
2. Peel the backing o the template and stick it to the wall,
aligning the bottom edge with the line drawn in Step 1.
Pencil line
TOPTOP
3. Use a ⁄” drill bit to drill a hole in the center of
each cross (+).
4. Cut along the perforated lines. When nished, remove
template from wall.
INSTALLING THE EVAPORATOR
1. Locate the desired installation location.
2. If utilizing an external or secondary drip tray, ensure the drip tray is installed on a level surface.
Minimum Tools Needed:
Saw
T-square
Drill
¼” nut driver bit
Level
CPVC tube cutter
3.
galvanized hanging straps. (NOTE: Plumber’s tape/hanger strap not provided.) Cut four pieces of galvanized
hanging straps long enough to extend from the ceiling joists to the screws located at the top corners of the
evaporator unit.
.seloh wercs eht tuo gnippirts tneverp ot euqrot fo .sbl 8 ot llird tes ,llird a gnisu fI .4
screw through the appropriate hole on the hanger strap. Re-install the removed screw. Secure the free end of the
hanger strap to the ceiling joist to prevent the evaporator unit from moving out of place. Repeat this step for the
remaining three corners.
Hanger strap
Ceiling joist
Plywood