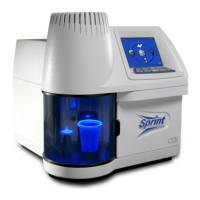
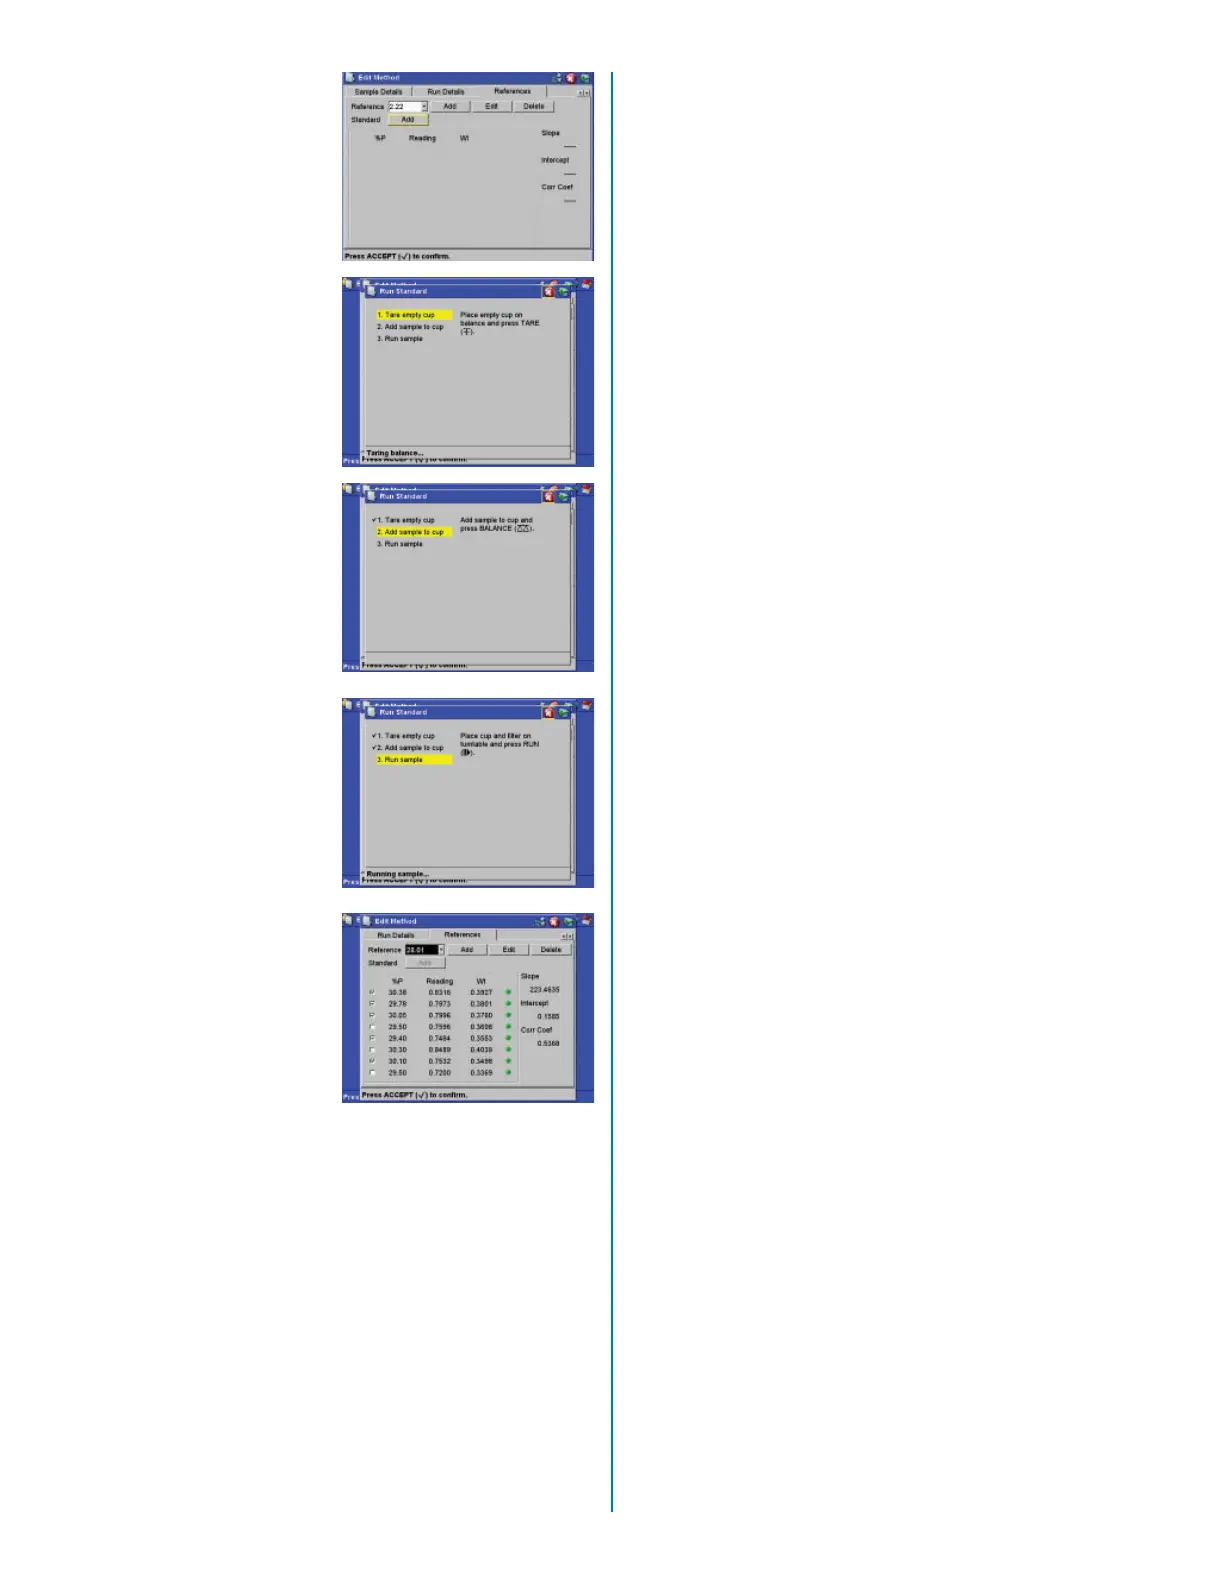
29. Using the arrow
keys, select the
Standard “Add” but-
ton to add calibration
points to each refer-
ence value.
30. Pass the open end
of an empty sample
cup once or twice in
front of the anti-static
ionizer. Place the
empty cup on the
external balance and
close the balance
doors.
31. Press “Tare” on the
instrument keypad.
32. Add a reference
sample to the cup on
the external balance
and close the bal-
ance doors.
33. Press the “Balance”
key.
34. Place the cup con-
taining the sample
on the instrument
turntable.
35. Place a fi lter in the
fi lter holder.
36. Press the “Run” key.
37. Once the sample
test is complete, the
standard will appear
in the list on the
screen.
38. Continue to add,
edit, and/or delete
references until at
least 2 – 3 standards
per protein value are
entered.
The reading should be between 0.5 and 0.8. The sam-
ple size can be adjusted to obtain an accurate reading.
There are some exceptions. If the reading is >1.0000,
the sample size will be using most of the tagging abil-
ity of the iTAG® Solution 1. For accurate results, an
excess of iTAG® should remain after reacting with the
sample. Having an upper reading of 0.8 permits extra
iTAG® binding for higher protein samples to use with
this method or add to the calibration curve. If the read-
ing is <0.4, the reading may be approaching the lower
limit of detection.
The correlation coeffi cient of the calibration line does
not have to be 1.0000 in order to be considered a
good calibration. TheSPRINT® measures true protein.
(It does not bind to non-protein nitrogen.) Most calibra-
tion lines are based on Kjeldahl and Leco Valves which
measure total nitrogen; therefore, there is a bias in the
calibration values.
Eight (8) points can be added under each reference
value. To delete a value under a reference standard,
use the arrow keys to change the green dot beside the
reference standard to a red dot and press the “Enter”
key.
Note: The standards can be checked or unchecked to
determine the effect on the slope, intercept and/or cor-
relation. If the correlation and intercept both improve,
leave the standard unchecked.
Once the standards are satisfactory, press the “Ac-
cept” key to add the new method into the instrument
memory.
To verify the method, test samples with a known pro-
tein content and compare the SPRINT® results with
the known value. Perform the test at least seven (7)
times, calculate the standard deviation, and determine
the precision the method will provide.
Notes:
If the “No Flow Detected” error message appears on
the instrument screen, either the fi lter was not lifted
from the fi lter holder or the fi lter is clogged. To over-
come this error, increase the sample settling time, ad-
just the fi lter height, and/or decrease the sample size.
Some samples require a small sample weight range.
27