page 15 www.centsys.com
6.1.2. General assembly
Open the packing carton and expose
the SDO4 SMART components.
Orientate the drive rail so that the
terminal bracket faces towards the
garage door
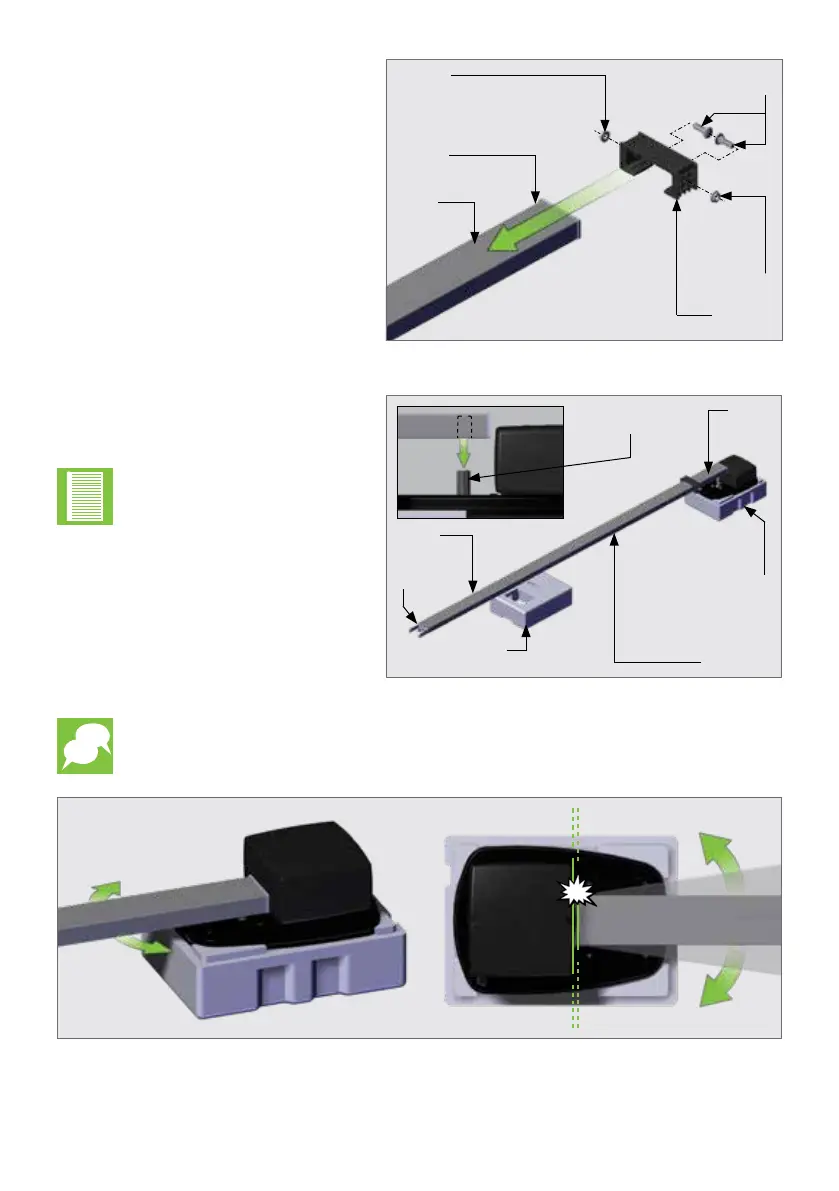
1. Fit the M8 black gutter bolts onto
the drive rail hanger. Secure
them using the supplied M8 nuts.
This must be done before tting
the drive rail hanger onto the
Drive Rail.
Fit the Drive Rail hanger and
slide it down the Drive Rail
starting from ‘End A’ (Figure 6).
FIGURE 8
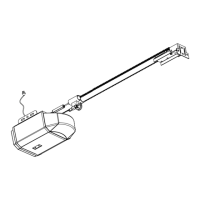
FIGURE 7
FIGURE 6
End A
Operator
still in packaging
for support
Motor
Coupling
Drive Rail
Packaging used
for support
End B
Terminal
Bracket
3. Swing the track from side to side should the motor coupling struggle to engage with
the shaft. DO NOT exceed 25° in either direction.
2. Orientate the Drive Rail as shown
in Figure 7, and t ‘End A’ over
the motor coupling found on the
motor.
Keep the operator in its packaging for support, and use the other half of the
packaging to support the other end of the Drive Rail.
MAX 25°
MAX 25°
It is important at this
point of the installation to
open the battery housing
(Refer back to Figure 2),
and connect the batteries
before continuing with the
installation.
OPERATOR INSTALLATIONSECTION 6
M8 Gutter
bolts
End ‘A’
M8 Nut
M8 Nut
Hanging
Bracket
Drive
Rail


 To Next Page