FY –33VC Operation manual
- 9 -
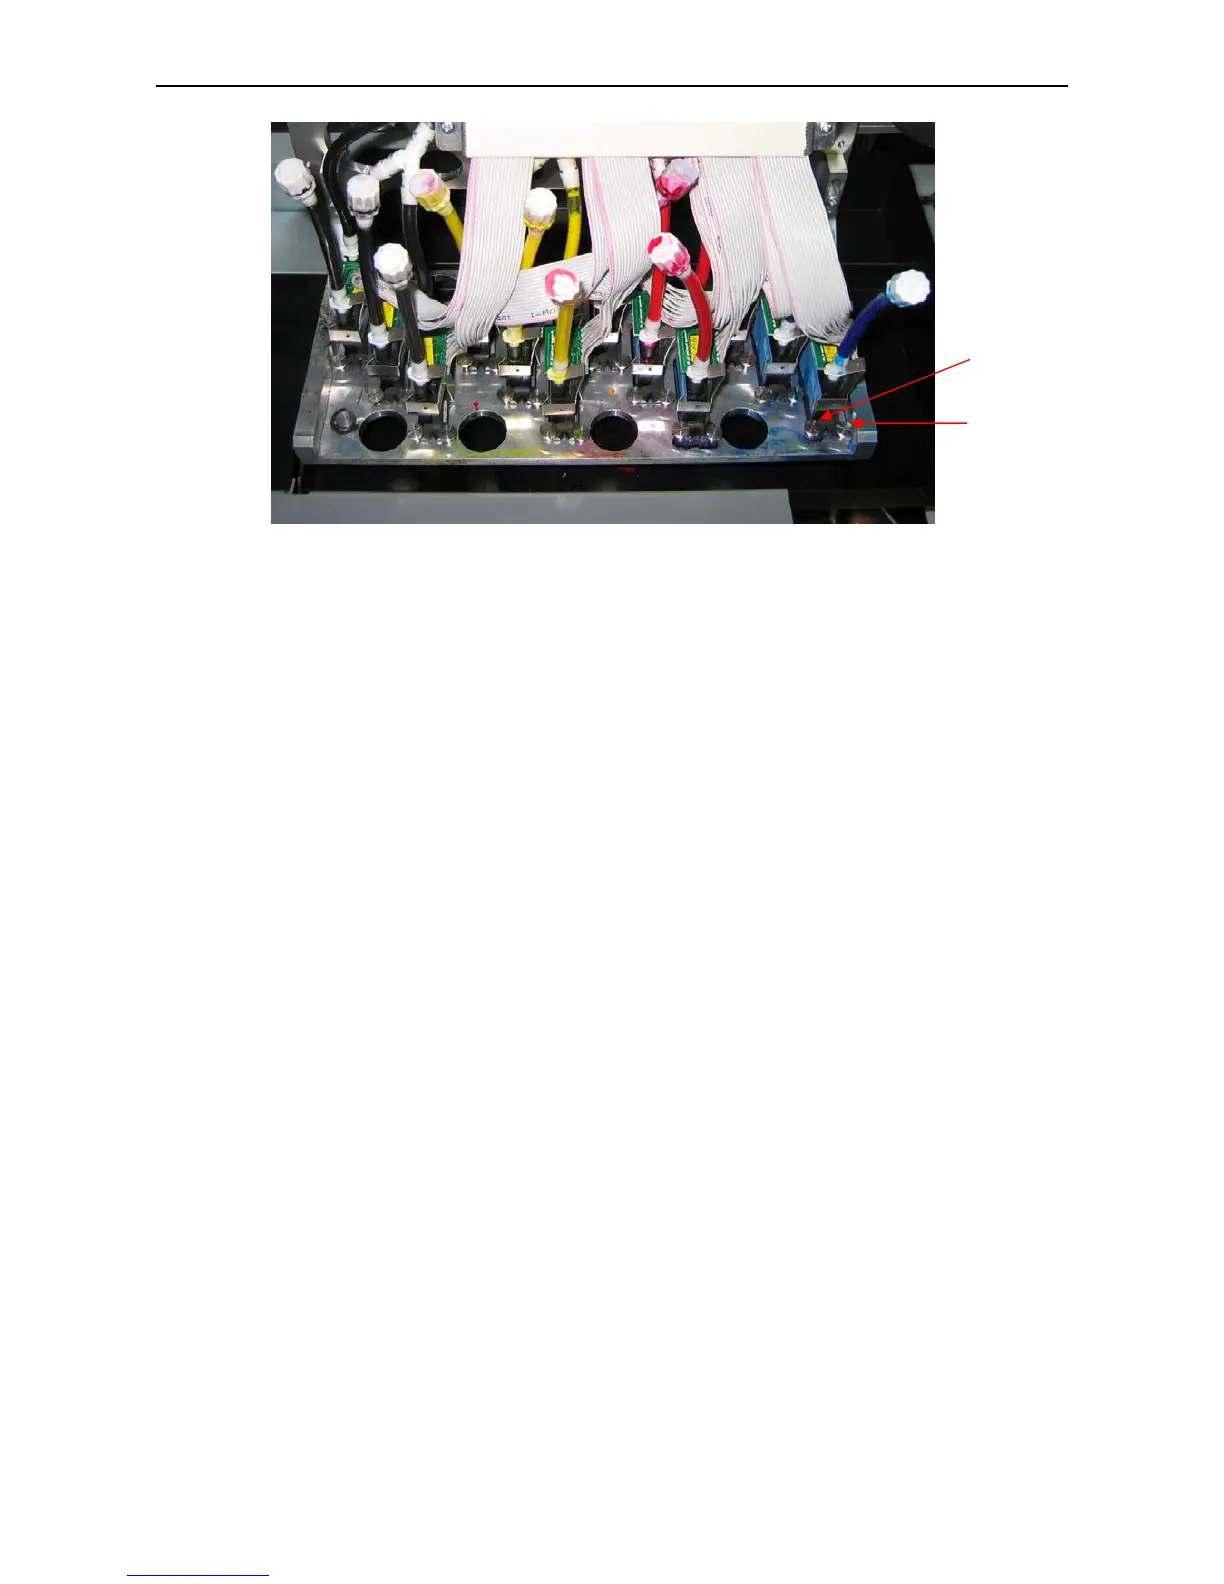
Figure 3-3 Print head frame
1—Up screw 2—Left screw 3—Right screw
Method: Loosen Up and Left Screw, then remove Right Screw
Insert Xaar print head 126 downwards
Put on Right Screw and tighten all three screws
★
After assembling the print head, clip cirques, which is prepared in spare parts tank, on the
plugs of In and Out tube to prevent the plugs jumped out.
4. Please connect all power cables correctly;
5. Install Rip software on the computer.
3.2 Attention before Turning on FY-33VC
1. In order to clean print head easily, please prepare following items:
• Flush solution
• Non-woven fabric.
2. In order to inspect temperature and humidity of printing environment, please prepare relative
measurers. Requirement for environment:
• Temperature: 20°C - 28°C
• Humidity: 40% - 70%
3. Power supply
• You may select AC 110V or 220V for different countries or regions.
• Control power supply: AC 100 - 240V 50/60HZ
• Heating power supply: AC 100 / 240V 50/60HZ (AC 100 V optional)
• Feeding power supply: AC 100 / 240V 50/60HZ (AC 100 V optional)
• Cleaning power supply: AC 100 / 240V 50/60HZ (AC 100 V optional)
• Please choose the type of power shown on the printer in case of damage to the printer.
• Make sure the printer is well grounded.
• It is better to use UPS stable-voltage power.
2
3
 Loading...