11
Trolley
Threaded
Shaft
Lock Washer
5/16"
Outer Nut
5/16"-18
Inner Nut
5/16"-18
Trolley
Trolley
Temporary Stop
Screwdriver
Trolley
Threaded
Shaft
Lock Washer
5/16"
Outer Nut
5/16"-18
Inner Nut
5/16"-18
Trolley
Hex Bolt
Trolley Stop
Hex Bolt
5/16"-18x7/8"
Nut
5/16"-18
Lock Washer
5/16"
Cable Pulley
Bracket
Nut
5/16"-18
Lockwasher
5/16"
Hex Bolt
5/16"-18x7/8"
HARDWARE SHOWN ACTUAL SIZE
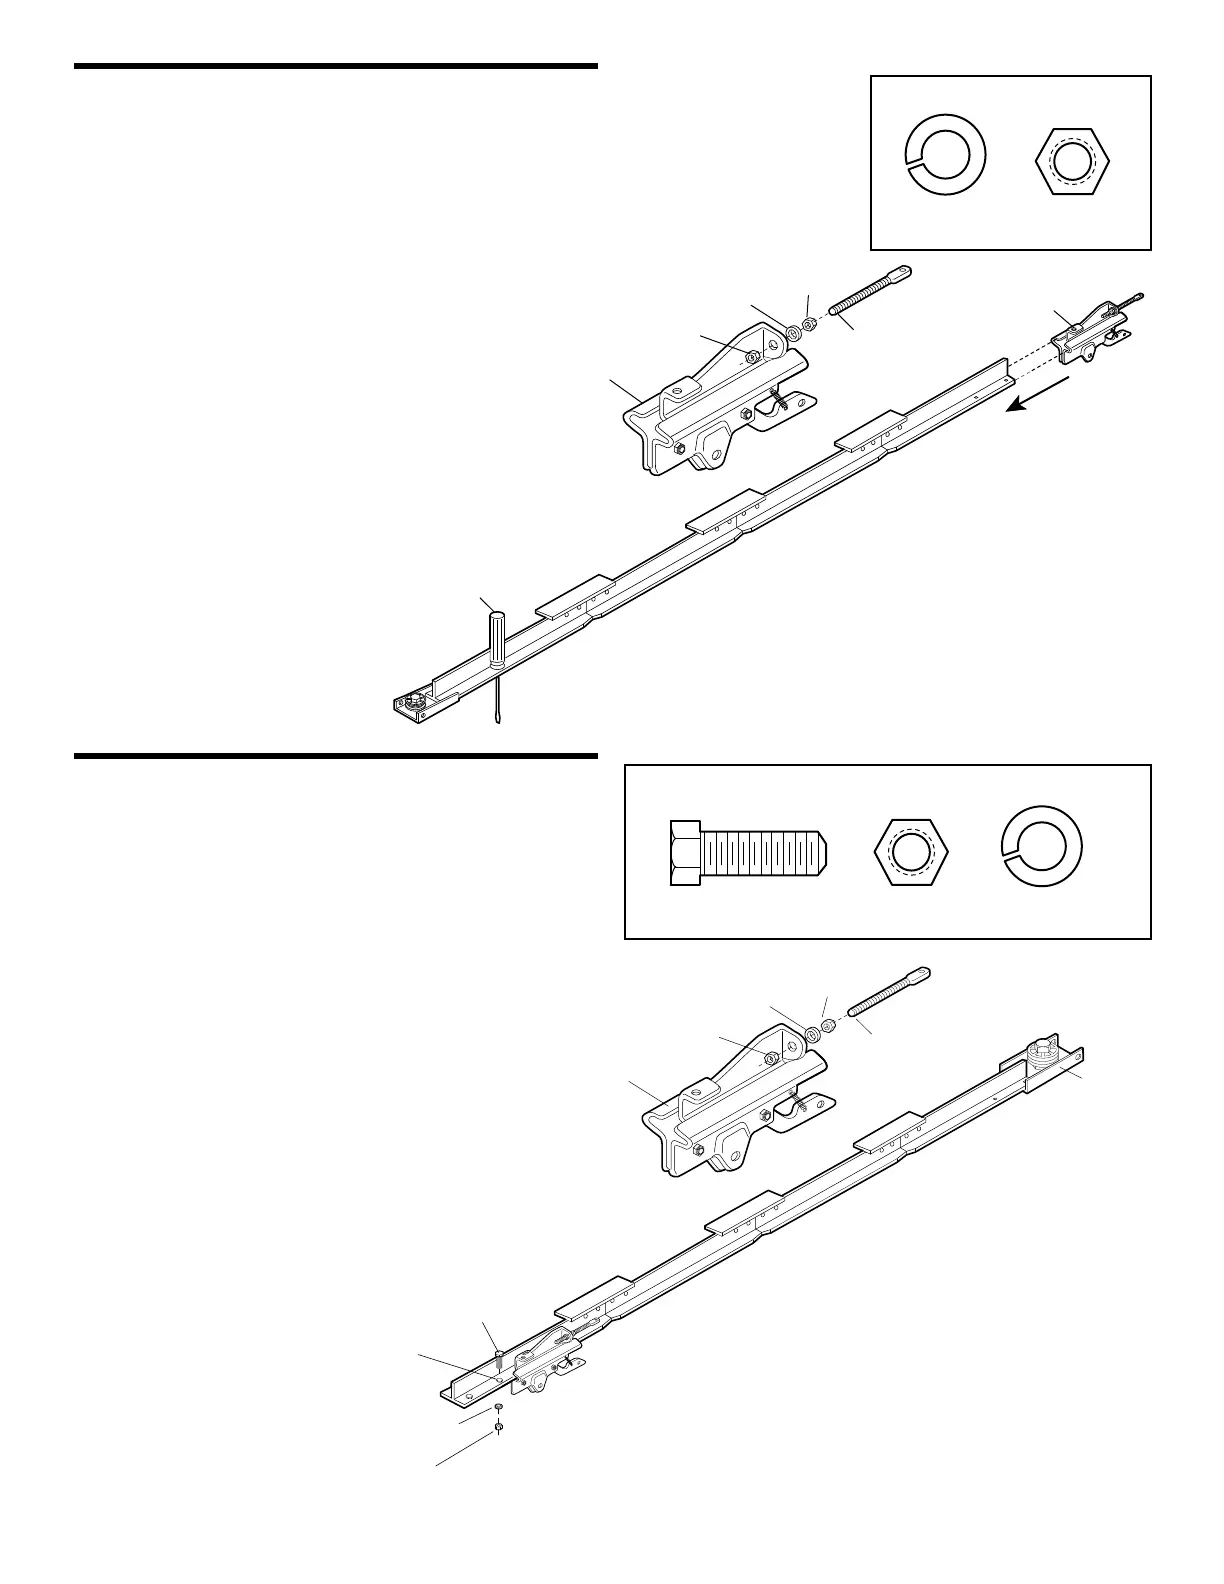
ASSEMBLY STEP 2
For Sectional and One-Piece Doors Only
Install the Trolley
• Attach the trolley threaded shaft to the trolley with the
lock washer and nuts as shown.
• As a temporary stop, insert a screwdriver into the hole
in the front end of the T-rail.
• Slide the trolley assembly along the rail to the
screwdriver stop.
NOTE: If trolley hits against any nuts on the
T-rail, the bolts and nuts were attached
from the wrong side and must be
repositioned. Review Assembly Step 1.
Lock Washer
5/16"
Nut
5/16"-18
HARDWARE SHOWN ACTUAL SIZE
ASSEMBLY STEP 3
For Sliding and Swinging Gates Only
Install the Trolley
• Attach the trolley threaded shaft to the trolley with the
lock washer and nuts as shown.
• Insert a hex bolt into the hole in the front end of the
T-rail.
• Slide the trolley assembly along the rail until it rests
against the hex bolt (trolley stop).
NOTE: If trolley hits against any nuts on the
T-rail, the bolts and nuts were attached
from the wrong side and must be
repositioned. Review Assembly Step 1.