EasyManua.ls Logo

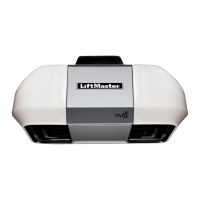
Chamberlain 8355 User Manual

Chamberlain 8355
76 pages
To Next Page IconTo Next Page
Page #1 background imageLoading...
Page #1 background image
CONTENTS
Preparation. . . . . . . . . . . . . . . .2-3
Assembly . . . . . . . . . . . . . . . . .4-5
Installation . . . . . . . . . . . . . . .6-13
Install the Door Control. . . . . . 14-16
Install the Protector System
®
. . 17-20
Power. . . . . . . . . . . . . . . . . . 21-22
Adjustments . . . . . . . . . . . . . 23-25
Operation . . . . . . . . . . . . . . . . . 26
Features . . . . . . . . . . . . . . . . . . 27
Door Control . . . . . . . . . . . . . 28-29
Remote Control . . . . . . . . . . . 30-31
To Erase the Memory . . . . . . . . . 31
To Open the Door Manually . . . . . 32
Maintenance . . . . . . . . . . . . . . . 32
Troubleshooting. . . . . . . . . . . 33-34
Accessories. . . . . . . . . . . . . . . . 35
Warranty. . . . . . . . . . . . . . . . . . 36
Repair Parts . . . . . . . . . . . . . 37-38
PREMIUM Series
Belt Drive Garage Door
Opener
The Chamberlain Group, Inc.
845 Larch Avenue
Elmhurst, Illinois 60126-1196
Please read this manual and the enclosed safety materials carefully!
Fasten the manual near the garage door after installation.
The door WILL NOT CLOSE unless the Protector System
®
is connected and properly
aligned.
Periodic checks of the garage door opener are required to ensure safe operation.
The model number label is located on the front panel of your garage door opener.
This garage door opener is ONLY compatible with MyQ
®
and Security 2.0™
accessories.
ONLY enable the Timer-to-Close* or MyQ
®
remote operation feature* when
the garage door opener is installed on a sectional door. (*Not available on all
models)
NOTE: If you are installing the garage door opener on a one-piece door, visit
www.liftmaster.com for installation instructions.
www.liftmaster.com
Serial Number:
Date of Purchase:
Model 8355 - 1/2 hp
FOR RESIDENTIAL USE ONLY
Write down the following information for
future reference:
.
Other manuals for Chamberlain 8355

Questions and Answers:

Chamberlain 8355 Specifications

General IconGeneral
Drive SystemChain Drive
Horsepower1/2 HP
Motor TypeDC Motor
Smart TechnologyYes
Battery BackupYes
Safety and Security FeaturesSecurity+ 2.0
Remote Controls Included2
SecurityRolling code technology
Safety FeaturesSafety sensors
LightingLED
WarrantyLimited Lifetime (Motor), 1-Year (Parts)

Summary

Preparation

Safety Symbol and Signal Word Review

Explains safety symbols and signal words used in the manual for hazard communication.

Check the Door

Verifies garage door balance, binding, and seal for safe opener operation.

General Safety Warnings

Provides critical safety warnings regarding mechanical and electrical hazards during installation and operation.

Carton Inventory

Lists all components included in the garage door opener package for installation.

Assembly

Attach the Rail to the Garage Door Opener

Connects the opener rail to the main motor unit using provided hardware and instructions.

Tighten the Belt

Adjusts the belt tension for proper operation and smooth movement of the garage door opener.

Installation

Important Installation Instructions

Outlines critical safety warnings and mandatory steps for a secure and safe garage door opener installation.

Reduce Risk of Severe Injury or Death

Provides essential safety guidelines to prevent serious injury or fatality during the installation process.

Determine Header Bracket Location

Guides users on selecting the optimal position for the header bracket based on door type and clearance.

Install the Header Bracket

Details the process of securely mounting the header bracket to either the wall or ceiling.

Attach Rail to Header Bracket

Connects the opener rail assembly to the previously mounted header bracket using specific hardware.

Position the Garage Door Opener

Guides placement of the opener unit onto the ladder for safe lifting and alignment.

Hang the Garage Door Opener

Secures the opener unit to structural supports using hanging brackets for stability.

Install Light Bulbs

Instructions for installing compatible light bulbs into the garage door opener unit.

Attach Emergency Release Rope and Handle

Installs the manual release mechanism for safe operation during power outages or emergencies.

Install the Door Bracket

Mounts the bracket to the garage door for connecting the opener arm, with variations for different door types.

Connect Door Arm to Trolley

Links the door bracket arm to the opener trolley, allowing the opener to move the door.

Install the Door Control

Install Door Control

Mounts the wall-mounted control panel and connects it to the garage door opener.

Wire Door Control to Opener

Connects the door control wiring to the main garage door opener unit for communication.

Attach Warning Labels

Affixes entrapment and safety test labels to the wall and garage door as required by safety regulations.

Install the Protector System®

Introduction to Safety Reversing Sensors

Explains the function and importance of the safety reversing sensors for preventing entrapment.

Safety Reversing Sensors Installation Checks

Lists essential checks for correct sensor installation, alignment, and beam obstruction.

Install Safety Reversing Sensors

Provides methods for mounting safety sensors on door tracks or walls for obstruction detection.

Floor Installation of Safety Sensors

Details how to mount safety reversing sensors on the floor, using brackets if needed.

Wire Safety Reversing Sensors

Connects the safety sensors to the garage door opener, covering pre-wired and new installations.

Pre-Wired Installation of Safety Sensors

Explains how to connect safety sensors when wiring is already present in the garage.

Power

Connect Power

Details how to safely connect the garage door opener to a power source via typical or permanent wiring.

Ensure Safety Reversing Sensors Alignment

Verifies correct alignment of safety sensors by checking LED indicators for proper operation.

Ensure Door Control Wiring Correctness

Confirms the door control unit is correctly wired by checking its command LED indicator.

Adjustments

Introduction to Adjustments

Explains how electronic controls allow for setting door open/close positions and force adjustments.

Program the Travel

Sets the desired open and close limits for the garage door opener's movement.

Test Safety Reversal System

Verifies the door reverses upon contact with an obstruction, ensuring safety.

Test Protector System®

Checks if the safety sensors prevent closing when obstructed, confirming system integrity.

Operation

Important Safety Instructions

Provides comprehensive safety guidelines for operating the garage door opener to prevent injury.

Features

Alert2Close and Timer-to-Close

Describes alerts for closing doors and automatic closing features for convenience and security.

MyQ® and Security+ 2.0™ Technology

Explains wireless communication features for remote control and accessory compatibility.

Energy Conservation and Lighting

Details energy-saving sleep mode and how garage door opener lights function and can be controlled.

Using Your Garage Door Opener

Outlines how to activate the opener using various controls and its response to obstructions.

Door Control

Using the Door Control

Instructions on operating the door opener via the wall-mounted control panel's push bar and light button.

Synchronize Door Control

Steps to pair the door control with the garage door opener for proper communication.

Door Control Features

Explains features like Learn Device, Lock, Automatic Light, and Maintenance Alert accessible on the control panel.

Control Panel Setup

Details how to configure LOCK, LIGHT duration, and activate/deactivate the Maintenance Alert System.

Remote Control

Add/Reprogram Remote via Door Control

Guides on programming or changing remotes/keyless entry PINs using the door control panel.

Program Remote via Garage Door Opener

Provides an alternative method to program remote controls directly using the opener's learn button.

Erase Remote Control Memory

Steps to clear all programmed remote controls and keyless entry devices from the opener's memory.

Manual Door Operation and Maintenance

Disconnect and Reconnect Trolley Manually

Instructions for manually operating the garage door by disconnecting and reconnecting the trolley.

Monthly Maintenance Checks

Outlines essential monthly tasks for ensuring the opener and door operate safely and correctly.

Annual and Periodic Maintenance

Details yearly lubrication requirements and multi-year rail greasing for opener longevity.

Remote Control Battery Replacement

Safety guidelines and instructions for replacing the battery in the remote control transmitter.

Troubleshooting

Diagnostic Chart

Lists common diagnostic codes (flashes) and their corresponding symptoms and solutions for troubleshooting issues.

Troubleshooting Common Issues

Addresses specific problems like lights not turning off, neighbor's remote activation, and Homelink® programming.

Accessories

LiftMaster Internet Gateway and Accessories

Describes various compatible accessories like Internet Gateway, remote light switches, keyless entry, and smart control panels.

Warranty

Limited Warranty Terms

Outlines the one-year limited warranty for the product and lifetime warranty for motor and belt.

Repair Parts

Rail Assembly Parts

Lists part numbers for components related to the opener's rail assembly, including belts and pulleys.

Installation Parts

Lists part numbers for installation components like door arms, brackets, sensors, and hardware.

Garage Door Opener Parts

Provides a detailed list of part numbers for the main garage door opener unit components.

Contact Information

Offers phone numbers and website for installation, service, and ordering repair parts.

Related product manuals