4.
INSTALLATION
4.
INSTALLATION
o The sewing machine should only be installed
by a qualified technician.
• Ask your dealer or a qualified electrician for any
electrical
work
that may need to be done.
· The sewing machine
weights
more than 29 kg.
The installation should be
carried out by
two
or
more people.
o Do not connect the
power
cord until installation
is
complete,
otherwise
the
m8chine
will
oper8te ifthe treadle is
prEJSSt)cl
by mistake,
v;hich could result in injury.
Be
sure to connect the ground. If the ground
connection is not secure, serious electric
shocks will result.
• Install the belt guard to the machine head.
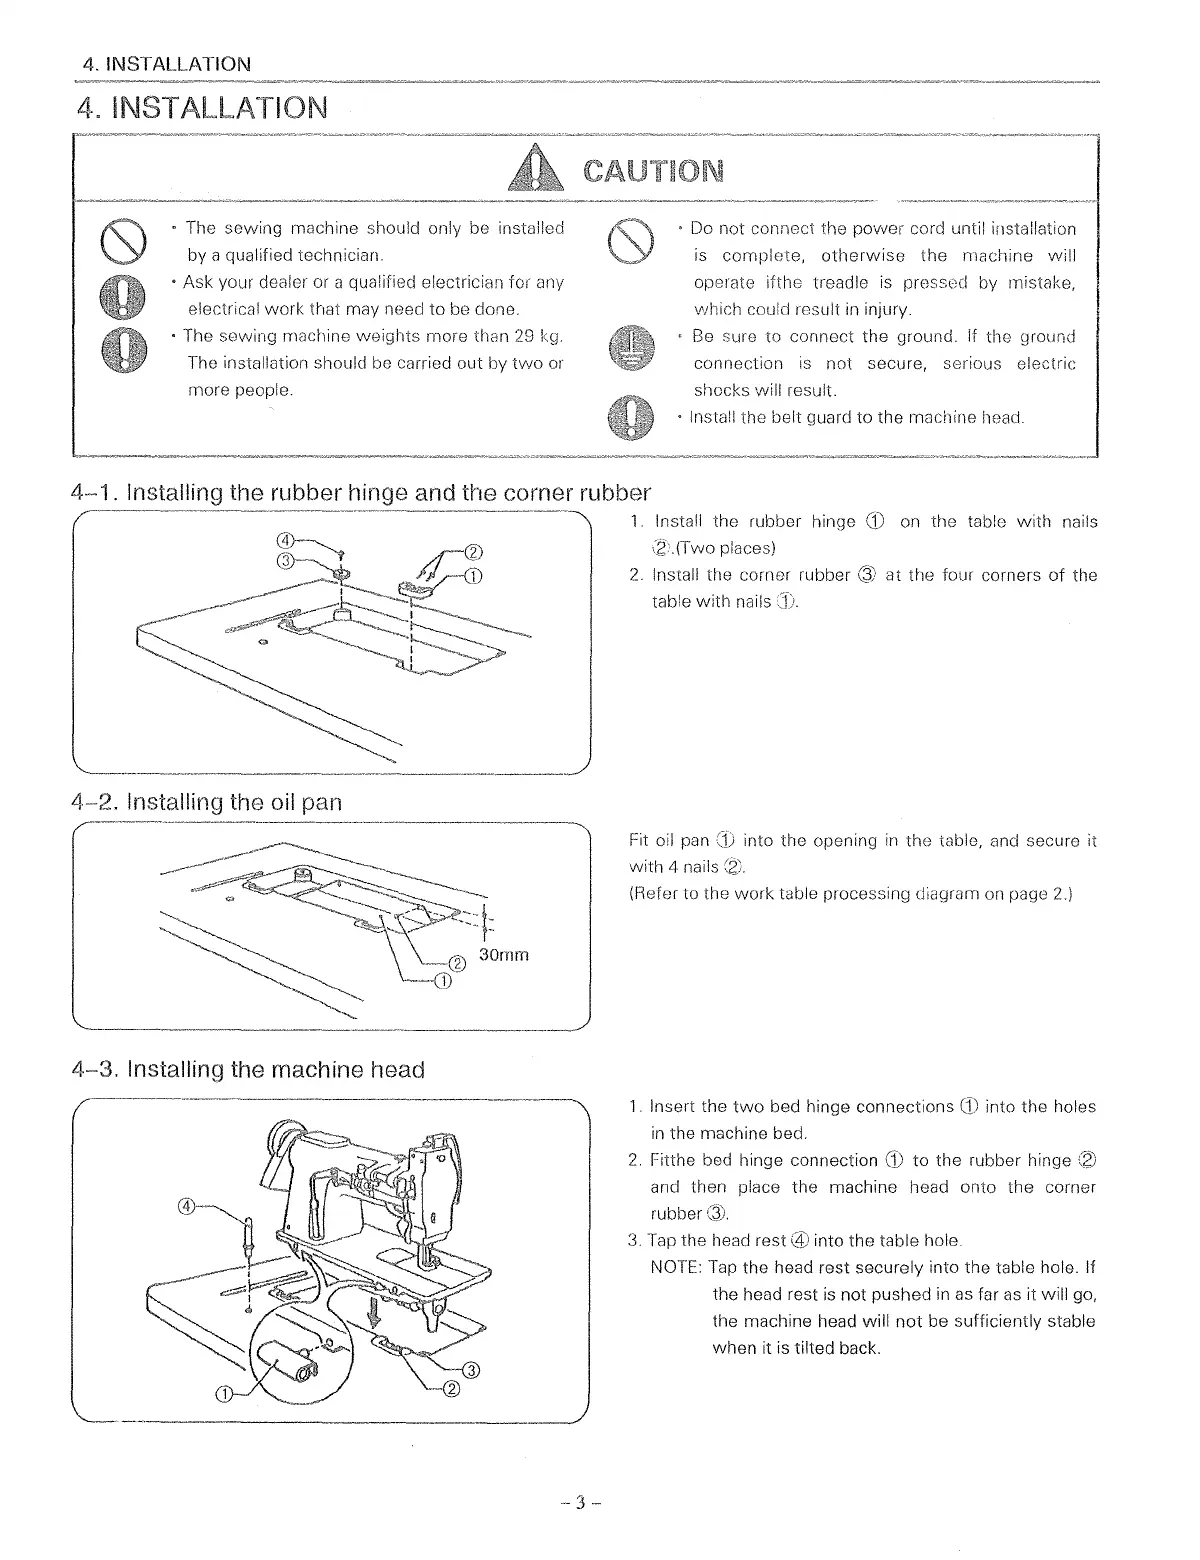
4-1.
Installing the rubber hinge and the corner rubber
4~2.
Installing the oil pan
4-3.
Installing the machine head
--
3
1.
Install the rubber hinge
(1)
on the table
with
nails
(2
(Two places)
2.
Install the corner rubber Q) at the four corners
of
the
table
with
nails
Fit oil pan
with
4 nails
into the opening
in
the table, and secure it
(Refer to the
work
table processing diagram on page
2.)
1.
Insert the
two
bed hinge connections
CD
into the holes
in
the machine bed.
2.
Fitthe bed hinge connection to the rubber hinge
and then place the machine head onto the corner
rubber
3.
Tap the head rest into the table hole.
NOTE:
Tap
the head rest securely into the table hole. If
the head rest
is
not pushed in
as
far
as
it will go,
the machine head will
not
be sufficiently stable
when
it is tilted back.
From the library of: Superior Sewing Machine & Supply LLC
 Loading...