10
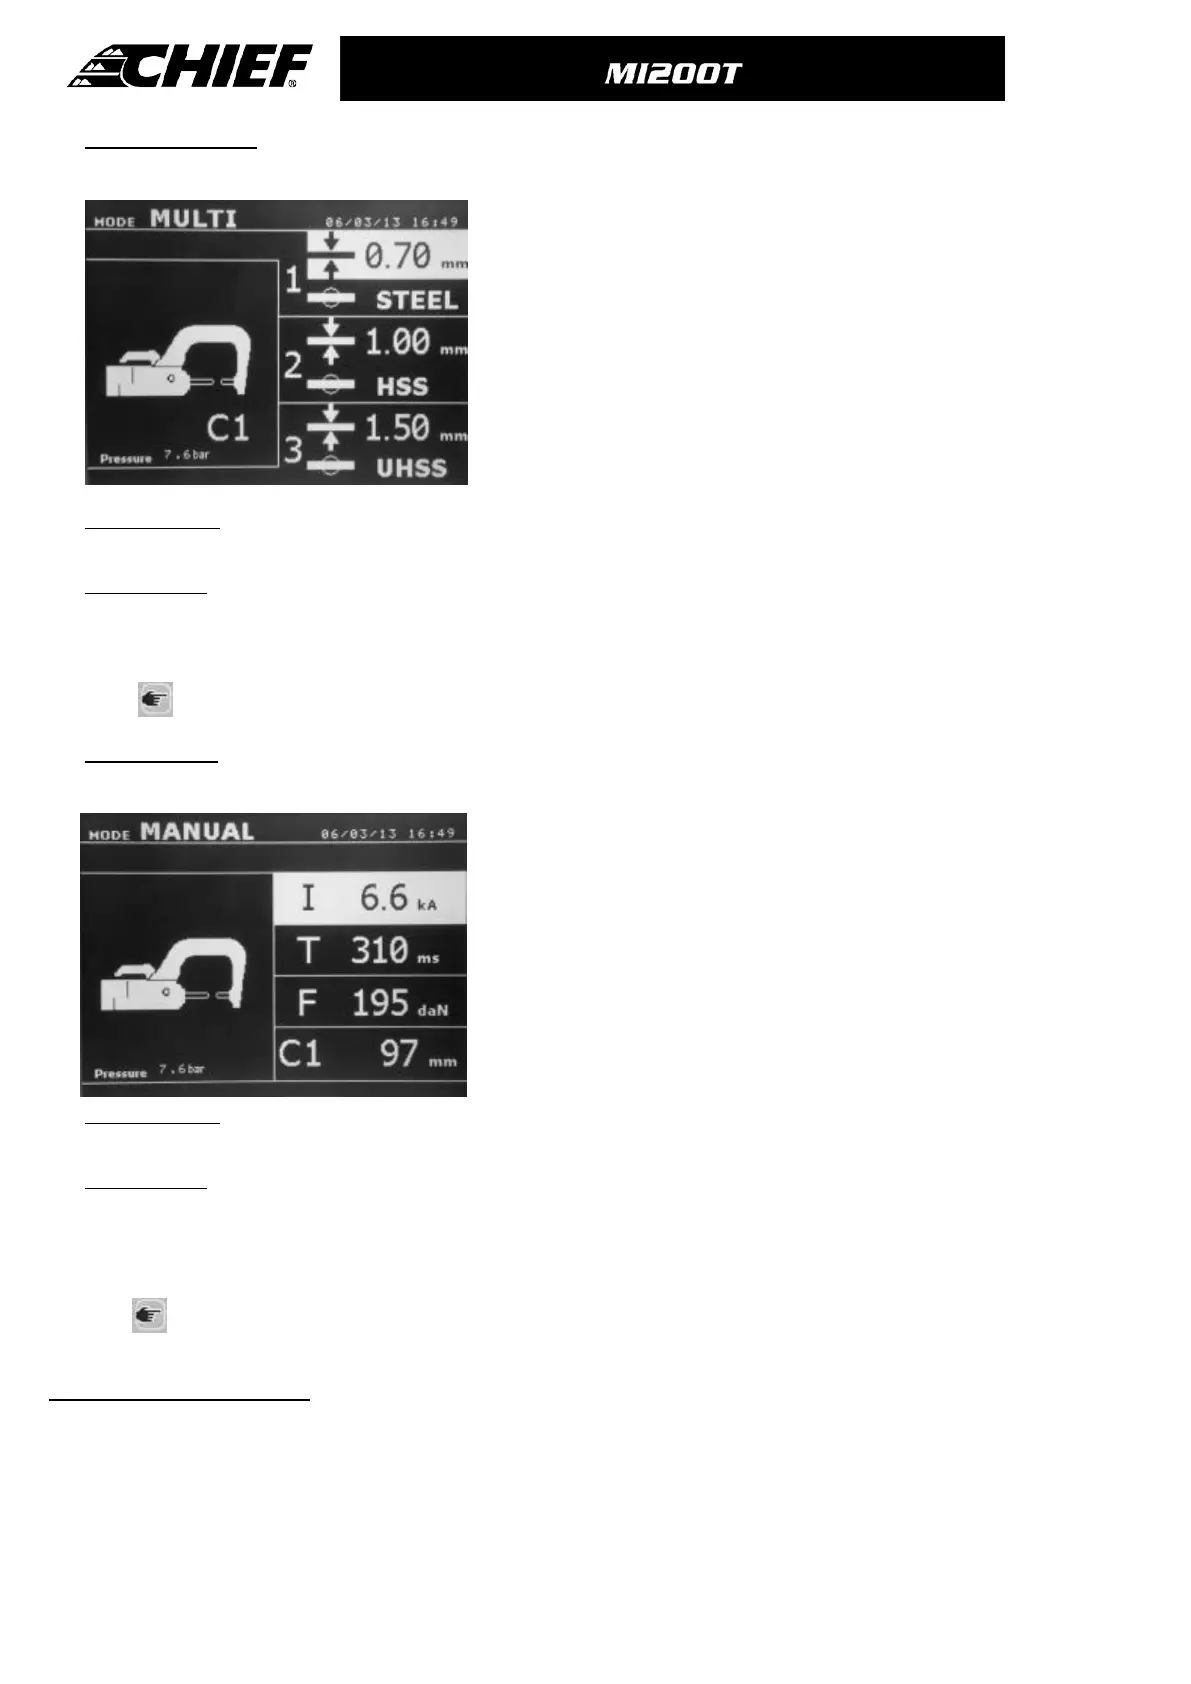
MULTI-sheet Mode
This mode allows the user specify the thickness and type of each sheet in an assembly of 2 or 3 sheets.
Using The up and down button (key definition diagram, (5) ) allows
selection of the parameters for each sheet. When the parameters for a
sheet are highlighted, the sheet thickness and type of steel can be
adjusted using the + and – keys (key definition diagram, (3) ).
The individual sheet parameters that can be adjusted in this mode are :
- Sheet thickness : it can vary from 0.60 mm up to 3.0 mm in steps of
0.05mm.
-The type of steel for each sheet : standard steel, HSS steel, UHSS steel,
BORON steel.
- To activate the required sheet, press the up and down keys (button
definition diagram, (3)) to highlight the required sheet ; then use the +
and – keys to select the thickness and type of steel.
Before the weld: If the input air pressure is too low to reach the required electrode force, a warning will sound, and the
machine will display the error message “Pressure too low”. Pressing the button for a second time will force the execution of
the welding spot with the available air pressure.
After the weld: If the welding current measured during the spot is 6% less than the setting, the machine will display the
error message “Current too low” - the welding spot should be checked.
A message will be displayed at the end of every welding spot, showing the measured welding current and electrode force.
This message is displayed on the screen until a key on the control panel is pressed, or until a new welding spot is
performed, by pressing the B button on the clamp.
Press for 2 seconds to revert back to standard mode.
MANUAL Mode
This mode allows the user to manually select the welding parameters, for example when following instructions from a
Manufacturer
The default settings in manual mode correspond to the settings
automatically selected in standard mode (thickness and type of sheet,
electrode force, arm).
The parameters can be adjusted using the + and – keys (Key Definition
diagram, (3) ). The up and down keys allow navigation from one
parameter to the next
-Welding current (2000 to 13000 A, steps of 100 A) displayed in kA.
-Welding time (100 to 850 ms, steps of 10 ms)
-Electrode force (100 to 550 daN, steps of 5 daN)
-Arm used on the clamp (number and length)
Before the weld: If the input air pressure is too low to reach the required electrode force, a warning will sound, and the
machine will display the error message “Pressure too low”. Pressing the button for a second time will force the execution of
the welding spot with the available air pressure.
After the weld: If the welding current measured during the spot is 6% less than the setting, the machine will display the
error message “Current too low” - the welding spot should be checked.
A message will be displayed at the end of every welding spot, showing the measured welding current and electrode force.
This message is displayed on the screen until a key on the control panel is pressed, or until a new welding spot is
performed, by pressing the B button on the clamp.
Press
for 2 seconds to revert back to standard mode.
CAR MANUFACTURER Mode :
The CAR MANUFACTURER mode is optional and is configurable in the setup menu that is activated by pressing the mode
key for 2 seconds (CAR MANUFACTURER : ON / OFF).
This mode allows calling, in a nominative manner, a pre-recorded welding spot according to a car manufacturer repair
specification. Select the CAR MANUFACTURER in the left column, then by pressing the (+) key the spots list is displayed on
the right column. Select the requested welding spot (highlighted); the machine is ready to weld.