Section 3: Operation
3-20 013-100199-04
NOTES: 1) To hide these “direct” slide bars, disable the “Display Slide bars”
checkbox in the Menu Preferences menu. 2) To hide the entire menu system from
view, turn off the on-screen display by pressing
OSD
.
Use Auto Setup (
Auto
)
For a good and efficient first step in perfecting the image, press
Auto
. This initiates an
automated process in which the projector quickly optimizes critical display parameters
such as size, position, pixel tracking, etc., based on the type of incoming source data
detected. An Auto Setup can save considerable setup time, and you can still modify
the adjustments as desired using menu options described below.
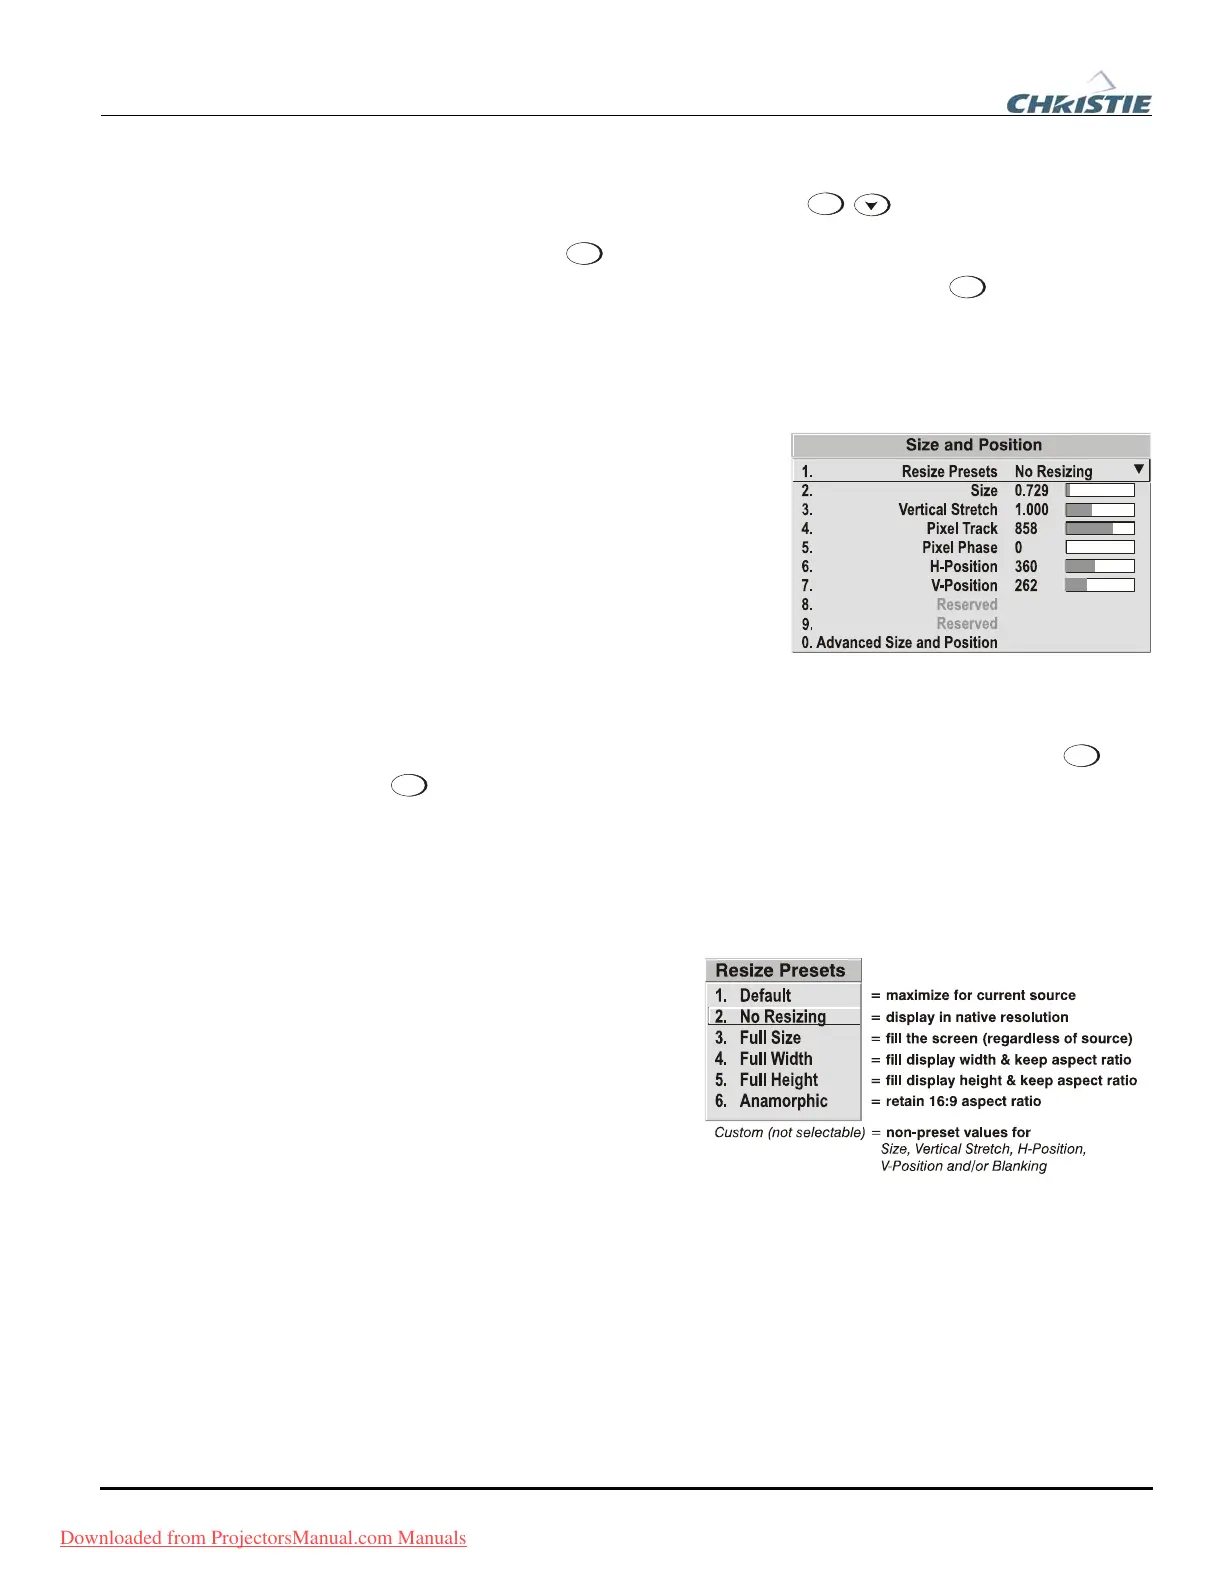
In the Size and Position menu, you can
increase or decrease the size of your image,
change its proportion (aspect ratio), move
the image to a specific area of the screen,
and refine other related parameters. Use
Size and Position controls to match the
image precisely to the screen used at the
site.
Refer to "Using Slide bars and Other Controls" (earlier in this section) if you need
help using any of the options and controls. Changes made in the Size and Position
menu are applied immediately and are saved when you exit the menu (press
Exit
or
Menu
).
Resize Presets
NOTE: The same resize presets are available to all HD and HD2 widescreen models.
Please note however, the graphics used to describe each preset in this section are of
the SXGA+ models only.
Select a Resize Presets option to
quickly display an image in its
native resolution or to
automatically resize an image to
closely fill the projector’s native
resolution or to optimize the
width or height of your display.
Size, Position and Blanking
parameters will automatically
adjust accordingly or, if Blanking
is set first, which defines an Active Input Area; Resize Preset scaling will occur in this
region of interest only. Resizing options are explained in detail below.
WHAT IS THE RESIZING DEFAULT? By default when displaying a new source, your
image will utilize as much of the projector’s display area as possible for the type of
incoming source data, but with minimal or no changes to aspect ratio. See Select
“Default” below.
WHEN “CUSTOM” APPEARS: The “Custom” re-size descriptor automatically appears in
the Size and Position menu when any of the values for Size, Vertical Stretch, H-
Before You Be
in f
Size and Position Menu f
Downloaded from ProjectorsManual.com Manuals