In parallel, the symbol displayed on the remote control reacts according to the fan coil unit status. This enables you to check
that the receiver and its remote control have been "coupled".
To remove links between a remote control and a receiver already associated.
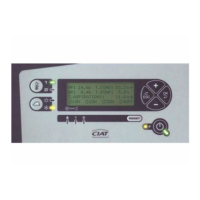
Switch the radio receiver to conguration mode, pressing and holding its button for around 10 s, until the LED starts ashing
rapidly. "Decoupling" is executed automatically
Then on the remote control, enter "cong" mode by pressing the ventilation
, and standby , buttons simultaneously, until
"CF2" is displayed on the screen.
Press the
button until the remote control displays "del".
The rest of deconguration is executed automatically.
When deconguration is complete, the display will return to "CF1".
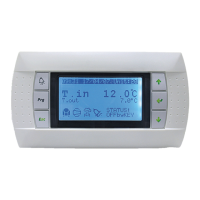
● Using the radio remote control
After 30 seconds without use, the remote control will go into standby (display switches off) so as to save the batteries.
To "wake" the remote control, press any button.
A horizontal dotted line (-----) ashes on the screen while the remote control synchronises with its receiver (this will take a few
seconds).
● Battery replacement message
If the message "bAt" appears for a few seconds (instead of the ashing dotted line mentioned above) when the remote control is
woken up from standby mode, replace the batteries.
● Master/Slave configuration with the radio-frequency remote control::
1) The KNX bus is present between the Master and Slaves, in this case the configuration procedure is the same as that
described on page 13.
2) No bus is wired between the Master and Slave, in this case it is possible to control up to 8 terminal units with a single remote
control (each terminal unit must be equipped with a radio-frequency receiver).
To configure
- Set P00 to 0 on all the controllers in the master/slave loop (default factory setting).
- Initially, congure the remote control with the 1st radio receiver, as per the procedure described above.
- This radio receiver thereby becomes the "master", and it will indicate to the remote control all information necessary for its
operation.
- Switch receiver no.2 (slave) to "coupling", making it ash slowly using button
(hold for around 3 seconds).
- Enter the remote control Conguration menu (button
or ) for 6 seconds)
- The display turns to CF2: this means that the master is correctly congured and that you can congure a slave.
- Press
: "Add
2
"
- The conguration is executed automatically.
- At the end of the conguration: the remote control returns to its normal display and the receiver LED goes off.
- Restart the operation for the other slaves, up to a maximum of 6 terminal units.
Removing links between a remote control and several receivers:
- Start by "decoupling" all the radio receivers by pressing their respective
buttons for more than 10 seconds (LED ashing
rapidly). Deconguration is automatic.
- On the remote control enter the conguration menu (
and for 5 seconds) until "CF2" is displayed.
Press
, "dEL" appears.
- Wait until the display turns to "CF1"
- All of the receivers and the remote control are "decongured"
Wiring of window contacts (CF), presence contacts on inputs D1/C to D2/C in case of Master/Slave configuration without
KNX bus.
V3000
D1 C
V3000
D1 C D1 C
CF
1
CF
2
V3000 V3000
D1 C
V3000
D1 C D1 C
CF
1
CF
2
Radio receiver Radio receiver Radio receiver
MASTER SLAVE SLAVE
Important: he correct polarities (D1 to D1 and C to C for all controllers)
EN
EN - 17 EN7515935-00