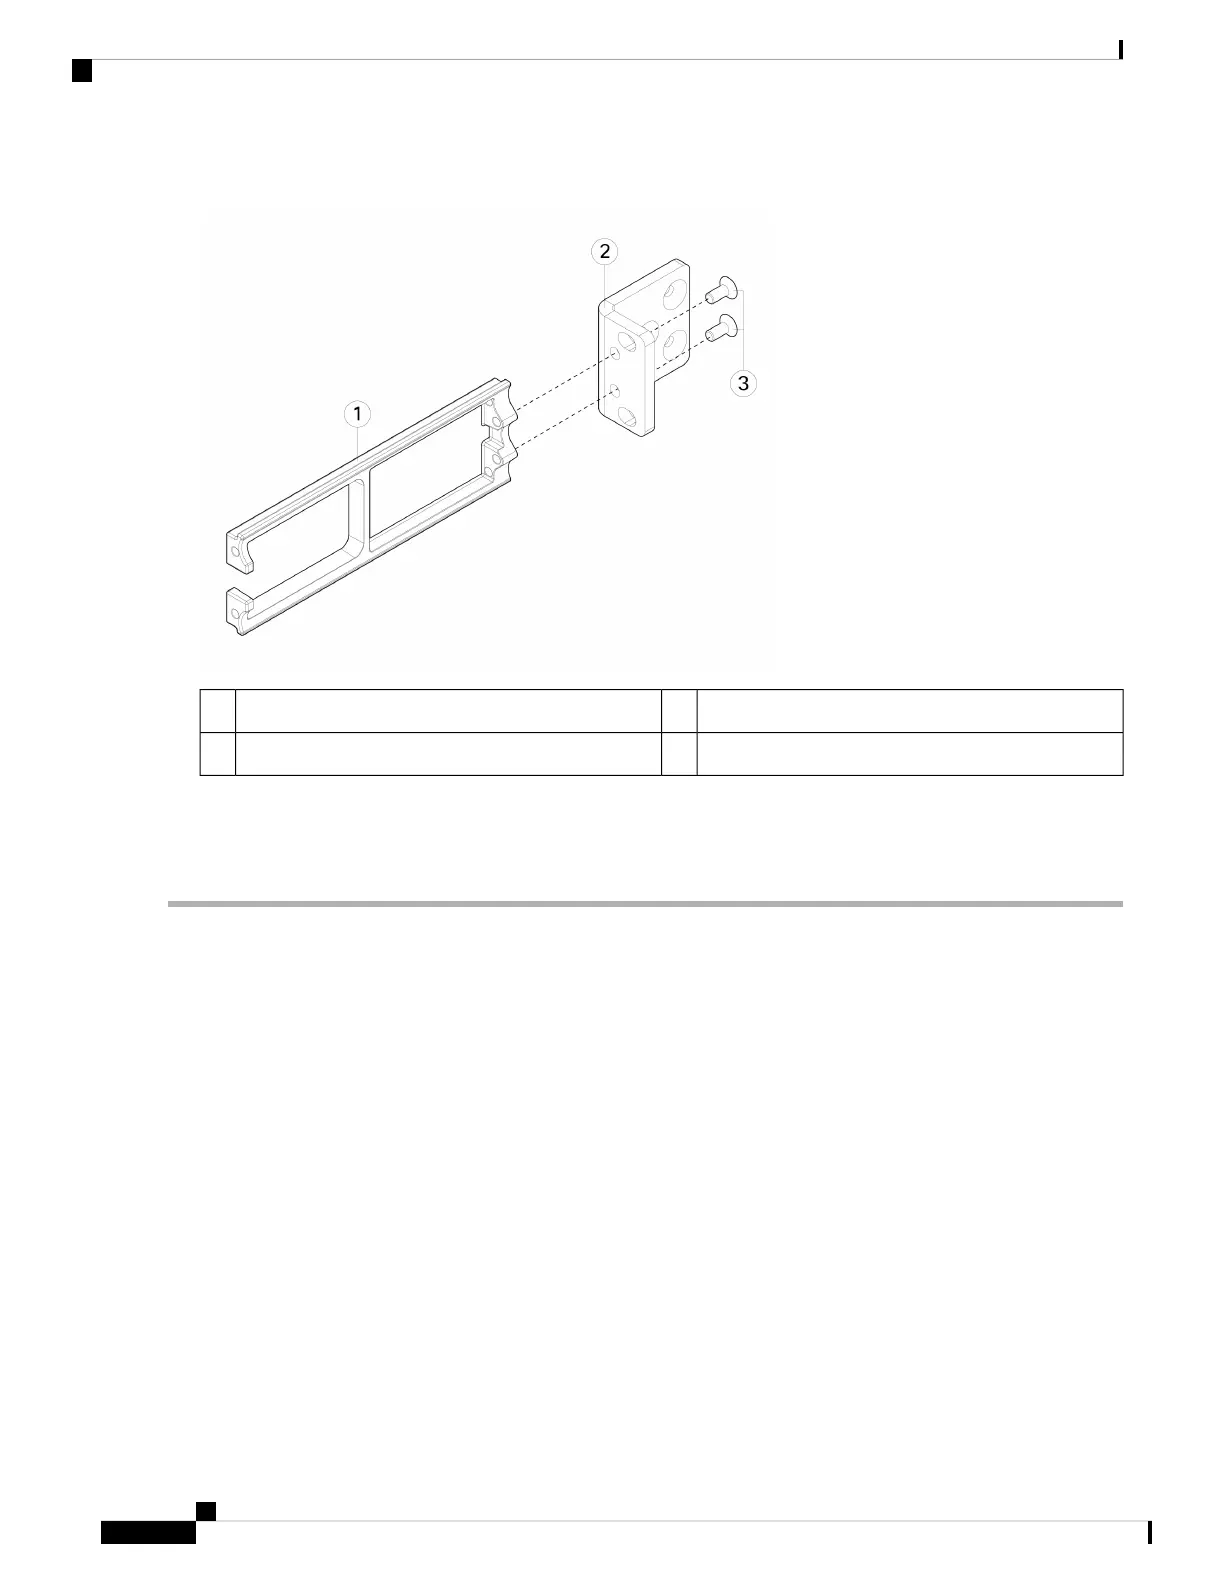
Figure 38: Install the Cable Management Screws into the Rack-Mount Bracket
Rack-mount bracket2Cable management bracket1
8-32 x 0.375-inch Phillips screws (two per bracket)3
b) Install two 8-32 x 0.375-inch screws through the inside of each rack-mount bracket to secure the cable management
bracket to the rack-mount bracket.
Step 3 Attach the chassis with the installed rack-mount bracket to the rack using the screws that work for your rack.
What to do next
• See Ground the Chassis, on page 61 for the procedure to ground the Secure Firewall 3100.
• Install the cables according to your default software configuration as described in the Cisco Secure
Firewall 3100 Getting Started Guide.
Rack-Mount the Chassis Using Slide Rails
This procedure describes how to install the Secure Firewall 3100 in a rack using slide rails. It applies to all
models of the 3100 series. You use the pegs on the chassis to secure the slide rail. See Product ID Numbers,
on page 33 for a list of the PIDs associated with racking the chassis.
You can install the optional cable management bracket on all models of the Secure Firewall 3100. The optional
cable management bracket kit comes with two cable management brackets and four 8-32 x 0.375-inch screws.
The rack is a standard Electronic Industries Association (EIA) rack. It is a 4-post-EIA-310-D, which is the
current revision as specified by EIA. The vertical hole spacing alternates at .50 inches (12.70 mm) to .625
inches (15.90 mm) to .625 inches (15.90 mm) and repeats. The start and stop space is in the middle of the
Cisco Secure Firewall 3110, 3120, 3130, and 3140 Hardware Installation Guide
54
Rack-Mount the Chassis
Rack-Mount the Chassis Using Slide Rails
 Loading...