Do you have a question about the Cisco ASR 920 series and is the answer not in the manual?
| Brand | Cisco |
|---|---|
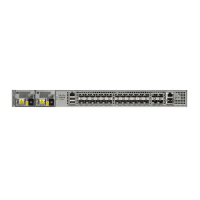
| Model | ASR 920 series |
| Category | Network Router |
| Language | English |
The chassis is shipped with mounting brackets that can be installed on the front or rear of the chassis. To install the brackets on the front of the chassis, perform these steps:
Ensure adequate air flow when mounting the router in a rack. For more information, see the 'Air Flow Guidelines' section on page 11.
The Cisco ASR 920 Series Router supports the following cable guides: A920-CBL-GUIDE (left and right)—help in routing the cables from all components on the front panel thereby enabling a proper cable-bending radius.
While wall mounting the Cisco ASR 920 Series Router, always ensure that the power supplies are at the top position.
For the best support of the Cisco ASR 920 Series Router and cables, ensure the router is attached securely to wall studs or to a firmly attached plywood mounting backboard.
This section provides procedures for installing and connecting SFP modules. Also, it provides the procedure for removing SFP modules.
To remove an SFP module from a module receptacle, follow these steps:
Remove the rubber plugs from the module port and fiber optic cable, and store them for future use.
Basic guidelines for DC-powered systems include the following: Each chassis power supply has its own dedicated input power source.
Basic guidelines for AC-powered systems include the following: Each chassis power supply has its own dedicated branch circuit.
Use the following guidelines to prevent power loss to the device: To prevent input power loss, ensure that the maximum load on each circuit supplying the power is within the current ratings of the wiring and breakers.
Remove the tape from the circuit-breaker device handle, and restore power by moving the circuit-breaker device handle to the On (|) position.
Plug the power cord into the power supply. Connect the other end of the power cord to an AC-input power source.
This procedure shows how to connect to the USB serial port using Microsoft Windows.
This procedure describes how to connect a Mac OS X system USB port to the console using the built-in OS X terminal utility.
This procedure shows how to connect a Linux system USB port to the console using the built-in Linux terminal utility.
A USB device driver must be installed the first time a Microsoft Windows-based PC is connected to the USB serial port on the router.
This procedure describes how to uninstall the Microsoft Windows USB device driver in Microsoft Windows XP, Windows Vista, Windows 2000, Windows 7, and Windows 8.
The US-to-RJ45 adapter cable and the DB9 console cable are not included with the router; they can be ordered separately from Cisco.
To connect a USB flash device to the Cisco ASR 920 Series Router, insert the memory stick in the USB port labeled USB MEM.
To remove and replace a USB flash token memory stick from and into a Cisco ASR 920 Series Router, follow these steps:
The following steps describe how to connect a cable to the router's BITS port:
Connect one end of a straight-through Ethernet cable to the GPS unit.