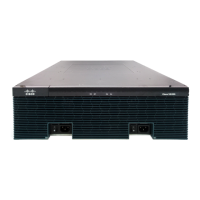
Setting the Chassis on a Desktop
You can place the router on a desktop, bench top, or shelf.
Do not set the chassis in an area where the high acoustic noise can be an issue.
Note
Do not place anything on top of the router that weighs more than 10 pounds (4.5 kg), and do not stack the
gateway hardware on a desktop. Excessive distributed weight of more than 10 pounds, or pound point load
of 10 pounds on top could damage the chassis.
Caution
To prevent airflow restriction, allow clearance around the ventilation openings to be at least 1 inch (2.54cms).
Statement 1076.
Warning
After you install the voice gateway, you must connect the chassis to a reliable earth ground. For the chassis
ground connection procedures, see the Chassis Grounding section.
Attach Cisco VG450 Voice Gateway Chassis to Wall
Step 1 Attach the wall-mounting brackets to the voice gateway chassis as shown in the following figure, using the four PHMS
screws and the plastic spacers provided for each bracket.
Do not over-torque the screws. The recommended torque is 15 to 18 inch-lb (1.7 to 2.0 N-m).
Caution
To attach to a wall stud, each bracket requires one number-10 wood screws (round- or pan-head) with number-10
washers, or two number-10 washer-head screws. The screws must be long enough to penetrate at least 1.5
inches (38.1 mm) into the supporting wood or metal wall stud.
Note
For hollow-wall mounting, each bracket requires two wall anchors with washers. Wall anchors and washers
must be size number 10. Route the cables so that they do not put a strain on the connectors or mounting hardware.
Note
Your chassis installation must allow unrestricted airflow for chassis cooling.
Caution
Step 2 Attach the voice gateway to the wall using the brackets.
If you prefer, you can also install the voice gateway diagonally using the other two sides.
Note
After you install the voice gateway, you must connect the chassis to a reliable earth ground. For the chassis ground
connection procedures, see the Chassis Grounding section.
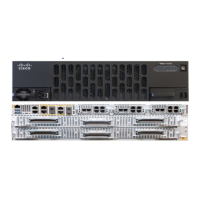
Installing the Cisco VG450 Voice Gateway
6
Installing the Cisco VG450 Voice Gateway
Setting the Chassis on a Desktop