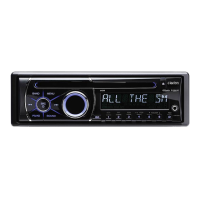
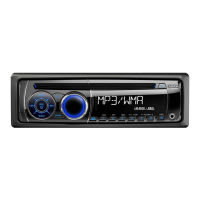
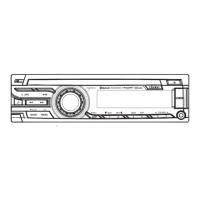
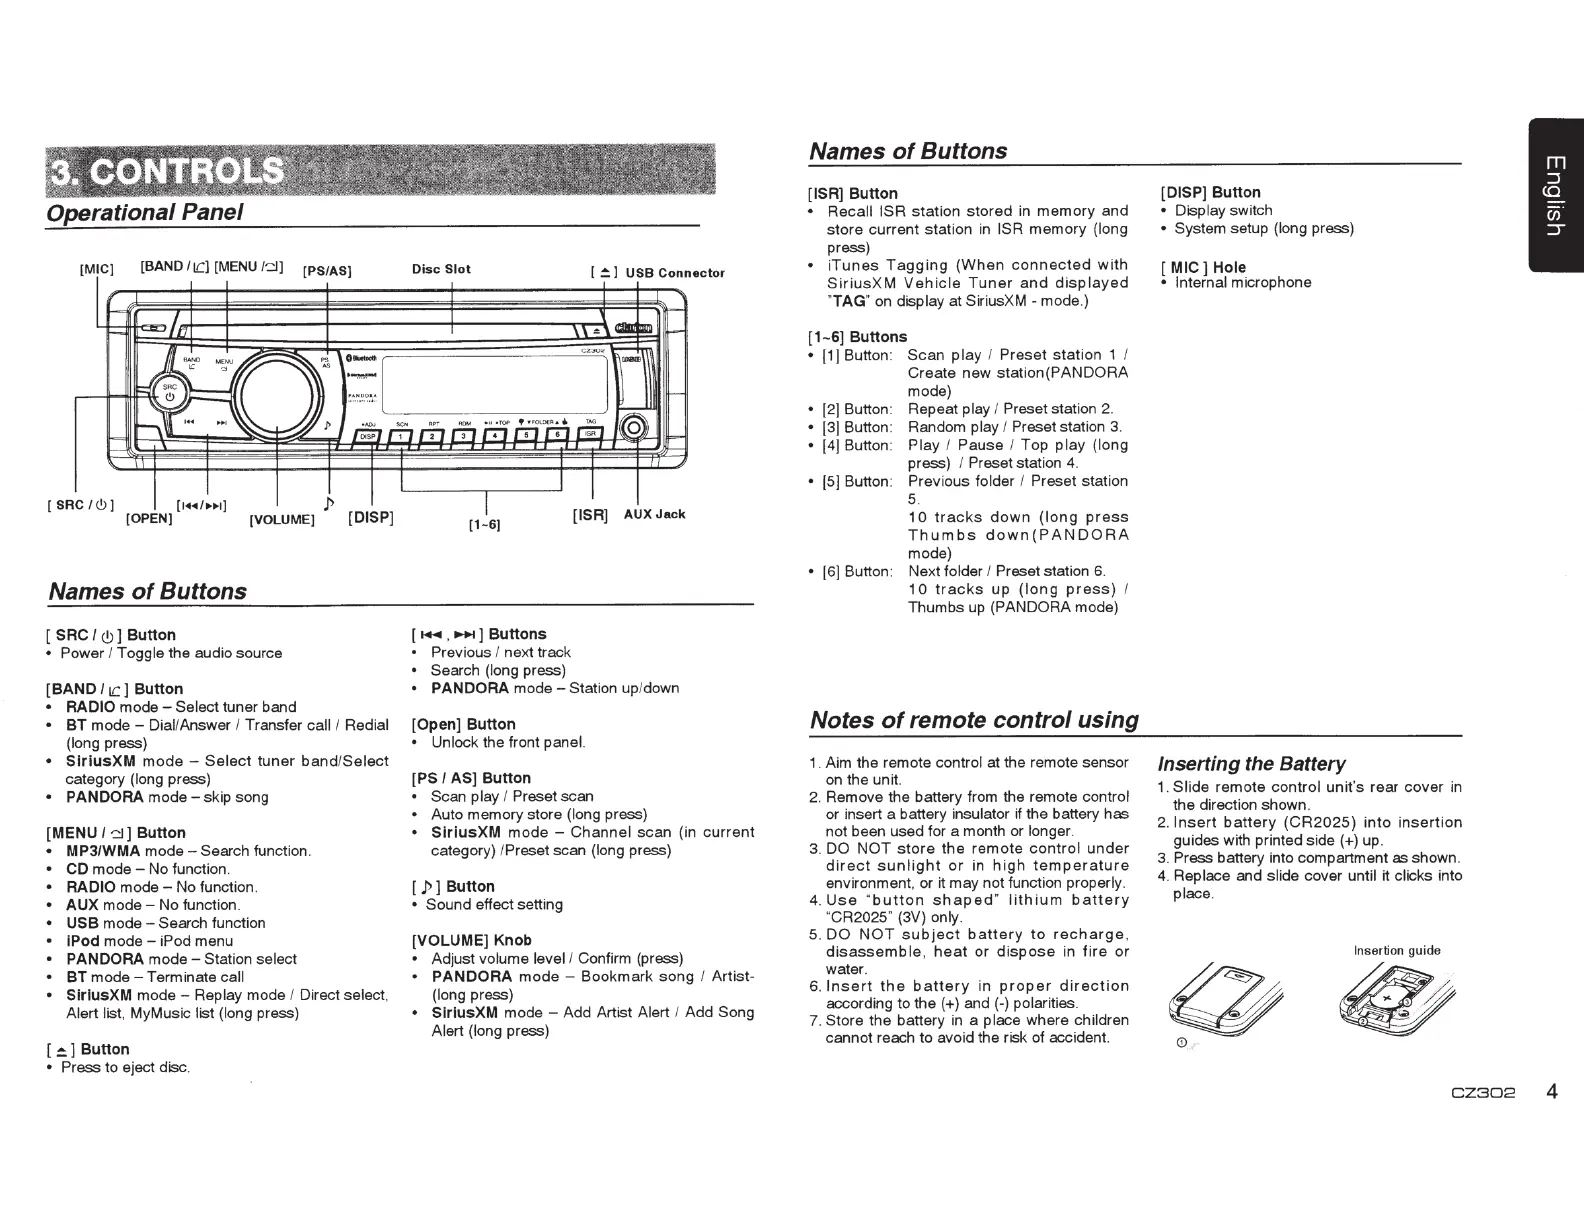
Operational Panel
[MIC)
[BAND
i
iC)
[MENU
/
~
)
[PS/AS]
[
SAC
I<!>)
[1••!••1]
[OPEN] [VOLUME]
[DISP]
Names
of
Buttons
[
SAC
I<!>]
Button
• Power I
Toggle the audio source
[BAND
I
1C
]
Button
• RADIO
mode-
Select tuner band
•
BT
mode - DiaVAnswer
I
Transf
er
call / Redial
(long press)
•
SlrlusXM
mode
-
Se
lect tun
er
band
/
Select
category (long press)
• PANDORA
mode - skip song
[MENU
I~
]
Button
MP3/WMA
mode-
Search function.
CD mode - No function.
RADIO
mo
d
e-
No function.
AUX
mode-
No function.
USB
mode-
Search function
I
Pod
mode -
iP
od
menu
PANDORA
mo
de - Station select
BT
mode - Terminate
call
Slr
l
usXM
mode - Replay mode
I
Direct
se
le
ct
.
Alert list, My
Mu
sic list (long press)
[
~
1
Button
• Press
to eject disc.
Disc
Slot
[
~I
USB
Connector
[1-
6]
[
.-
.
10+1]
Buttons
• Previous I
next track
•
Search (long press)
• PANDORA
mode-
Station up/down
[Open]
Button
•
Unlock the front panel.
(PS I
AS]
Button
•
Scan play
I
Preset
scan
•
Auto memory store (long press)
•
SlrlusXM
mode
- Channel
sca
n (in
current
category)
/Preset
scan (long press)
[ ]>]
Button
•
Sound effect setting
[VOLUME]
Knob
•
Adjust volume level / Confirm (press)
•
PANDORA
m
ode
- Bookmark
song
I
Artist-
(long press)
•
SlrlusXM
mode - Add Artist Alert
I
Add
Song
Alert (long press)
Names
of
Buttons
(ISA]
Button
• Recall
ISR
station
stored
in
me
mo
ry
and
store
current station in
ISR
mem
ory (long
press)
•
i
Tunes
Tagg
i
ng
(When
connected
with
SiriusXM
Vehicle
Tuner
and
displayed
"TAG" on display
at
SiriusXM - mode.)
[1-6]
Buttons
•
11]
Button:
Scan
play
I Preset
station 1
Create
new
station(PANDORA
mode)
• ]2] Button: Repeat play
I
Preset
station 2.
• ]3] Button: Random play
I Preset
station
3.
•
]4] Button: Play I Pause I Top
play
(long
press)
I Preset station 4.
•
]
5]
Bu
tton:
Previous
folder
I Preset
station
5.
10
tracks
down
(lo
ng
press
Thumbs
down(PANDORA
mode)
•
]6] Button: Next folder
I Preset
station 6.
10
tracks
up
(long
press
)
I
Thumbs up (PANDORA
mode)
Notes
of
remote control using
1. Aim the remote control at the remote sensor
on the unit.
2. Remove the battery from the remote control
or insert a battery insulator
if
the battery
has
not been used for a month or longer.
3.
DO
NOT
sto
re
the
remote
contro
l
under
direct
sunlig
ht
or
in
high
temperature
environment, or it may not function properly.
4.
Use
"
button
shaped
" li
thi
um
batte
ry
"CR2025"
(3V)
only.
5.
DO
NOT
subject
b
attery
to
recharge
,
disassemble
,
hea
t or
dispose
in f
ire
or
water.
6.
I
nser
t
the
battery
in
pr
ope
r
direction
according to the (+) and (-) polarities.
7.
Store the battery in a place where children
cannot reach to avoid the risk of accident.
[DISP]
Button
•
Display switch
• System setup (long press)
[
MIC]
Hole
• Internal
microphone
Inserting the
Battery
1.
Slide
remote
co
n
tr
ol
un
it's
rear
cover
in
the direction shown.
2.
Insert
battery
(CR
2025)
in
to
inser
tion
guides with print
ed
side(
+) up.
3.
Press ba
tt
ery into compartment as shown.
4. Replace and slide cover until it clicks
in
to
place.
Insertion
gu
ide
0
fib
0
C Z
30
2
4
 Loading...