12. Using CleanSpace HALO BIO with the BioHood
If you are using the HALO BIO system, carry out the following additional steps.
STEP 1 – CHECK MASK SEAL
Check that your mask is configured and fitted with the blue CS3026 BIO Exhalation Valve Cover on the front. See
Section 20. Check that your respirator is configured and fitted with the CS3025 HALO BIO Filter, with the blue inlet
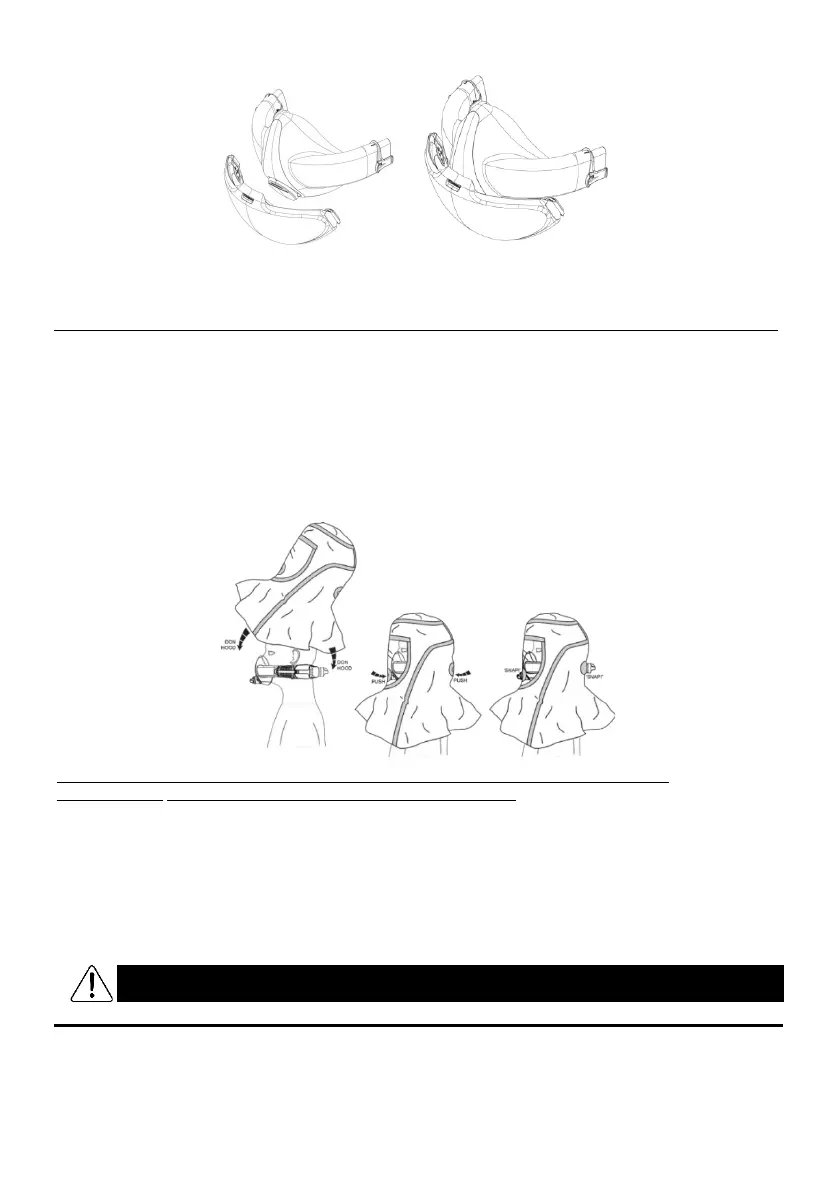
tube. Don the BioHood. Reach behind your head and pull the rear grommet (rubber patch) over the filter inlet tube
until you hear a “snap” and the grommet is sealed around the inlet tube. Press the front grommet (rubber patch) over
the mask BIO Exhalation Valve Cover until you hear a “snap” and the grommet seals around the BIO Exhalation
Valve Cover. If necessary, support the BIO Exhalation Valve Cover with your other hand, reaching up inside the
BioHood.
Have your buddy check that the air vent in the BIO Exhalation Valve Cover is fully through the front
grommet and the rear grommet is sealing neatly around the filter inlet tube.
Locate the BIO Seal Check Cap (CS3029), which is a red rubber cap. Fit the cap over the mask BIO Exhalation Valve
Cover and push until it snaps into place. Ensure that no air is flowing from the valve. With the respirator in On Mode
and while breathing normally, reach up inside the BioHood and use your fingers to feel around the perimeter of the
mask for leaks. For extra sensitivity, breathe out firmly to increase the mask pressure and wet your fingers to make it
easier to feel tiny leaks. If there are any leaks, readjust the respirator (harness, adjust button etc) and try again. Tilt
your head down, up, left, and right and check that there are still no leaks. Once you can feel no leaks from the mask,
the seal check is complete. Remove the Seal Check Cap by pulling on the flange around its base. Failure to remove
the cap will lead to build-up of Carbon Dioxide in the mask and may result in headache or dizziness.