15
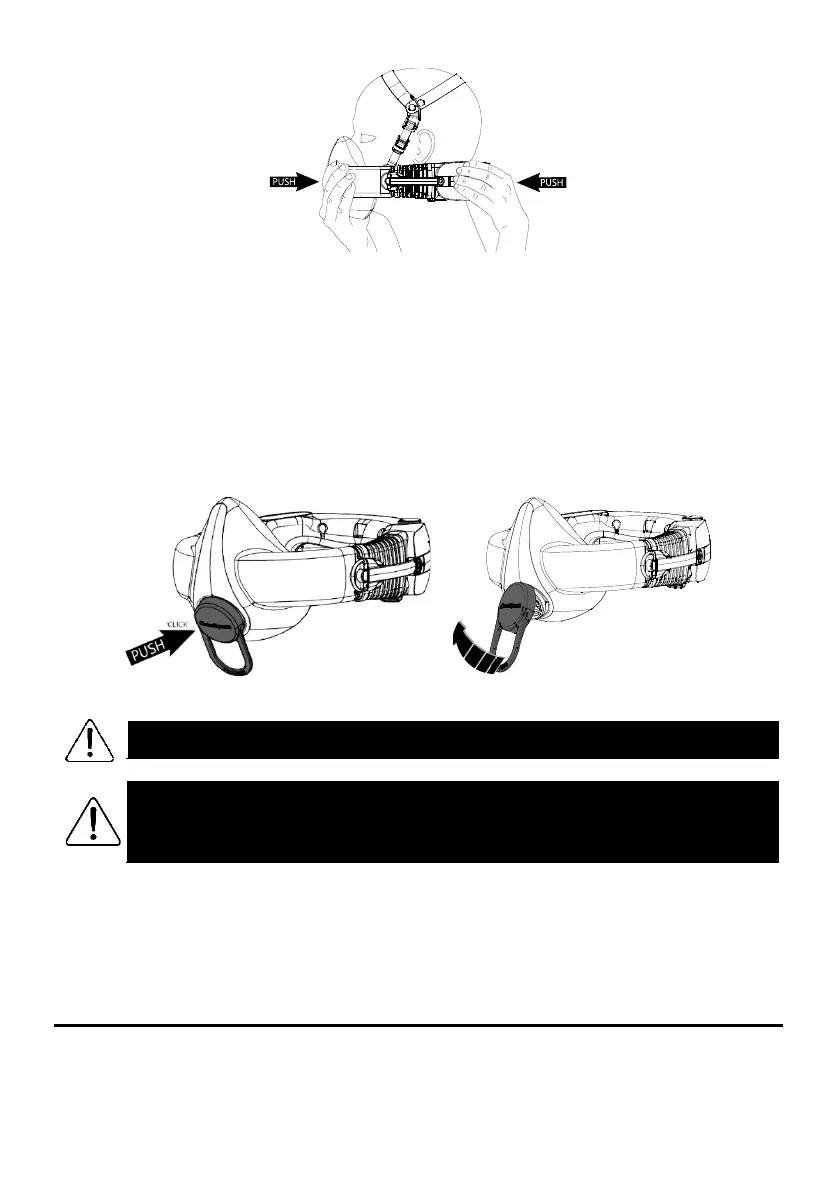
Figure 20 – Adjusting the Mask
STEP 5 – MASK SEAL CHECK
A seal check is used to ensure that an adequate seal is achieved each time the respirator is donned and should be
completed before entering the contaminated area. To complete a seal check, first place the Seal Check Cap over the
exhalation valve of the half mask, ensuring that no air is flowing from the valve. With the respirator in On Mode and
while breathing normally, use your fingers to feel around the perimeter of the mask for leaks. For extra sensitivity,
breathe out firmly to increase the mask pressure and wet your fingers to make it easier to feel tiny leaks. If there are
any leaks, readjust the respirator (harness, adjust button) and try again. Tilt your head down, up, left, and right and
check that there are still no leaks. Once you can feel no leaks from the mask, the seal check is complete. Before
entering the contaminated area, remove the Seal Check Cap by gently twisting the handle so that one side of the cap
comes loose from the exhalation valve. Be careful not the dislodge the exhalation valve cover. See Figure 22.
WARNING
Be sure to remove the Seal Check Cap before entering the contaminated area. The Cap blocks
the exhalation valve, making it more difficult for your exhaled air to be expelled from the mask.
Failure to remove the cap will lead to increased levels of rebreathed Carbon Dioxide, and may
result in headache or dizziness. Never leave the Cap in place for more than 2 minutes!
STEP 6 – INSTALL STERI-PLUS EXHALATION FILTER (OPTIONAL)
To fit the assembled Steri-Plus, align it with the half mask exhalation valve and push it until it clicks into place, ensuring
that the vents on the blue outer case of the Steri-Plus are facing in the same direction as the bottom of the mask as
shown in Figure 23. If required use your thumbs to help provide a support to push against when clipping the Steri-Plus
into place. See Section 16 for information on assembling and changing the Steri-Plus.