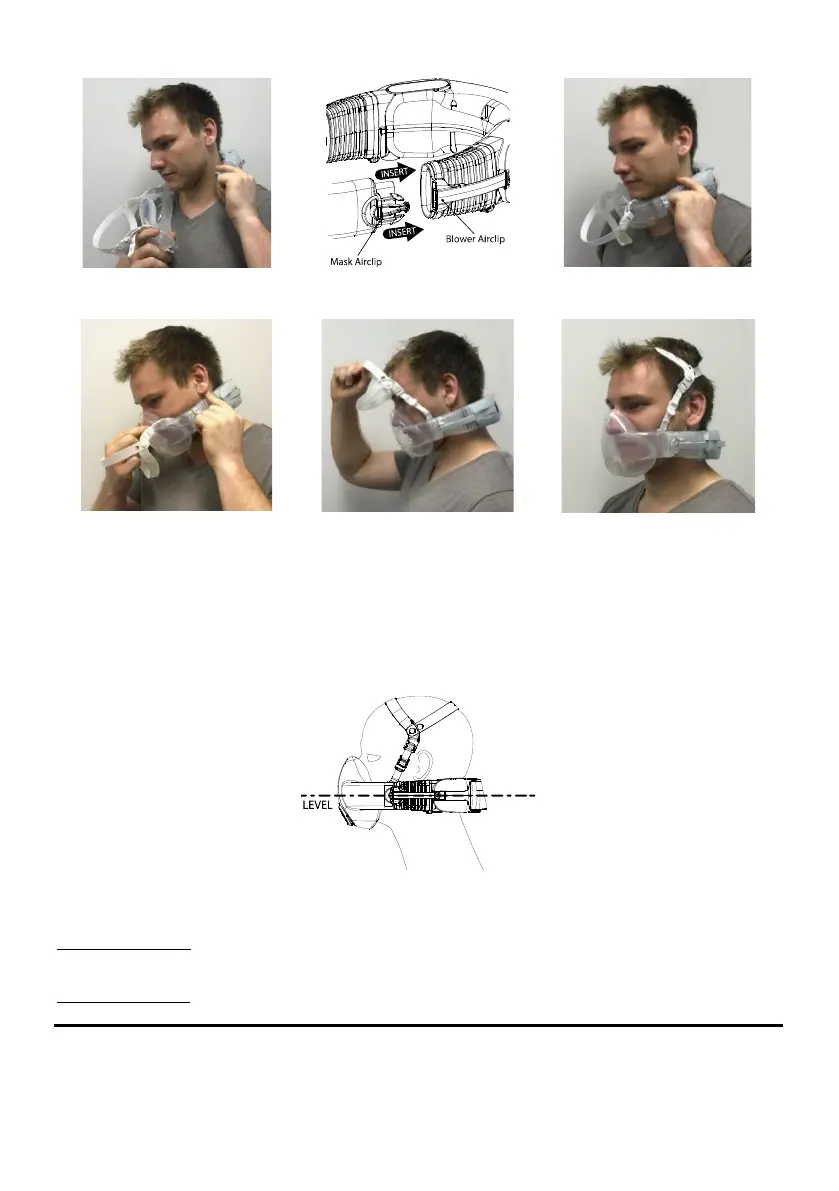
14
If the motor does not start and air does not flow, check the system was in Standby Mode (with the green battery
indicators on). If the system is Off (i.e. not in Standby Mode and no green indicators), remove the respirator, press
the Power button to activate Standby Mode and don again as described in Figure 13-18 above.
•
Check the harness
The harness should take a little of the weight of the mask and support the power unit so that the respirator system
sits level on your head. If necessary adjust the harness. This is done by shortening or lengthening the front straps by
moving the cleats up or down the straps. Remember to shorten or lengthen each side by the same amount. If
necessary the rear strap can also be adjusted.
Figure 19 - Correct Position for CleanSpace HALO
•
Adjusting the mask on your face
Adjust the mask for comfort and until you do not feel any leaks between the mask cushion and your face.
To tighten the system, place one hand against the back of the power unit and the other over the front of the mask.
Push the power unit forwards and the mask back (Figure 20). You will hear a series of clicks as the mask is
tightened.
To loosen the system, press the adjust buttons on either side of the bellows and pull the mask and power unit away
from each other.