13
•
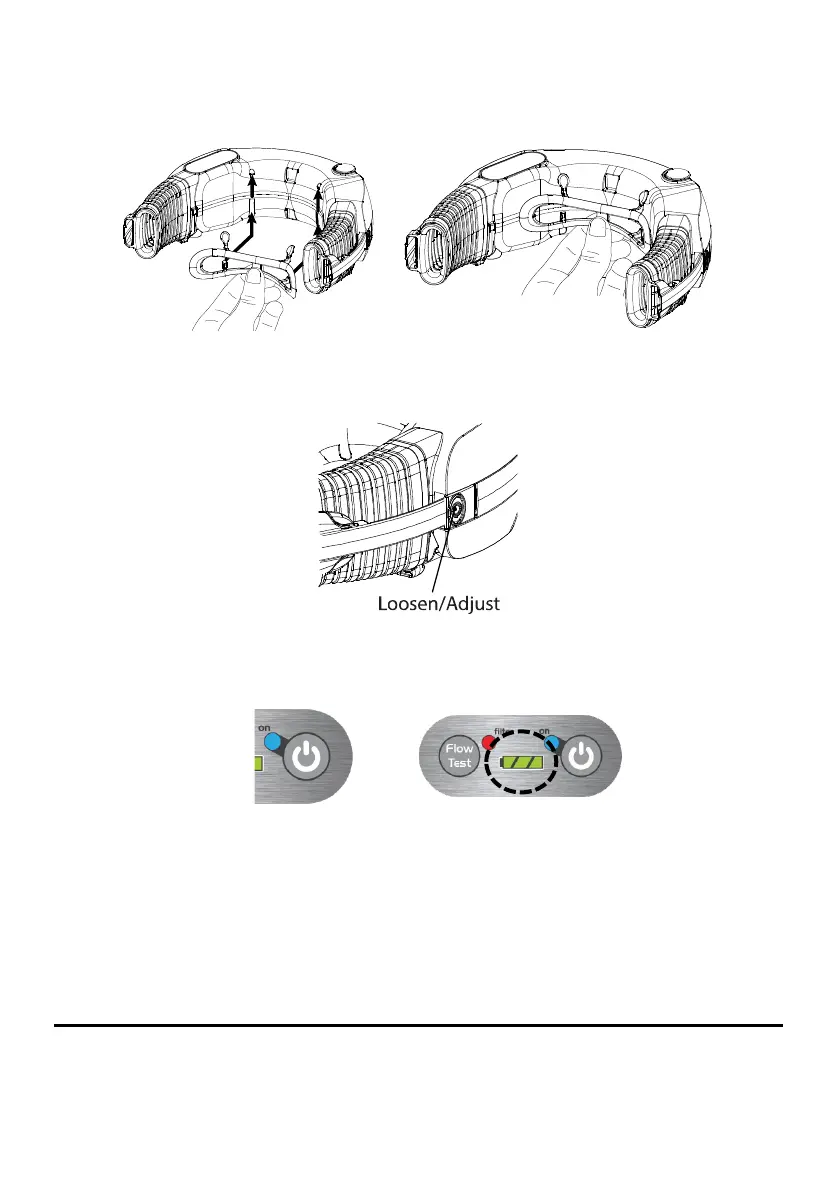
Fit a neck support
Align the neck support with the power unit, the two arms with the rounded heads should be at the top. Locate the
bottom arms of the neck support in the grooves at the bottom of the unit and slide neck support upwards until you
hear a ‘click’.
Figure 11 - Fitting neck support
•
Loosen both bellows to their widest opening
Press the adjust button on the power unit and loosen the bellows on both sides so they are fully extended. See
Figure 12.
Figure 12 - Adjust Button
•
Place the power unit in Standby Mode
Press the Power button once. The green battery indicators will light up on the keypad. The motor will not come on
and the air will not flow in Standby Mode.
•
Don the power unit and switch to On Mode.
Place the power unit behind your neck with the bellows and mask resting down one side. The harness should be
hanging in front of the mask (See Figure 13 - 15). Fasten the AirClips on your left-hand side so that both sides of the
mask are connected to the power unit. Pull the mask up to sit comfortably on your face (Figure 16).
Start to breathe
to trigger the system into On Mode (air will flow).
Pull the harness back and onto your head (Figure 17). Adjust
harness and settle the mask and power unit so that both are comfortable. Adjust the bellows and harness to achieve
a comfortable fit and seal on the face. Do not overtighten the system (Figure 18).